
Responding to GDPR data requests can be time-consuming, especially when information is spread across different parts of the system. The new Print Details feature streamlines this process by generating a complete, downloadable report of all key client data in just one click. This includes communications, consent forms, personal details, and more, ensuring nothing is missed and making it easier than ever to provide clients with a full data export securely.
Step 1: Navigate to the Client Card
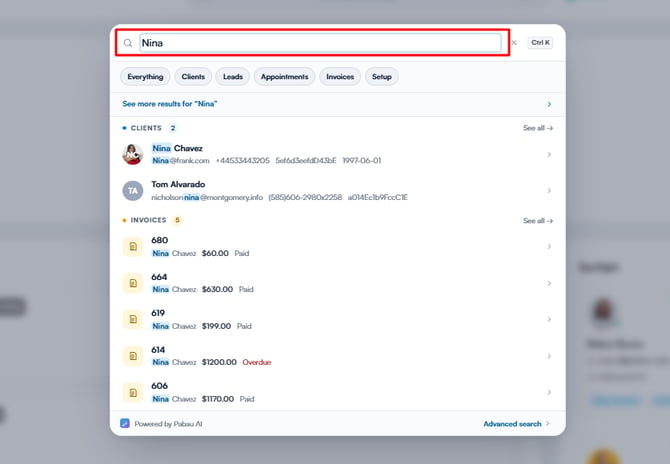
Start by logging into your Pabau account using your login credentials. Then, navigate to the search bar at the top of the screen and begin to type the client's name for quick access. The client profile will appear on the search results. Click to access their client card.
Step 2: Navigate to the Three Dots
On the client card, navigate to the left side of the screen and hover over the client’s details. A three-dot menu will appear in the top-right corner of the client’s profile photo. Click it to view the available actions.

Step 3: Print Client Details
To generate the full client data export, click the "Print Client Details" button.

Step 4: Print Summary
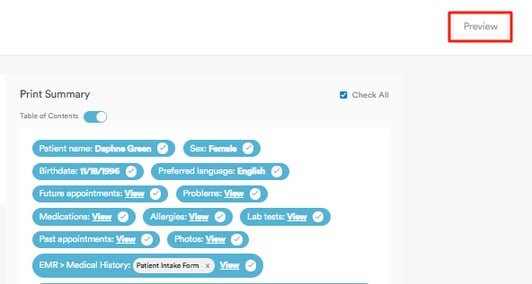
Next, you’ll be taken to a page where you can choose exactly which information to include in the report. If you want to generate a full data dump, simply tick the Check All option to select every available data category.

If you enable the Table of Contents toggle, the report will be divided into sections, allowing you to jump directly to the part you want to view. If the toggle is disabled, the report will display all information in a single continuous list.

Step 5: Preview Report
Navigate to the top right corner of the screen and click the "Preview" button to see how the report will look.
Step 6: Print Report
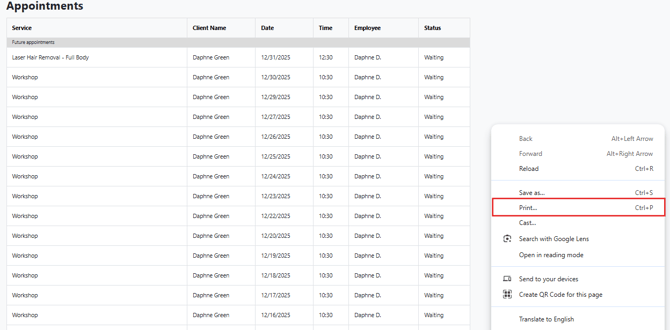
Right-click on the preview to reveal the print option, then proceed to print the report as you normally would.
Alternatively, you can press Ctrl + P (or Cmd + P on a Mac) for a quick way to open the print dialog and print the report.
By following these steps, you can easily complete GDPR-ready data dump for any client.
For more guides, refer to related articles below, select additional guides, or use the search bar at the top of the page. These guides will help you get the most out of your Pabau account.
Additionally, to help you fully utilize and understand your Pabau account, we recommend exploring additional guides and resources offered at the Pabau Academy. It offers in-depth video tutorials and lessons, offering a holistic learning experience that can equip you with the essential skills for achieving success with Pabau.