After setting up your Pabau Pay card terminals, managers and/or owners at your clinic must have access to the Wallet feature to manage payouts efficiently.
Step 1: Accessing Team Settings
To begin, log into your Pabau account and navigate to the Team feature located in the left sidebar menu. Then, select Team again to access the list of team members.

Step 2: Selecting User Profile
Identify the profile of the user who requires Wallet permission and click on their profile to access their settings.
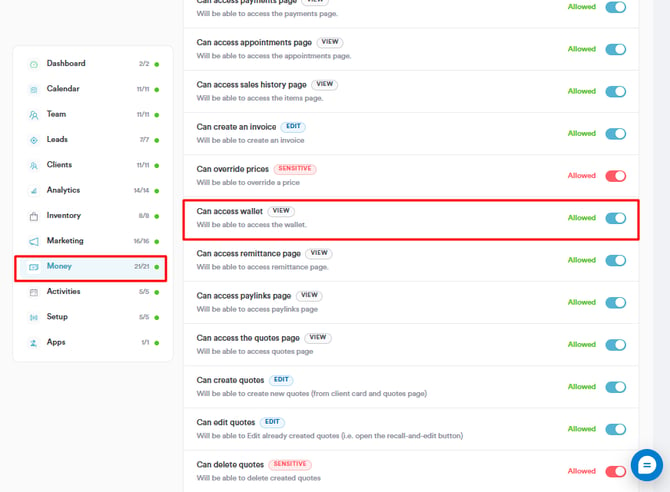
Within the user's profile, navigate to the "Permissions" tab located on the left side of the screen. Here, you'll find various groups of permissions.
Step 3: Enabling Wallet Permission
Expand the "Money" group of permissions and locate the "Can access wallet" permission. Toggle this permission to the "on" position to enable access to the Wallet feature.
Step 5: Saving Changes
Once you've enabled the Wallet permission, ensure to save the changes by clicking on the "Save Changes" button located in the top right corner of the screen.
Step 6: Accessing the Wallet
To access the Wallet feature, users can click on the Wallet icon located in the top right corner of the screen, adjacent to their avatar.

By following these steps, you can successfully enable Wallet permission for designated users in your Pabau account, allowing them to manage payouts effectively.
For more guides, refer to related articles below, select additional guides, or use the search bar at the top of the page. These guides will help you get the most out of your Pabau account.
Additionally, to help you fully utilize and understand your Pabau account, we recommend exploring additional guides and resources offered at the Pabau Academy. It offers in-depth video tutorials and lessons, offering a holistic learning experience that can equip you with the essential skills for achieving success with Pabau.