
NOTE: This guide covers the new Online Bookings and Client Portal, which are being rolled out to clinics in phases. If your screens look different, your account may still be on the classic version — message us via the in-app chat and we will help.
The classic Customize → Team tab controlled how your staff appear when clients choose who to see. In the new Online Bookings, how provider cards look is set in the Team cards section of Pabau Studio, and who appears — with their photo, job title and bio — comes from each staff member’s profile.
In this article, you will learn where each classic team setting lives now, how to design the provider step, and how to choose which staff clients can book online.
Where the Team Settings Live Now
| Classic setting | In the new version |
|---|---|
| Display employee name (Full Name, First Name, Initials, Anonymous) | Show surname — off shows the first name only (a title such as “Dr.” is kept). Initials and anonymous names are no longer offered. |
| Skip the Select employee step | Enable step off in Team cards, or the Provider switch under Manage. Bookings then go to “Any professional”. |
| Show employee’s reviews | Show review score |
| Hide employee photos | Show avatar off |
| Show job title | Show job title |
| Show employee profiles | Show bio button and Open bio on click. The bio itself is written on the staff member’s profile. |
Step 1: Design the Provider Cards
Go to More → Online Bookings, click Customise page, open the Provider page and click Edit.
- Hover over the provider cards and click the Team label.
- Under View, choose Tiles, List or Photo. Under Wording you can change the Heading.
- Under Show, switch on or off: Enable step, Show avatar, Show job title, Show surname, Show review score, Show bio button and Open bio on click (clicking a card opens the bio instead of choosing that person).
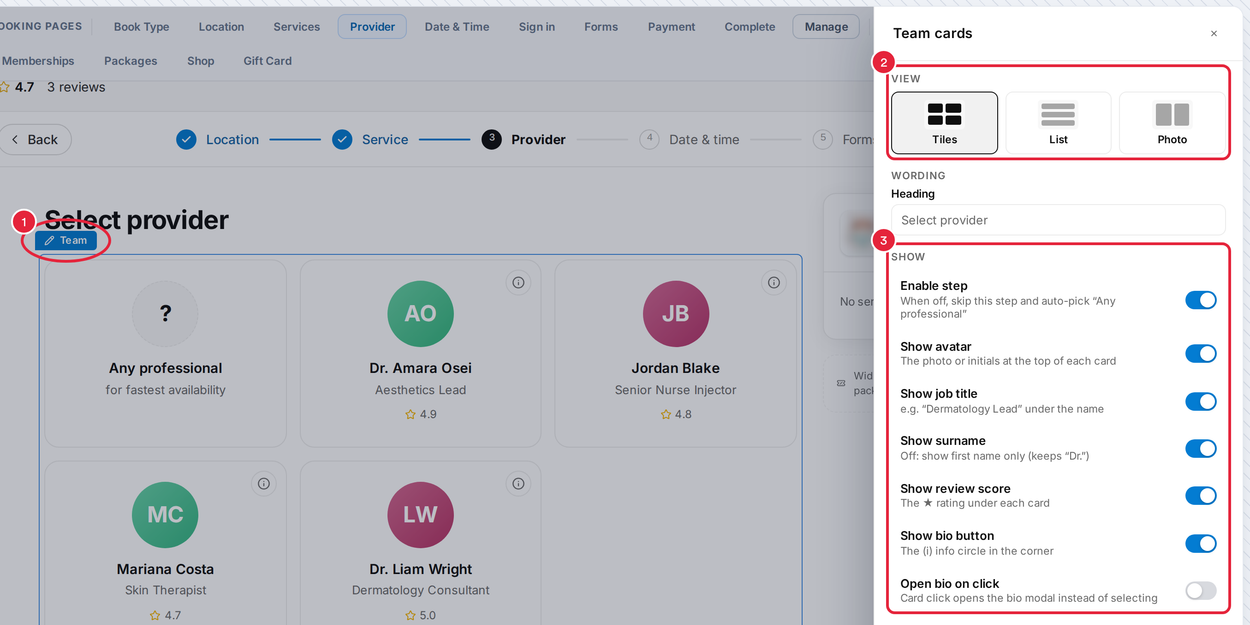
The Team cards section
NOTE: The providers you see in Studio are examples, so you can preview each layout. Clients see your real staff.
Step 2: Skip the Provider Step
- Click Manage at the end of the Booking pages strip.
- Switch off Provider. Clients skip the step and the booking goes to any available provider.
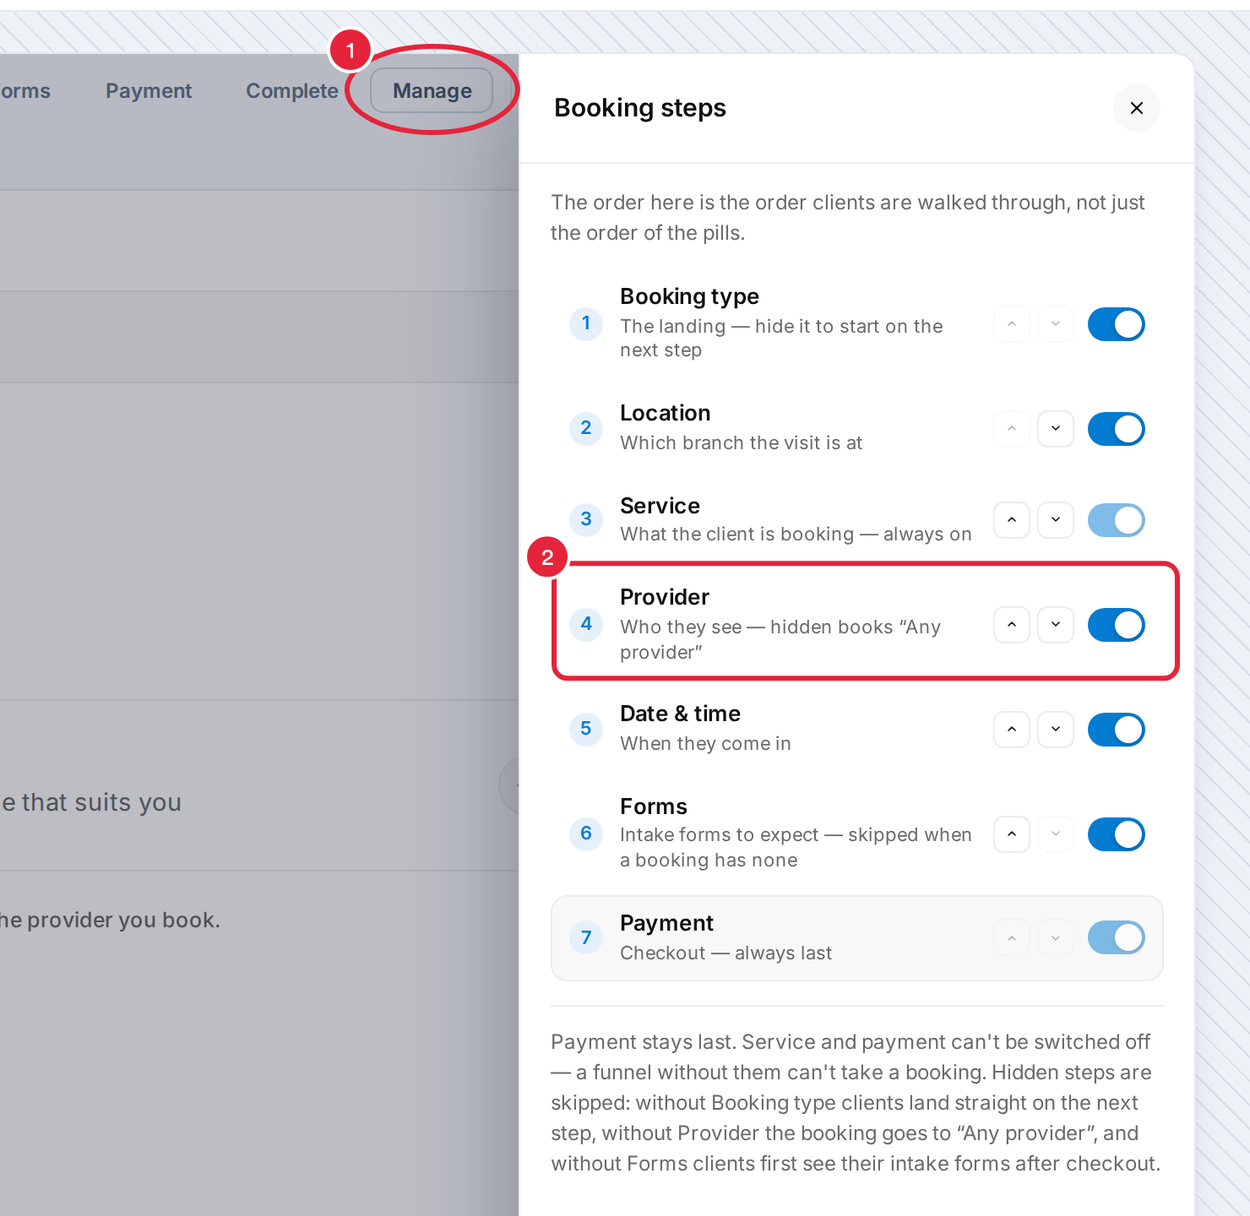
The Provider switch in Booking steps
Click Publish to make your changes live.
Step 3: Choose Which Staff Clients Can Book
Go to Team and open the staff member’s profile.
- Click the Services tab.
- Switch on Has a calendar available for bookings and Accepts online bookings. Staff with Accepts online bookings off never appear on your booking page.
- Under Services, tick the services this person performs, then click Save changes.
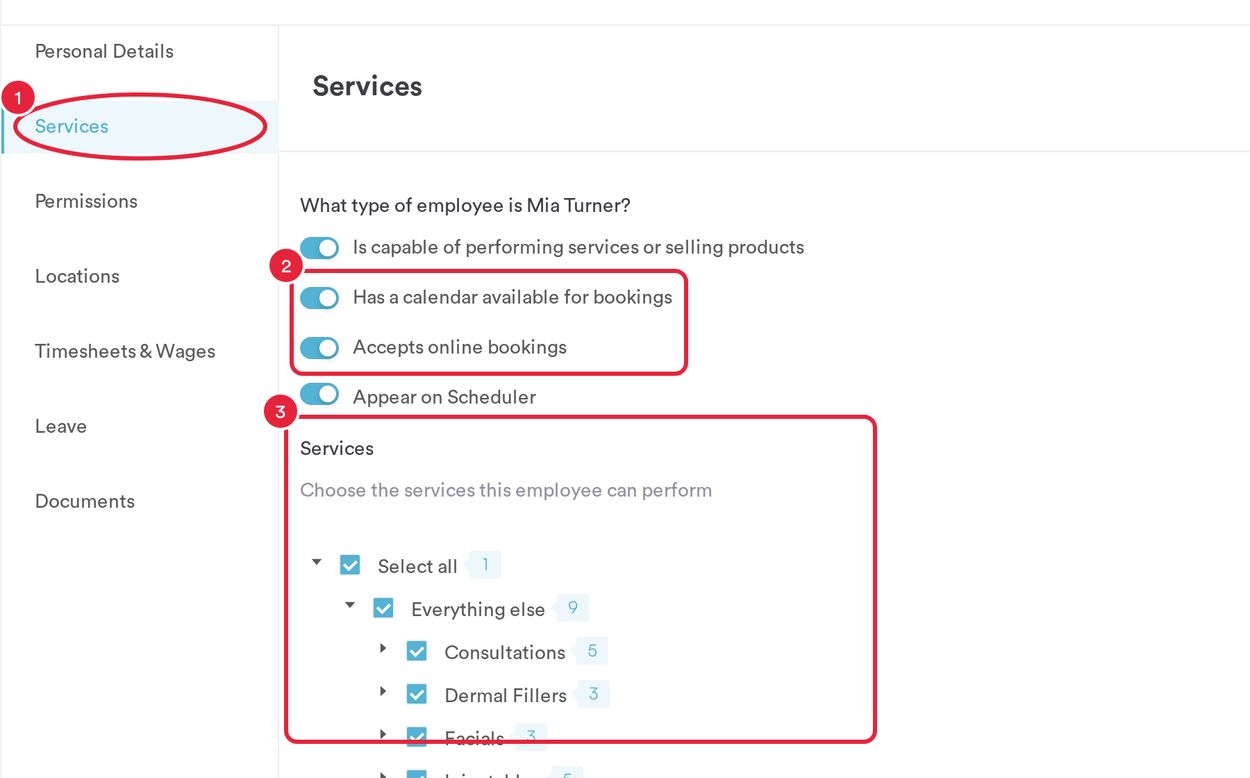
A staff member’s Services tab
Staff also need shifts on the rota to show any times — see Preconditions for Online Bookings: Your Readiness Checklist.
Step 4: Add a Photo, Job Title and Bio
On the staff member’s Personal Details tab, add their job title and a short Bio — this is what clients read when they open the provider’s bio on your booking page. To add a photo, see How to Add a Staff Photo.
TIP: The Providers have a photo check on the Online Bookings Overview tab lists everyone without a photo — click Review to fix them one by one.
What’s next?
See where the other classic settings went: General, Services and Categories, Location and Booking Details.
Questions? Reach us any time via the in-app chat — we’re happy to help.
Was this guide helpful? Let us know by voting below - your feedback helps us write clearer articles.
For more guides, browse the related articles below or use the search bar at the top of the page. You can also watch our video learning series, the Pabau Academy, or visit the Support page for additional help.