By adjusting these settings, you can tailor the platform to reflect your clinic's branding, messaging, and functionality, ensuring a professional and user-friendly experience.
Step 1: Access Online Booking Customization
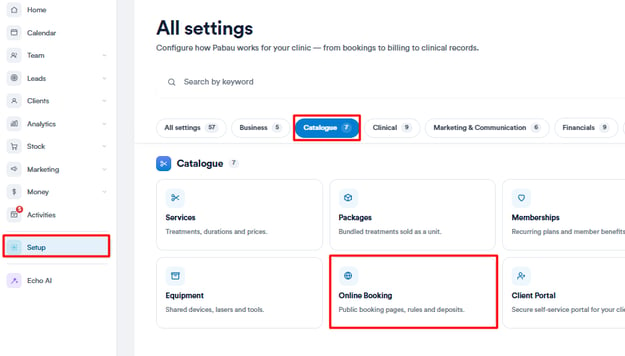
Log in to your Pabau account. Navigate to Setup in the left sidebar, select Online Booking under Catalogue, and click "Customize" on the right side of the screen.
Toggle the Active switch in the upper-right corner to enable or disable your online booking platform.
Step 2: General Customization
Here you can customize the look and feel of your online bookings page to bring it to life with your brand and choose what your clients will be able to see and do when they book online.
Header Message
The header message is the first thing clients see when accessing your online booking portal. Ensure it is welcoming and aligns with your clinic's tone. For example:
Welcome to our Online Booking Platform! Scheduling your appointment has never been easier. Skip the wait times and book at your convenience.

Showcase of how it will this example look like on the online booking portal.

Footer Message
This message appears at the bottom of the page and can provide additional information, such as contact details or a friendly closing statement. For example:

On the online booking portal, the footer message will be displayed here:
Terms and Conditions & Privacy Policy
You can link your clinic’s Terms and Conditions and Privacy Policy to ensure clients are informed before completing their bookings.

Feature Selection
You can customize the client's booking journey by enabling or disabling these key features:
- Require form completion before booking: Ensures clients complete necessary forms before confirming appointments.
- Hide Account Payments: Removes the option for clients to add funds to their account balance.
- Hide Package Purchase: Disables package purchases in the online booking portal.
- Allow Appointment Cancellations/Rescheduling – Defines whether clients can modify their bookings online.

NOTE: Enabling gift voucher purchases, account payments, and package purchases requires Stripe integration. Refer to this guide for setup instructions.
Notification & Appearance Settings
-
New Booking Notification – Set the email address to receive all online booking confirmations. For setting up sender addresses in your system please refer to this article.
- Time Interval – Define time gaps between appointment slots to ensure smooth scheduling for staff and clients. For instance, if you opt for a 60-minute interval, clients booking online will encounter available times such as 10:00, followed by 11:00, and so forth.
- Background Color – Choose a color that complements your clinic’s branding for a professional and cohesive look. By clicking on the plus next to the colors you can add hex codes as well.

By customizing these general settings, you enhance the user experience, making it easier and more convenient for clients to book with your clinic.
For more guides, refer to related articles below, select additional guides, or use the search bar at the top of the page. These guides will help you get the most out of your Pabau account.
Additionally, to help you fully utilize and understand your Pabau account, we recommend exploring additional guides and resources offered at the Pabau Academy. It offers in-depth video tutorials and lessons, offering a holistic learning experience that can equip you with the essential skills for achieving success with Pabau.