In Pabau, you can create membership plans that allow you to set up recurring payments and offer paid plans to enhance client loyalty. The plans renew automatically, and your clients’ cards will be charged upon renewal—keeping things hassle-free for everyone.
Setting up memberships offers several key benefits:
Steady revenue: Enjoy predictable, recurring income each month.
Convenience: Automated renewals and easy session tracking simplify the process for clients.
Custom plans: Tailor memberships with flexible services, sessions, and pricing.
Increased sales: Encourage clients to explore more services or upgrade their plans.
Save time: Automated payments and renewals reduce admin work for your team.
Better cash flow: Predictable income helps manage business expenses more effectively.
NOTE: The membership feature will be usable only when the Stripe integration is active.
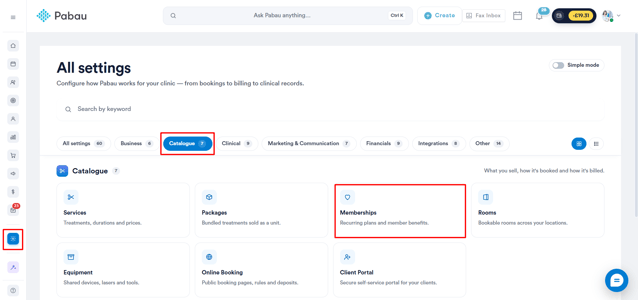
Step 1: Navigate to Setup
Start by logging in to your Pabau account using your login credentials. Then, navigate to the Setup page and find Memberships under the Catalogue section.
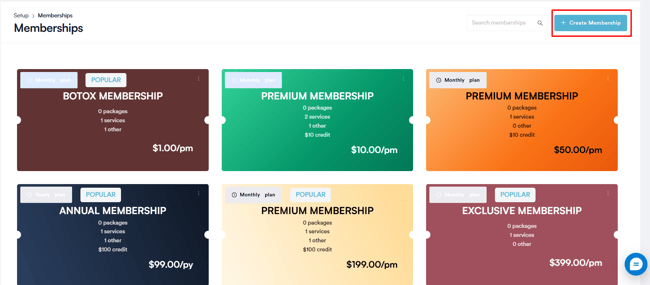
Step 2: Create a Membership
Once you're on the Memberships page, click the "Create Membership" button to get started.
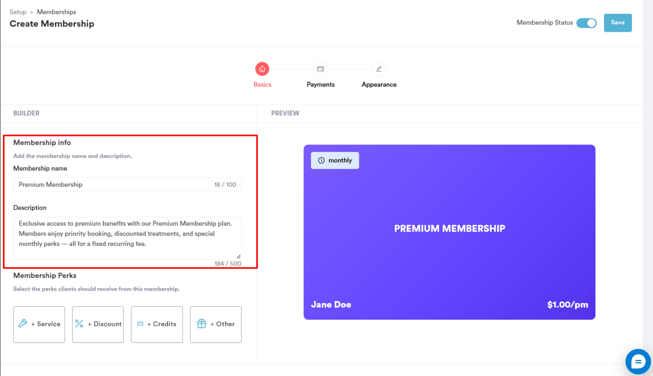
Step 3: Insert Details
In the first step, you need to add the basic details of the membership plan, such as the membership name and description, and set the membership perks.
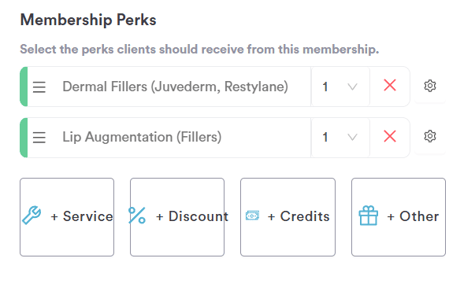
Step 4: Add Perks
The membership perks can be in the form of services, discounts, credits, or other benefits:
Service: Choose services from your account and specify how many times each service is included in the membership.
Every time the membership is active, the client can access the list of selected services free of charge. This means that if any of these services require a deposit, they can be booked free of charge.
To add additional services, click on the "Service" button again.
Clients receive the service/s free of charge as long as the membership is active. If an appointment is booked and occurs during the membership period, it's free. If booked before the membership expires but happens after it ends, the service must be paid for.
Discount: Set automatic discounts for members at checkout. Choose from the discounts you have created in the system. Every time the membership is active, the client will have a discount rate auto-applied in the Point of Sale or online bookings. The rules of the discount will apply, i.e. which services or products the discount can be used with.
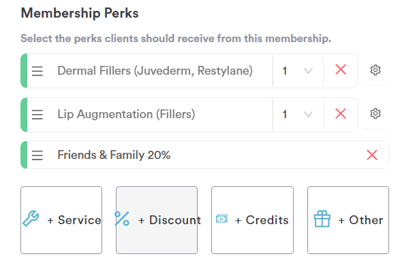
Credits: Add a credits amount to the membership. Members will receive the specified credits automatically while the membership is active, which they can use toward services or products at checkout.
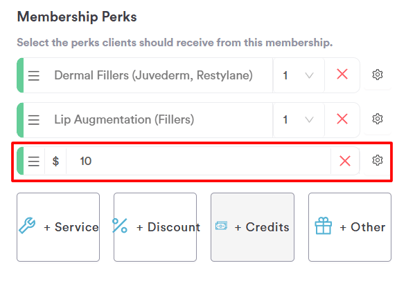
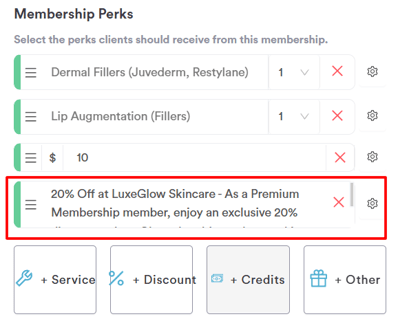
Other: A third type of membership perk is "Other". In this field, you can free-type any other external or additional benefits you want to offer to your clients.
Rearrange the perks on your digital membership card by clicking the three-line icon next to each perk and dragging it to your preferred position.
NOTE: The perks are cumulative, meaning a membership can include multiple benefits, such as service A free of charge, service B free of charge, plus discounts on additional services.
The client cannot have more services free of charge than the number of allowed services. Discounts are not restricted and can be applied for as long as the membership is active.
The allowed service limits will renew every time a payment is taken for the membership.
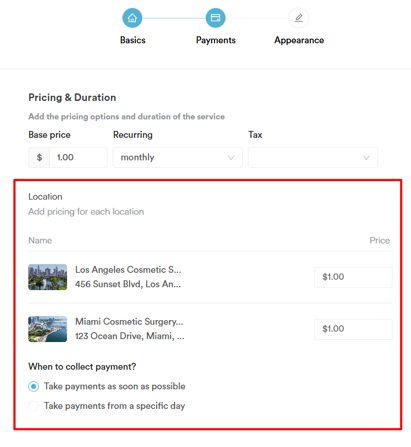
Step 5: Set Up Pricing and Duration
Once you've set up the membership details and perks, click on "Next step" in the bottom right corner.
First, enter the price of the membership plan in the "Amount" field.
Next, you can choose how you would like to charge your clients. Memberships can be offered with the following payment schedules:
- Weekly
- Monthly
- Yearly
In the Tax field, choose the tax rate that should apply to this membership. For more details on creating and managing taxes, please refer to this article.
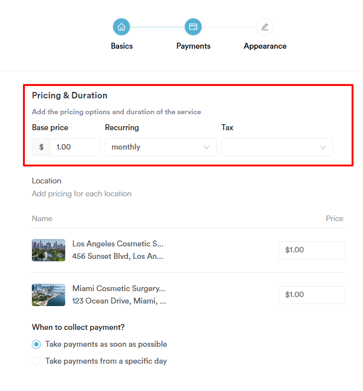
If your account has multiple locations, you can also set a different price per location under the Location section. Each location will be listed with its own price field, allowing you to customize the membership cost depending on where the client is being seen.
You can also choose from two options for the first payment of a membership:
- Charge immediately and start the membership right away.
- Charge on a specific day of the month or year and start the membership from that date.
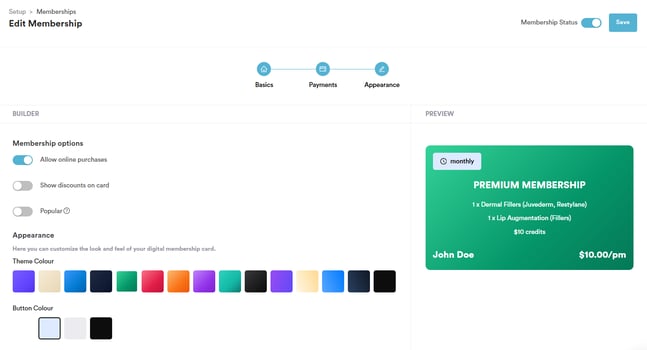
Step 6: Customize Appearance
Once you have set up the payment schedules, the next step is customizing the appearance.
In the builder on the left side of the page, you can make the membership available for online purchase and choose whether to display the discount amount on the digital membership card.
You can select the background theme of the membership card and choose the button color.
The membership will be marked as active by default. If needed, you can adjust the status by toggling the switch in the top-right corner.
To finalize the membership setup, click "Save" in the top-right corner of the screen.
By following these steps, you can create memberships in your Pabau account.
For more guides, refer to related articles below, select additional guides, or use the search bar at the top of the page. These guides will help you get the most out of your Pabau account.
Additionally, to help you fully utilize and understand your Pabau account, we recommend exploring additional guides and resources offered at the Pabau Academy. It offers in-depth video tutorials and lessons, offering a holistic learning experience that can equip you with the essential skills for achieving success with Pabau.