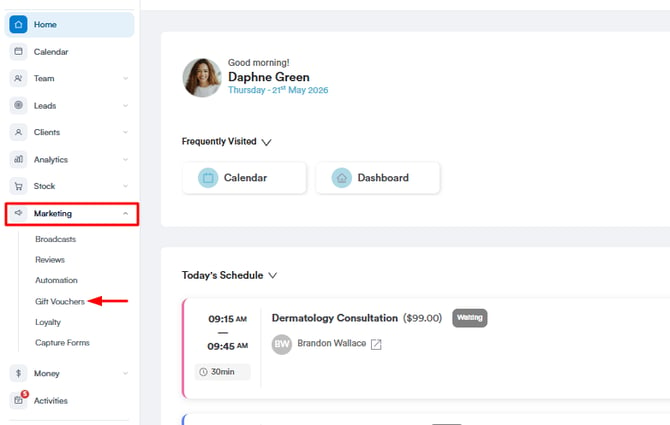
Step 1: Navigate to Gift Vouchers
Log in to your Pabau account, and in the left sidebar menu, go to Marketing, then click on Gift Vouchers.
Step 2: Create a Gift Voucher
Click on "Create Voucher" to initiate the gift voucher creation process.

-
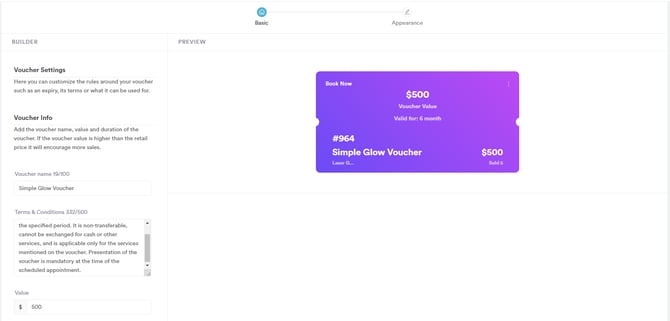
Set the voucher name
Choose a name for the voucher so it’s easy to recognize and market (e.g., “Birthday Treat Voucher” or “Luxury Facial Gift”). -
Set the terms and conditions
Define any rules around how the voucher can be used—such as expiry dates, usage limits, or exclusions (e.g., “Non-refundable” or “Cannot be combined with other offers”). -
Set the voucher value
Decide how much the voucher is worth (e.g., £50, £100, or a custom amount). This value determines what the recipient can redeem it for. -
Set the voucher validity
Choose how long the voucher will remain valid after it’s issued (e.g., 6 months, 1 year). -
Specify which services the gift vouchers can be used for
Limit or allow the voucher to be used only for specific treatments or services (e.g., “Valid only for massages and facials”). -
Preview changes to the name and value in the center of the screen
As you update the name and value, a preview will appear in the middle of the screen so you can see how the voucher will look before saving it.
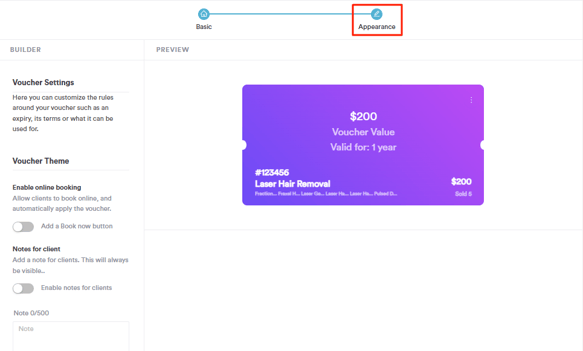
To customize the appearance of your gift voucher, head to the next step by clicking the “Next” button in the bottom-right corner of the screen.

In the Appearance step, you can:
-
🎨 Choose a background color – There are 4 preset color options available to choose from.
-
🖼️ Upload a background image (Marketing Plus feature) – If you'd like to use a custom image as the background of your voucher, you’ll need to have Marketing Plus subscription.
NOTE: To learn more, refer to our Marketing Plus guide.
You’ll also see two toggles in this step:
-
✅ Enable Online Bookings – Turn this on to allow clients to book online and apply their voucher during checkout.
-
📝 Enable Notes – This allows clients to add a personal note to the voucher, which will be visible to the recipient.
This step is all about giving your vouchers a touch of personality while ensuring they’re easy and convenient for clients to use.
Step 3: Selling Gift Vouchers Online
Click on the "Sell this voucher online" to enable online sales through your Pabau account integrated with Stripe.

Note: Selling gift vouchers online enhances your reach and revenue. Integrate Stripe for this functionality.
Step 4: Additional Configuration
You’ll also see two toggles in the "Appearance" step:
-
✅ Add a Book Now Button – Turn this on to allow clients to book online and apply their voucher during checkout.
-
📝 Enable Notes – This allows clients to add a personal note to the voucher, which will be visible to the recipient.
Step 5: Creating the Gift Voucher
Click on the "Create" button at the top right corner to save the configured gift voucher.
NOTE: You can also learn about this topic by watching a lesson on Pabau Academy.
In addition, we suggest reading our Gift Vouchers article for a more in-depth exploration of this topic.
For more guides, refer to related articles below, select additional guides, or use the search bar at the top of the page. These guides will help you get the most out of your Pabau account.
Additionally, to help you fully utilize and understand your Pabau account, we recommend exploring additional guides and resources offered at the Pabau Academy. It offers in-depth video tutorials and lessons, offering a holistic learning experience that can equip you with the essential skills for achieving success with Pabau.