In Pabau, you can create classes the same way you create services, with just a few extra settings to manage group appointments. Whether you're offering training, workshops, or group treatments, the class feature helps you manage multiple participants in one booking.
Step 1: Navigate to Setup
Start by logging into your Pabau account using your login credentials. Then, navigate to Setup, located on the bottom left corner of the left sidebar menu, to access the Setup page.

Step 2: Access Services
Under the Services section, click the Services tab.

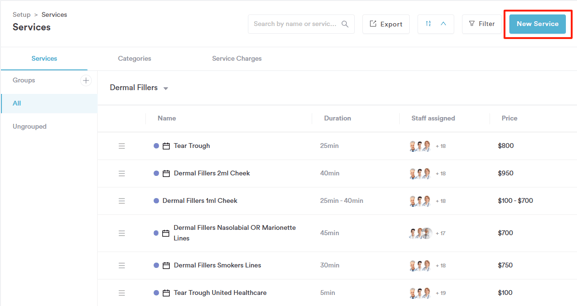
Step 3: Navigate to the "New Services" Button
Now, navigate to the "New Services" button on the top right corner of the page to start the process.
Step 4: Create Class
You'll now notice a new “Class” option just below the Virtual option. Click "Class" to indicate that the service you're creating is a group session.

At this stage, you can start adding the class information. On the "General" tab, you’ll be able to fill in the following details:
-
Class name:
The name of the class (e.g. Yoga Flow, Laser Training, etc.) -
Number of participants:
Set the maximum number of people that can attend the class. To qualify as a class, the Number of Participants must be greater than 1. -
Service Code:
An internal code to help you identify or categorize the class quickly (optional). -
Category:
Assign the class to a specific category (e.g. Fitness, Training, Wellness) for easier filtering and organization. Follow the steps from this guide to create a category. -
Appointment Color:
Choose a color to represent the class in your calendar, helpful for quick visual identification. -
Image:
Upload an image that represents the class (this can be shown in online booking, if enabled). - Set number of attendees:
Define the maximum number of clients who can attend the class. This helps manage capacity and prevents overbooking.

Step 5: Switch to the Pricing Tab
On this tab, you can set the price of the class, define your deposit amount, and configure your online payment policy, ensuring clients know what to pay and when.

Step 6: Configure Online Booking Settings
If you'd like the class to appear under a different name in online bookings, you can enter a Friendly Name. You can also provide a description to give clients more context.

Step 7: Set Communications
You can also set up communication to be sent before and after the class appointment on the "Client Pathway" tab.

Messages can be sent immediately upon enrolment or scheduled as part of an automation (requires Marketing Plus to be active).

Once you’ve finished configuring the class settings, go to the top-right corner of the screen, toggle Active on, and click Create.
 By following these steps, you can successfully create a class in Pabau.
For more guides, refer to related articles below, select additional guides, or use the search bar at the top of the page. These guides will help you get the most out of your Pabau account.
Additionally, to help you fully utilize and understand your Pabau account, we recommend exploring additional guides and resources offered at the Pabau Academy. It offers in-depth video tutorials and lessons, offering a holistic learning experience that can equip you with the essential skills for achieving success with Pabau.