Step 1: Navigate to Client Portal Settings
Log into your Pabau account and click on Setup in the left sidebar menu, then click on "Client Portal" under the "Catalogue" section.

Step 2: Customization in the Features Tab
Click on "Customize" located on the right side of the screen, then switch to the "Features" tab.

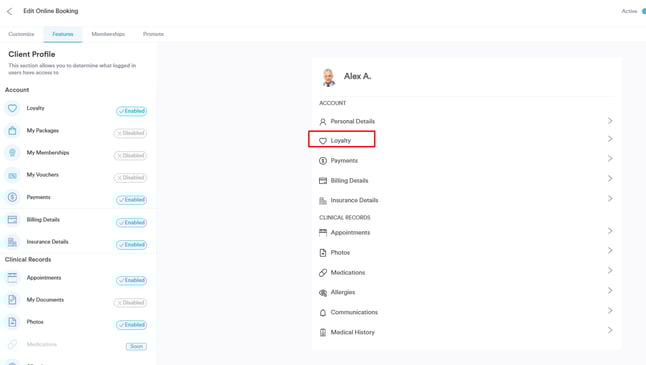
Here, you have the flexibility to determine what aspects of your business clients can access within the portal. Select the ones you want your clients to view and activate them. Once enabled, on the right side of the window, you can preview how the client's view will appear.
Step 3: Feature Overview from Client Perspective
Personal details will include general information such as name, surname, email, and contact information, along with any custom fields you wish to be displayed and filled out by the client. Clients can update their personal details at any time from here.

In the Appointments section, clients can access both upcoming and past appointments. They can view their upcoming appointments and have the option to cancel or reschedule them. Additionally, clients can rate their past appointments.

Communication will include all emails and SMS sent to the client.

In the My Packages section, clients can view all the packages they have purchased, along with the remaining or used sessions from each package.

In the Payments section, clients can view Billing Details, which include a list of all invoices with information on payments made or outstanding. Additionally, the section will feature Insurance Details, where the client can provide information about their insurance provider and membership number.

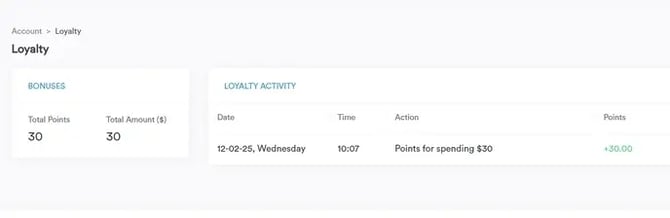
In the Loyalty section, clients can view the points they’ve earned, including the total amount and the date they earned them. These points can later be redeemed for appointments.
Under My Documents, all documents shared with the patient will be stored. It's important to note that patients will only see the documents you choose to share with them, not all documents from their client card.

In the Primary Care Physician section, clients are required to input the details of their primary care physician.

In Medical Records, clients can view and update their medical history questionnaire directly within the portal. Any information they add or change will automatically be saved and transferred to their client card, keeping their records up to date.


In the Allergies section, patients can add their allergies. These allergies will be automatically added to their client card.

Under Photos, clients will be able to view the photos shared with them.

In the Lab Requests section, they will be able to view and download their lab results.

Step 4: Save Changes
Click on "Save changes" in the upper right corner to confirm your selections.
By following these simple steps, you can tailor your client portal to align with your business preferences, providing a personalized and efficient experience for both you and your clients.
NOTE: You can also learn about this topic by watching a lesson on Pabau Academy.
For more guides, refer to related articles below, select additional guides, or use the search bar at the top of the page. These guides will help you get the most out of your Pabau account.
Additionally, to help you fully utilize and understand your Pabau account, we recommend exploring additional guides and resources offered at the Pabau Academy. It offers in-depth video tutorials and lessons, offering a holistic learning experience that can equip you with the essential skills for achieving success with Pabau.