Step 1: Navigate to POS Configuration
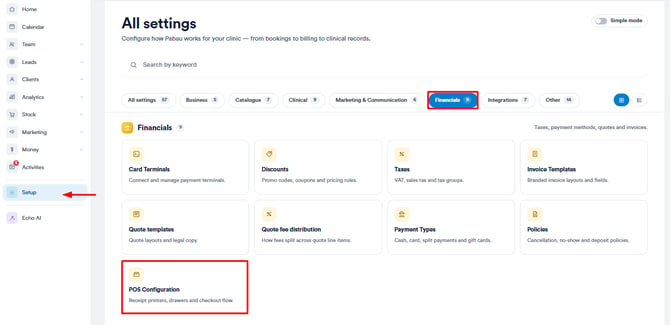
Start by logging into your Pabau account using your login credentials. Then, navigate to the setup page by clicking on the Setup tab in the left sidebar menu. Under the Financials section, you will find the POS Configuration.
Step 2: Configure the Point of Sale
The POS Configuration page allows you to manage which features are displayed at the point of sale. You can disable features by deactivating the toggle next to the feature name. Once deactivated, click the "Save changes" button for the updates to reflect. The selected features will show from view when raising an invoice.
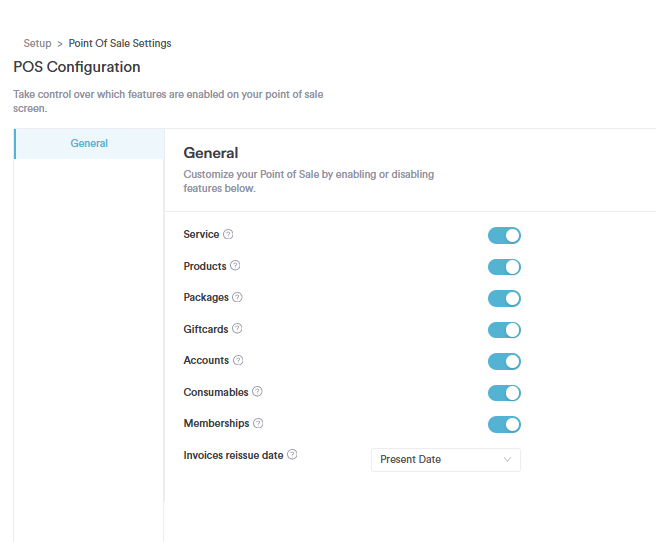
NOTE: The features that have the toggle deactivated (greyed out) not show in POS.
Step 3: Navigate to the Point of Sale
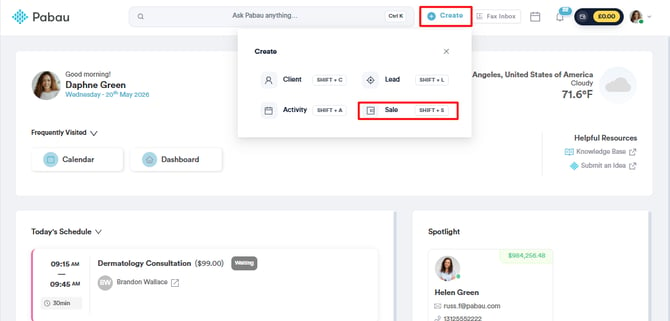
To check if the changes have been reflected in the point of sale, navigate to the "Create" button at the top of the page next to the search bar and proceed to click "Sale."
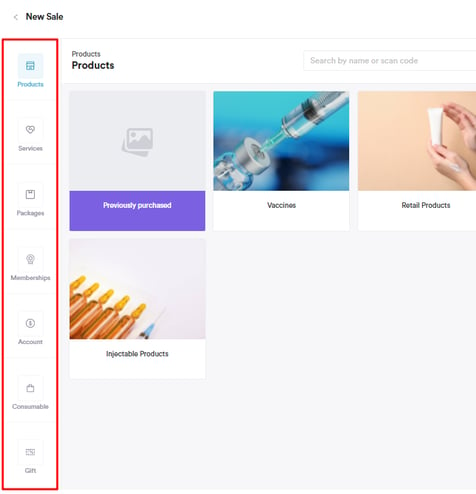
Ensure to first select the client at the top right side of the page so the available features will appear. You will notice that only the features that have the toggle activated on the POS configuration page appear on the far left side.
By following these steps, you can configure and manage the point of sale.
For more guides, refer to related articles below, select additional guides, or use the search bar at the top of the page. These guides will help you get the most out of your Pabau account.
Additionally, to help you fully utilize and understand your Pabau account, we recommend exploring additional guides and resources offered at the Pabau Academy. It offers in-depth video tutorials and lessons, offering a holistic learning experience that can equip you with the essential skills for achieving success with Pabau.