Want to let clients fill out forms directly from your website? Whether it's for lead capture, online consultations, or client registration, adding a form is easy. Just follow the steps below to copy the code you need to embed it into your site.
Step 1: Access "Capture Forms"
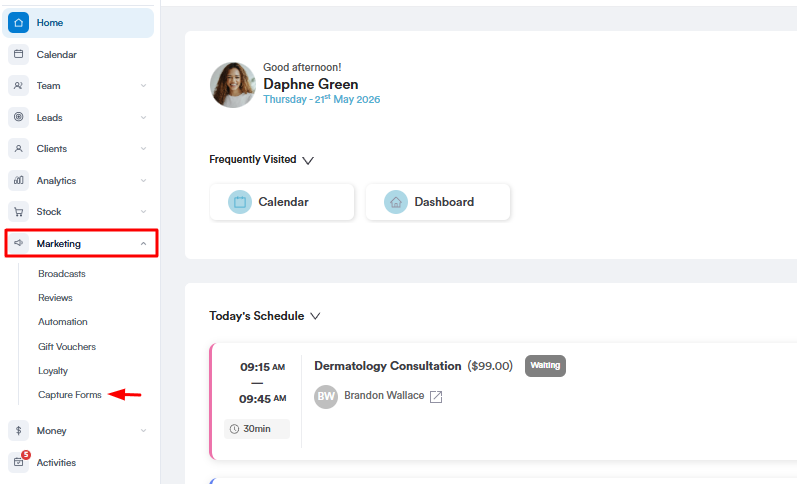
Start by logging into your Pabau account using your login credentials. Then, navigate to the Marketing section located on the left sidebar menu and click to expand it. The "Capture Forms" tab will be revealed.
Step 2: Access The Forms Tab
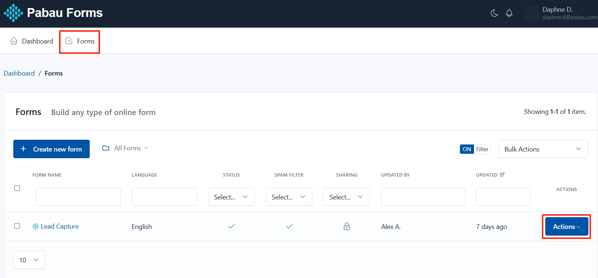
Navigate to the "Forms" tab on the top left corner to view your created forms. On the form you want to embed to your website, click the "Actions" button to view all available options.
Step 3: Publish & Share
The actions button will reveal the "Publish & Share" option. Click to view the share options.

Step 4: Embed Full Form
By default, the "Embed Full Form" tab will open. This provides you with the code needed to embed the form on your website.

The forms can be published in two formats: With or Without design (no theme) and can be shared in different ways, depending on the configuration you assigned.

Step 5: Embed Pop-Up Form
In this tab, you can create pop-ups designed to capture your visitors' attention.
You’ll have full control to customize elements like colors, borders, corner radius, backgrounds, button placement, and more.

When you're ready, click the "Generate code" button to open a modal where you can copy the HTML code to insert into your web page.


Once you've copied the code, paste it into the HTML of your website where you want the form to appear.
This could be:
-
A contact page
-
A booking page
-
Or a dedicated landing page
If you're using a website builder (like Wix, WordPress, Squarespace, etc.), look for an option to embed custom HTML or add code, then paste the code there.
Step 6: Share Form Link
In this tab, you’ll find a direct link to your form that you can easily copy and share with clients.
This link is perfect for sending via email, SMS, or messaging apps — no need for embedding code or technical setup.

Step 7: Send By Email
In this tab, you can customise and send your form via email. You’ll be able to define the recipient email addresses, sender name, reply-to email address, email subject, and email body.
This is a great way to send personalized invitations or reminders directly to your clients' inboxes.

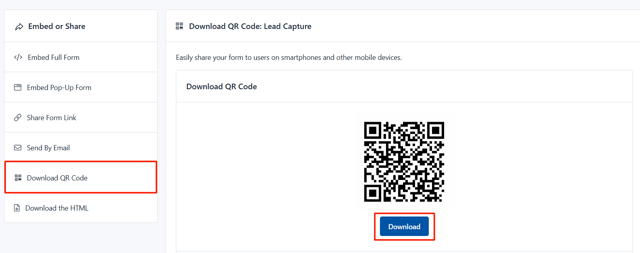
Step 8: Download QR Code
In this tab, you’ll find a QR code that links directly to the friendly URL of your form. You can easily click the “Download” button to save the QR code as an image, making it simple to print or share digitally with your clients — for example, on posters, flyers, or in your clinic.
Step 9: Download the HTML
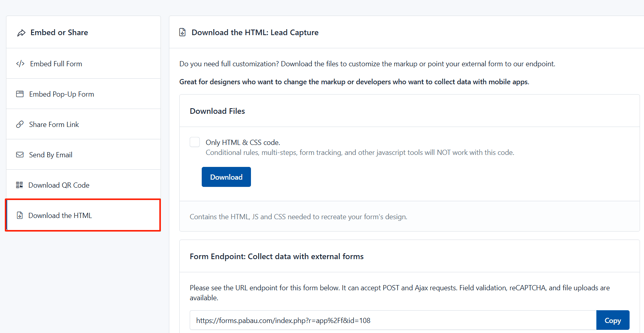
By following these steps, you can embed your forms into your website or share them as links.
For more guides, refer to related articles below, select additional guides, or use the search bar at the top of the page. These guides will help you get the most out of your Pabau account.
Additionally, to help you fully utilize and understand your Pabau account, we recommend exploring additional guides and resources offered at the Pabau Academy. It offers in-depth video tutorials and lessons, offering a holistic learning experience that can equip you with the essential skills for achieving success with Pabau.