How Clients Can Upload Attachments on Their Client Portal
This article explains how clients can upload photos and attachments to their client portal.
Step 1: Access the Client Portal
To access the client portal, click the 'Login' button at the top right corner of your online booking portal.

If you already have an account you can simply login using your login details.
If you're new, you can click 'Register' to create a new account.
Step 2: Navigate to the Avatar
In the client portal, click your avatar in the top right corner to access the features you have access to view. Click the 'Appointments' tab to access your past and upcoming appointments.

Step 3: Review Appointment Details
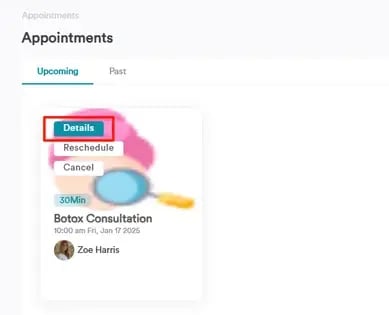
To see specific appointment details, click the 'Details' button at the top of the appointment.

Step 4: Upload Attachment/s
In the appointment details, you can complete attached forms, view general appointment info, and add notes or photos. To attach a photo, click the attachment icon in the top right corner.

Once you've clicked the icon, a window will pop-up where you can choose photos from your device to upload. After you've selected the image/s click the 'Upload' button, to finalize.


By following these steps, you can upload images to the client portal.
For more guides, refer to related articles below, select additional guides, or use the search bar at the top of the page. These guides will help you get the most out of your Pabau account.
Additionally, to help you fully utilize and understand your Pabau account, we recommend exploring additional guides and resources offered at the Pabau Academy. It offers in-depth video tutorials and lessons, offering a holistic learning experience that can equip you with the essential skills for achieving success with Pabau.