Table of Contents:
Pabau’s Fax Inbox centralizes all of your clinic’s fax communication — from managing fax numbers to sending and receiving documents directly inside the platform.
Whether you’re setting up fax for the first time or already have numbers to manage, this article walks you through each step so you can handle fax workflows without needing external tools or manual workarounds.
How to Set Up Fax
Step 1: Navigate to Sender Addresses
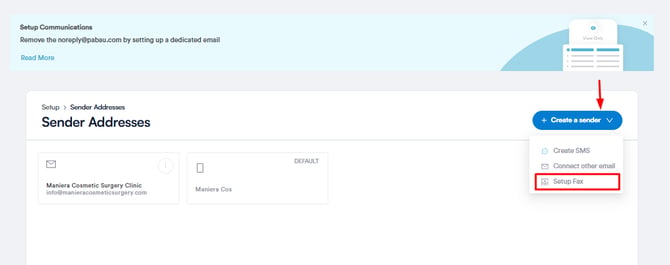
Start by logging into your Pabau account using your existing credentials. Before you can send or receive faxes, a fax number must be configured and assigned. In Pabau’s settings:
-
Go to Setup in the left sidebar menu.
-
Navigate to Marketing & Communications > Sender Addresses.
- Click the "Create a sender" button at the top right corner and click "Setup Fax."
Step 2: Add Fax Number
Here you can purchase or add a fax number that will be used as your “Fax as” sender ID when sending faxes. A window will open where you can add a fax number. Click the "Add/Port Number" button to get started.
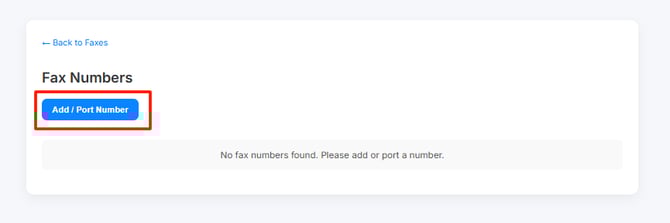
Depending on whether you already have a fax number or need a new one, choose the New Number or Port Existing tab at the top.
Step 3: Add New Number
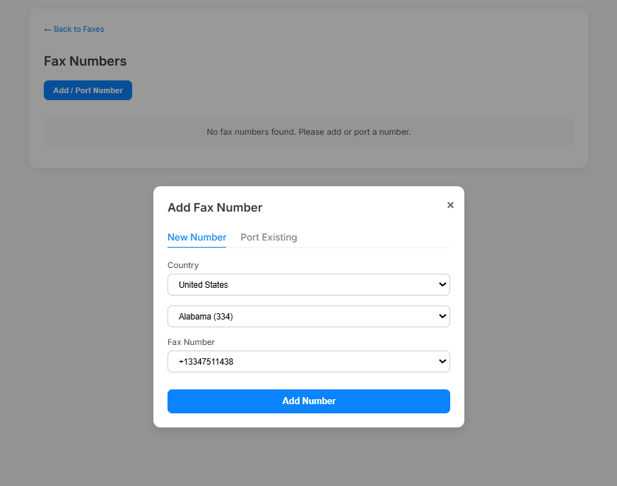
If you want to add a new number, you’ll be prompted to select the country, state/region, and choose an available fax number before moving on to the next step.
Then clicking "Add Number" will add the selected fax number to your account, making it immediately available for sending and receiving faxes within Pabau.
Selecting a recognizable clinic fax number helps ensure that external providers and labs immediately recognize where faxes are coming from. Once a fax number is added, it will appear in the Fax Inbox and “Send Fax” workflows as a sender option.
How to Send and Receive Fax
Step 1: Navigate to Fax Inbox
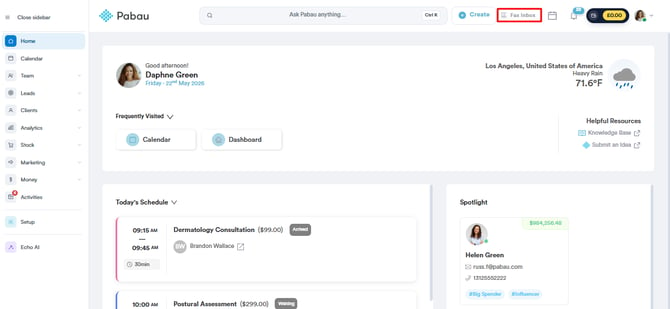
Locate the Fax Inbox in the top right navigation bar. Clicking the Fax Inbox button opens the central area where incoming and outgoing faxes are displayed, including unread counts if new faxes arrive. This inbox serves as your central hub to manage all fax communications without leaving Pabau.
Step 2: Send a Fax
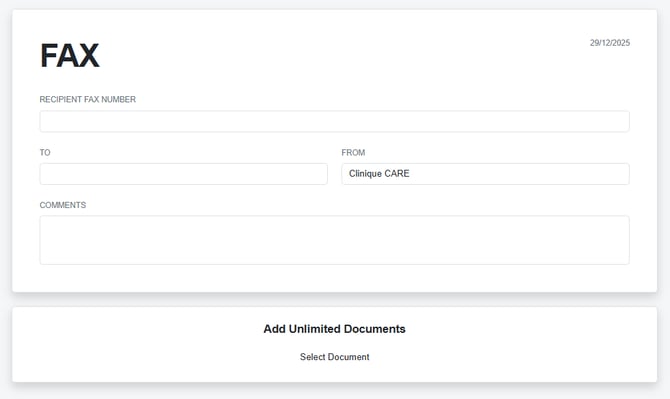
To begin, inside the Fax Inbox, click New Fax to open the fax send form.

Then proceed to fill out the following information:
-
Enter the Recipient’s Fax Number
Type the full destination fax number, including country and area codes. -
Choose Your Clinic’s Fax Number
If you have more than one number configured, pick the one you want to send from. This tells the recipient where the fax originated. -
Attach Your Documents
Upload the files you want to fax (e.g., PDFs or images). All pages you include will be sent in a single transmission. -
Add Notes/Comments (Optional)
If you’d like, include a brief message or instructions for the recipient. -
Click Send
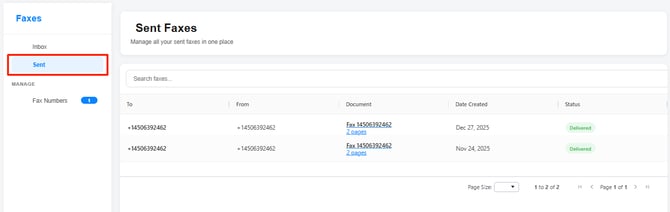
Once everything is set up, hit Send. Your fax is submitted and will appear in the Sent section of Fax Inbox once delivered.
Sending faxes this way removes the need for traditional fax machines — everything is done online through Pabau’s interface. Modern online fax systems work similarly, taking uploaded documents and transmitting them as a fax to the destination number.
Step 3: Receive Incoming Faxes
Incoming faxes come directly into your Fax Inbox:
-
Check the Inbox Tab
Any received faxes are shown under Incoming, with status, sender number, and timestamp. -
Open a Fax
Click a fax entry to view the document and its pages. -
Download or Save to Client
You can download the fax locally or attach it to a client record in Pabau, so it’s stored in EMR > Documents. -
Unread Count Updates
Once you view a fax, it’s marked as read and the unread indicator updates automatically.
Just like online email‑based fax systems, everything is stored in a searchable interface so you can find and manage faxes easily.
Step 4: Manage Your Fax Messages
Once you’ve sent or received faxes, you can:
-
Filter your faxes (e.g., sent vs incoming) at the top left corner of the screen.
-
Search by number, date, or client.

-
View sent/received documents.

This keeps your Inbox organized and useful for tracking communications over time.
For more guides, refer to related articles below, select additional guides, or use the search bar at the top of the page. These guides will help you get the most out of your Pabau account.
Additionally, to help you fully utilize and understand your Pabau account, we recommend exploring additional guides and resources offered at the Pabau Academy. It offers in-depth video tutorials and lessons, offering a holistic learning experience that can equip you with the essential skills for achieving success with Pabau.