
Account Settings provide users with the flexibility to customize their profile information, enhance security through password management, and tailor notifications based on specific client actions.
Step 1: Access Account Settings
Begin by logging into your Pabau account using your credentials. Click on your avatar or profile picture located in the top right corner of the screen. From the dropdown menu, select "Account Settings."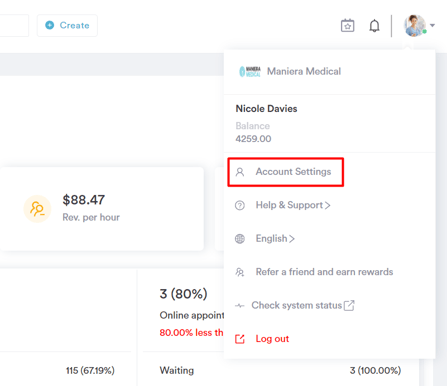
Step 2: Profile Tab
In the first tab, Profile, customize your:
- Profile Picture:
- Name, Language, and Timezone:
Modify your name, language, and time zone.
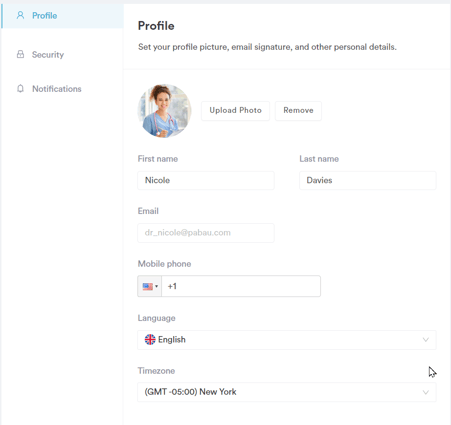
Language and time zone changes affect only your account, not other users.
Your login email can only be changed through the Team feature. Open your user profile, click "Change" under the email field, and validate the new login email via email confirmation.
Step 3: Security Tab
In the second tab, Security, you can change your password and your passcode for the Pabau App.
How to change your password:
- Click on your avatar in the top-right corner of your Pabau account.
- Select "Account Settings" and go to the "Security" tab.
- In the "Change password" section, enter your current and new password, then click "Change Password" to finish.
How to set your passcode for Pabau App (Pabau Go):
- Click on your avatar in the top-right corner.
- Select "Account Settings" and go to the "Security" tab.
- In the "Passcode" section, set a four-digit passcode for the app, if not done already.
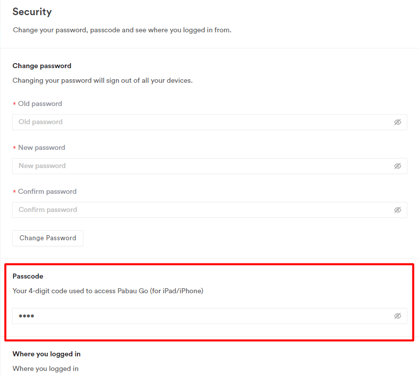
- To change your PIN code, replace the existing one with the new one.
- Click "Save Changes" in the top right corner of the Account Settings page.
Step 4: Notifications Tab
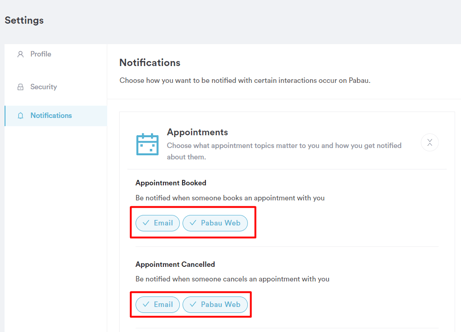
In the Notifications tab, you can choose how you want to be notified for various client actions.
There are two options: email and Pabau Web. If you choose email, you will receive a hard-coded email with the details of the action taken. The content of this email cannot be changed.
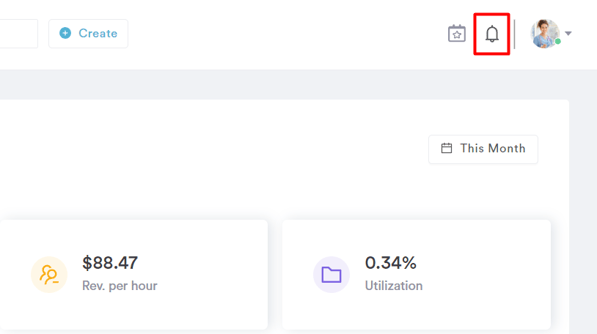
If you choose Pabau Web, you will receive a notification in the web version of Pabau, specifically in the "View notifications" bell icon right next to your avatar in the top right corner.
To choose one or both of these options, simply click on them. The button will become blue with a blue check mark.
- Appointment Updates:
- Medical Form Completion:
- Client Reviews:
- Lead Enquiries:
Opt to be notified when a lead fills out the enquiry form provided by Pabau.
Make sure to save the changes made to your settings by clicking on "Save Changes" in the top right corner.
NOTE: We suggest reading our Team article for a more in-depth exploration of this topic.
For more guides, refer to related articles below, select additional guides, or use the search bar at the top of the page. These guides will help you get the most out of your Pabau account.
Additionally, to help you fully utilize and understand your Pabau account, we recommend exploring additional guides and resources offered at the Pabau Academy. It offers in-depth video tutorials and lessons, offering a holistic learning experience that can equip you with the essential skills for achieving success with Pabau.