Table of Contents:
1. How to Upload a Document
1.1. How to Rename a Document
1.2. How to Download a Document
1.3. How to Delete a Document
2. How to Create a Document Folder
2.1. How to Rename a Document Folder
2.2. How to Delete a Document Folder
How to Upload a Document
Step 1: Navigate to the Client Card
Start by logging in to your Pabau account using your login credentials. Then, navigate to the Search bar at the top of the page and type at least three letters of the client's name. Pabau will filter the results as you type.

Step 2: Switch to the Documents Tab
To access the Documents tab, expand the Chart/EMR, and the tab will be revealed.
Step 3: Upload a Document
Click on the Create button at the top right corner of the page and select "File Upload." 
You can drag and drop files you want to upload or select them using the button at the bottom of the window to choose files from your computer.
The uploaded files will be visible in the bottom left corner, with a green checkmark indicating they've been successfully uploaded. If there are no more files you'd like to upload, you can go ahead and close the window.

If you have uploaded the wrong file, you can easily delete it by clicking the cross mark at the top right corner.
By following these steps, you can upload a document into the client card.
How to Rename a Document
Step 1: Navigate to the Client Card
Start by logging in to your Pabau account using your login credentials. Then, navigate to the Search bar at the top of the page and type at least three letters of the client's name. Pabau will filter the results as you type.
Step 2: Switch to the Documents Tab
To access the Documents tab, expand the Chart/EMR, and the tab will be revealed.
Step 3: Rename the Document
After locating the document you'd like to rename, either click on the three dots on the far right side of the document, or select the document on the left side - the rename option will appear at the top.
A window will appear, allowing you to enter a new name for the document. Be sure to click Save to apply the changes.
By following these steps, you can rename a document in the client card.
How to Download a Document
Step 1: Navigate to the Client Card
Start by logging in to your Pabau account using your login credentials. Then, navigate to the Search bar at the top of the page and type at least three letters of the client's name. Pabau will filter the results as you type.
Step 2: Switch to the Documents Tab
To access the Documents tab, expand the Chart/EMR, and the tab will be revealed.
Step 3: Download the Document
After locating the document you'd like to download, you can click on the three dots on the far right side, and the action to download the document will be shown.

The file will be downloaded right after.

To download documents in bulk, you can select multiple files by checking the boxes on the left side of the document list. Once you've chosen the files you want to download, the download option will appear on the top right side of the screen.
By following these steps you can download a document from the client card.
How to Delete a Document
Step 1: Navigate to the Client Card
Start by logging in to your Pabau account using your login credentials. Then, navigate to the Search bar at the top of the page and type at least three letters of the client's name. Pabau will filter the results as you type.
Step 2: Switch to the Documents Tab
To access the Documents tab, expand the Chart/EMR, and the tab will be revealed.
Step 3: Delete the Document
After locating the document you'd like to delete, click on the three dots on the far right side, and the action to delete the document will be revealed. 
Once you click Delete, you will get a prompt, and to finalize the action, click on Delete forever.
To delete documents in bulk, you can select multiple files by checking the boxes on the left side of the document list. Once you've selected the files you want to delete, the delete option will appear on the top right side of the screen.
By following these steps you can delete a document from the client card.
How to Create a Document Folder
Step 1: Navigate to the Client Card
Start by logging in to your Pabau account using your login credentials. Then, navigate to the Search bar at the top of the page and type at least three letters of the client's name. Pabau will filter the results as you type.
Step 2: Switch to the Documents Tab
To access the Documents tab, expand the Chart/EMR, and the tab will be revealed.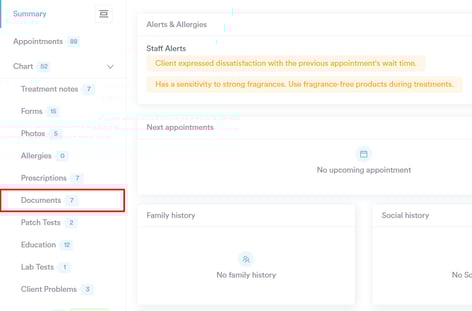
Step 3: Create a New Folder
Click on the Create button at the top right corner of the page and select "New Folder."

Enter a folder name and click the Create button to finalize the action.
Folders will appear at the top of the page. 
By following these steps you can create a document folder in the client card.
How to Rename a Document Folder
Step 1: Navigate to the Client Card
Start by logging in to your Pabau account using your login credentials. Then, navigate to the Search bar at the top of the page and type at least three letters of the client's name. Pabau will filter the results as you type.
Step 2: Switch to the Documents Tab
To access the Documents tab, expand the Chart/EMR, and the tab will be revealed.
Step 3: Rename the Document Folder
Click on the three dots on the far right side of the folder, and the action to rename the document will be revealed.
When you select "Rename," you can update the folder name and click "Update" to apply the changes.
By following these steps, you can rename a document folder in the client card.
How to Delete a Document Folder
Step 1: Navigate to the Client Card
Start by logging in to your Pabau account using your login credentials. Then, navigate to the Search bar at the top of the page and type at least three letters of the client's name. Pabau will filter the results as you type.
Step 2: Switch to the Documents Tab
To access the Documents tab, expand the Chart/EMR, and the tab will be revealed.
Step 3: Delete the Document Folder
Click on the three dots on the far right side of the folder, and the action to delete the document will be revealed.

Once you select "Delete," you will get a prompt to confirm whether you want to delete the folder permanently. Click "Delete forever" to finalize the action.

By following these steps, you can delete a document folder from the client card.
How to Move a Document to a Folder
Step 1: Navigate to the Client Card
Start by logging in to your Pabau account using your login credentials. Then, navigate to the Search bar at the top of the page and type at least three letters of the client's name. Pabau will filter the results as you type.
Step 2: Switch to the Documents tab
To access the Documents tab, expand the Chart/EMR, and the tab will be revealed.
Step 3: Move a Document to a Folder
Click on the three dots on the far right side of the document, and the action to move the document will be revealed.
Upon clicking, all the folders created in the client card will be listed, and the option to create a new folder will also be included. 
The document will be moved successfully.

By following these steps, you can move a document to a folder in a client card.
How to Share Documents Securely from the Client Card
Step 1: Navigate to the Client Card
Start by logging in to your Pabau account and use the search bar located at the top of the screen to search for the client with whom you wish to share a document.
Step 2: Access Client Card and Documents
In the client card, click on the Chart/EMR tab, and from the dropdown menu options, select "Documents."

Step 3: Locate the Document You Want to Share
In the ''Documents section'' of the client card, find the file you wish to share.

Click the three dots next to the document to view the available actions, then choose ''Secure Share'' to begin securely sending the document through the Client Portal.
Step 4: Share the Document Securely
Once you click ''Secure Share'', a panel will open on the right-hand side of the screen.
From here, you can review, customize, and send your documents securely to the client through the Client Portal.
Here’s what each section of the Secure Share panel includes:
-
Shared Documents
At the top of the panel, you’ll see the total number of documents that have been shared with the client.
If you’d like to review the details, click the ''View'' button to open the ''Share History''. This will display which documents were shared, when they were sent, and which staff member shared them.
-
Recipient Details
In the ''Share with'' field, select who will receive the shared documents, typically the client, but you can also choose to share them with an insurance company or another authorized contact.
- Forms Selected
Here, you can view the document you’ve chosen to share. If you’d like to include additional documents, simply select them from the list to add them before sending.

-
Share via SMS
You can enable the SMS toggle if you’d like the client to receive the secure link via text message in addition to email. To use this option, ensure that Secure Share via SMS is enabled in your ''Client Notifications'' settings.

-
Email Delivery
The shared document will be sent to the client via email. You can preview the email template by clicking the link displayed in this section.
The template can also be customized in ''Client Notifications'' to better suit your clinic’s style and messaging.
-
Client Portal Note
Use this field to add a personalized message for your client. This note will appear alongside the shared document in the Client Portal, providing context or any additional information your client may need.
-
Password Protection
The Password protect option is enabled by default to keep your documents secure. When enabled, an access PIN is automatically included in the email sent to the recipient. The recipient must enter this PIN to open the shared documents, and it remains valid for 30 days, ensuring that only the intended person can access the files.
-
Finalize & Send
Once you have reviewed all details, click ''Share Securely via Email'' to send the document to your client. If you decide not to proceed, click Close - no information will be saved or sent.
Step 5: How the Client Will Access the Document
After sharing the document, your client will receive an email containing the shared files along with the access PIN.

To open the document in the Client Portal, the client must enter this PIN, ensuring that only the intended recipient can view the documents.

After entering the PIN, the client will be redirected to the Client Portal, where they can securely view and open the document.

By following these steps, you can securely share documents with your clients, ensuring they receive the necessary information safely and efficiently.
For more guides, refer to related articles below, select additional guides, or use the search bar at the top of the page. These guides will help you get the most out of your Pabau account.
Additionally, to help you fully utilize and understand your Pabau account, we recommend exploring additional guides and resources offered at the Pabau Academy. It offers in-depth video tutorials and lessons, offering a holistic learning experience that can equip you with the essential skills for achieving success with Pabau.