Control Your Terminal Settings
In this article, we'll cover how you can adjust and control the settings of your Pabau Pay card terminals.
Access the card terminal's settings
To open the settings menu, swipe right from the left edge of the reader screen to reveal a Settings button. Tap the Settings button and enter the admin PIN 07139. From here, you can update your WiFi settings or generate a pairing code for device registration. Battery status is displayed at the top right of this screen. To close the settings menu, click the back arrow in the top left corner.
Screen timeout
The screen times out when the reader isn’t connected to a power source. The default timeout of 1 hour is to improve battery performance. To update this value, go to the settings, select Appearance, and then select a new screen timeout from the dropdown. The device screen turns on automatically when a device interaction occurs (such as touching the screen) or payment is requested.
Connect the reader to the internet
Because the BBPOS WisePOS E is a smart reader, its reader software communicates directly with Stripe. Your point of sale application communicates with the reader through either a LAN (using a Terminal SDK) or the internet. When communicating with the reader through the LAN, the reader must connect to the same local network as your point of sale application. If you’re running into issues connecting your reader to the internet, follow the troubleshooting steps to diagnose the issue.
Ethernet
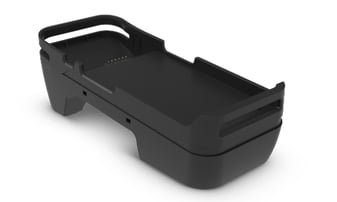
Ethernet connectivity requires the use of an optional dock, which provides wired Ethernet connectivity and keeps your smart reader fully charged using the included charging cable. You can purchase the dock separately through the Stripe dashboard. The Ethernet Dock features a 10/100 Ethernet port and rubber feet for stable countertop use.
To set up the dock:
- Connect the Ethernet cable from your dock to your router.
- Connect the dock to power. It has a minimum power requirement of 5V-2A (10W) and includes a charging cable, which you can plug into any USB-A power adapter (not included).
- When both cables are connected, insert the reader into the dock.
To confirm that the reader is properly docked, verify the reader is charging and the Ethernet icon is visible in the status bar.

Charging icon

Ethernet icon
NOTE: The dock’s charging cable must be USB-A to USB-C. The dock doesn’t work with a USB-C to USB-C connection.
The reader obtains an IP address using DHCP. As soon as the network cable is plugged in, the reader attempts to establish communication with Stripe.

Network priority
The BBPOS WisePOS E prioritizes connecting through Ethernet if possible. Even if previously configured for WiFi, the reader switches to using an Ethernet connection when connected to the dock with a plugged-in Ethernet cable. If you remove the reader from the dock, it switches back to the WiFi connection.
The BBPOS WisePOS E resets its priority to Ethernet when rebooting. Even if previously configured for WiFi, the reader switches to Ethernet if it detects an Ethernet cable connection while starting up.
If the you dock the reader, but there is no Ethernet cable plugged in, it uses WiFi. Regardless of connectivity while docked, you can still connect to WiFi and manage networks on the device.
Change the default reader language
The BBPOS WisePOS E supports changing the reader language in the settings menu. Swipe right across the screen to access the settings menu, and select your language.
For more guides, refer to related articles below, select additional guides, or use the search bar at the top of the page. These guides will help you get the most out of your Pabau account.
Additionally, to help you fully utilize and understand your Pabau account, we recommend exploring additional guides and resources offered at the Pabau Academy. It offers in-depth video tutorials and lessons, offering a holistic learning experience that can equip you with the essential skills for achieving success with Pabau.


