
Table of Contents:
1. How to Set Up Your Business Details
2. How to Make Your Account More Secure
2.1. How Two-Factor Authentication Works
3. How to Add Social Media Accounts
4. How to Enable Letters
How to Set Up Your Business Details
Step 1: Accessing Business Details
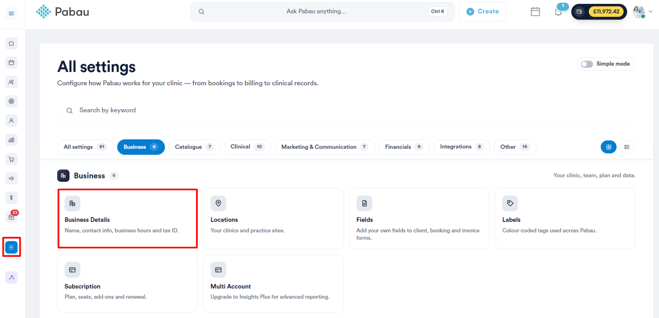
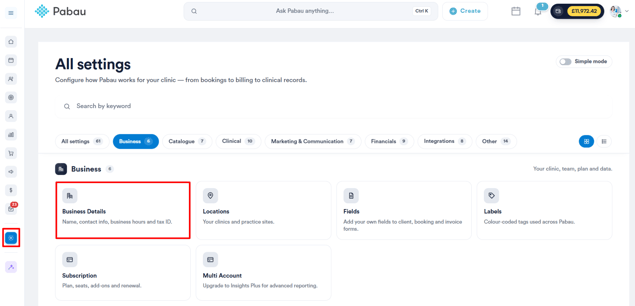
To begin, log in to your Pabau account. Next, navigate to Setup in the left sidebar menu. Then, click on Business Details located under the Business section.

NOTE: You can also learn about this topic by watching a lesson on Pabau Academy.
Step 2: Adding Basic Information
Once inside Business Details, you'll find everything related to your core business information — used across emails, invoices, and your client-facing portal.
-1.png?width=634&height=435&name=Screenshot%20(1)-1.png)
Start by uploading your company logo. It will appear on invoices, appointment confirmations, and the client portal. Use the Replace image button to upload or update it, and aim for a square, transparent PNG for best results.
Below that, fill in your Business identity details — including your business name, company email, phone number, website, address, country, business type, currency, and URL-friendly name.
You'll also notice an Enable photo storage banner at the top. This Core Plus feature lets you store and download client photos in original, uncompressed quality, perfect for before & after documentation.
Step 3: Setting Language and Time zone
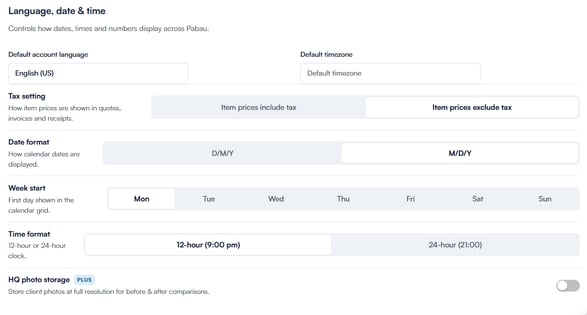
Scrolling down on the Details page, you'll find the Language, date & time section, which controls how dates, times, and numbers display across your Pabau account.
Set your default account language and timezone, then choose your preferred date format (D/M/Y or M/D/Y), time format (12-hour or 24-hour), and the first day of the week for your calendar grid.
Under tax setting, select whether item prices include or exclude tax — this applies across all quotes, invoices, and receipts in Pabau.
If you're on a Plus plan, you can also enable HQ photo storage to store client photos at full resolution for before & after comparisons.
NOTE: The currency selected here determines the currency your Pabau account operates in.
Step 4: Saving Changes
Once all necessary adjustments have been made, click on "Save Changes" in the top right corner to confirm.
By following these steps, you ensure that your business details are accurately reflected across your Pabau account, enhancing your branding and communication efforts.
How to Make Your Account More Secure
Step 1: Accessing Business Details
To begin, log in to your Pabau account. Next, navigate to Setup in the left sidebar menu. Then, click on Business Details located under the Business section.
Step 2: Manage Security Settings
Within ''Business Details'', open the Security tab. At the top, you'll see your Pabau Baseline Standard security score, which shows how well your account meets the security standard.
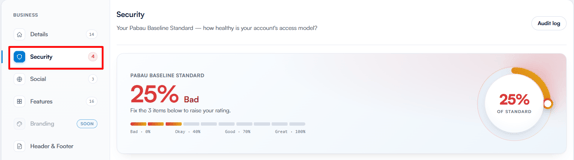
You can click Audit log in the top right corner to view a log of all failed sign-in attempts across your account, including password failures and 2FA failures. You can filter by user, country, or date, and export the data as a CSV.

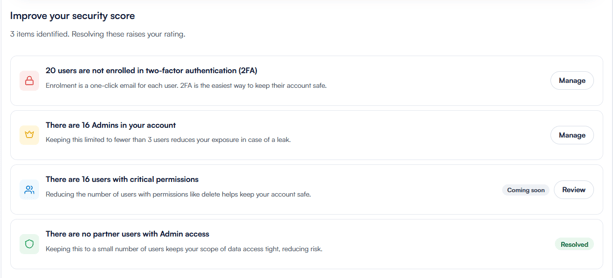
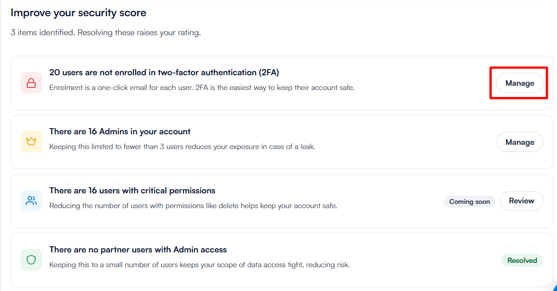
Below the score, the Improve your security score section lists any open recommendations, such as enrolling users in two-factor authentication or reducing the number of admin accounts. Each item has a ''Manage'' button to address it directly. Resolving these items raises your overall score.
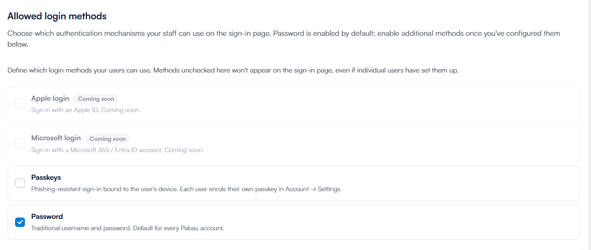
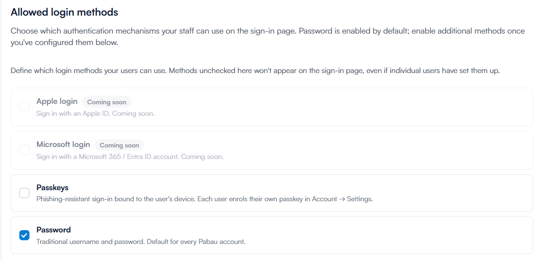
Under Allowed login methods, you can control which authentication methods your staff can use on the sign-in page. Password is enabled by default. You can also enable Passkeys — a phishing-resistant sign-in method bound to the user's device, which each staff member sets up individually via their Account Settings.
You can also enable Sign in with Google, allowing staff members to log in to Pabau using their existing Google account instead of entering their email and password manually.
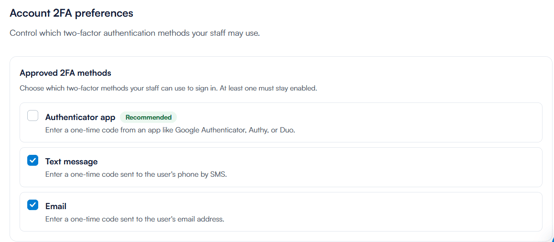
In Account 2FA preferences, choose which two-factor authentication methods your staff may use — authenticator app (recommended), text message, or email. At least one must remain enabled at all times. If a staff member hasn't set up a required method, they'll be prompted to configure it during login.
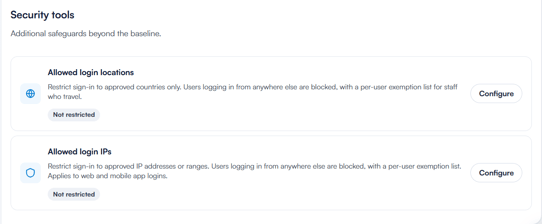
Finally, under Security tools, you can configure additional safeguards — restricting sign-in to approved countries only via Allowed login locations, or to specific IP addresses via Allowed login IPs.
After making changes to your security settings, click on "Save" to apply the modifications.
By implementing these security measures, you can enhance the protection of your Pabau account and safeguard sensitive information effectively.
Once this time elapses, your account will automatically unlock, allowing you to attempt to log in again.
Should you require immediate account unlocking, kindly reach out to our customer support team at customercare@pabau.com.
Please ensure that you contact us from the email address associated with the account you wish to unlock.
How Two-Factor Authentication Works
Two-factor authentication significantly enhances the security of your Pabau account by requiring an additional verification step beyond just entering your login credentials. This added layer of security helps protect your account from unauthorized access, even if login credentials have been compromised.
The Login Process with Two-Factor Authentication:
Initiating Login:
When you or your team members attempt to log in to your Pabau accounts, you will first provide your standard login credentials (username and password) as usual.
Verification Code Request:
Upon providing the correct login credentials, you will be prompted to provide a verification code.
Receiving the Verification Code:
The verification code will be delivered via the 2FA method configured for the user — text message, email, or authenticator app (Google Authenticator, Authy, or Duo).
Inputting the Verification Code:
To complete the login process, you must input the verification code received on your mobile phone. This code acts as the second factor of authentication.
Successful Login:
Once the correct verification code is entered, access to your Pabau account is granted.
To set up 2FA, please follow the steps below:
Step 1: Navigate to Business Details
Navigate to ''Setup'' in the left sidebar and select ''Business Details'' under the ''Business'' section.

Step 2: Access Security Settings
Click on the "Security" tab on the left side of the screen.
Step 3: Manage 2FA Enrollment
In the ''Security'' tab, start by enrolling your staff. Under the ''Improve your security score'' section, click Manage next to the 2FA recommendation to send enrollment emails to any staff members who haven't set it up yet.
A popup will appear showing all users and their current 2FA status — you can see at a glance how many are enrolled and how many aren't, along with each user's available contact methods (phone number or email).
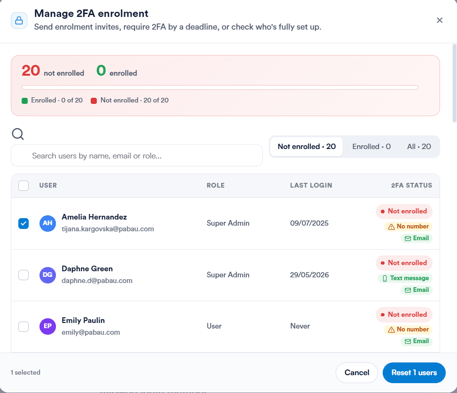
Select the users you want to enroll and click Reset users to send them an enrollment invite. You can also filter by enrolled or not enrolled, or search by name, email, or role.
Once users are enrolled, head to Account 2FA preferences to choose which 2FA methods your staff are allowed to use — authenticator app (recommended), text message, or email. At least one method must remain enabled at all times.
NOTE: If 2FA is configured to deliver verification codes via text message, Pabau credits will be charged for each code sent. To ensure uninterrupted access, it's advisable to enable auto top-up of credits.
By completing these steps, you ensure that all staff members are enrolled in two-factor authentication and your account is protected with an additional layer of security.
How to Add Social Media Accounts
Step 1: Access Business Details
To begin, log in to your Pabau account. Next, navigate to Setup in the left sidebar menu. Then, click on Business Details located under the Business section.
Step 2: Add Social Media Links
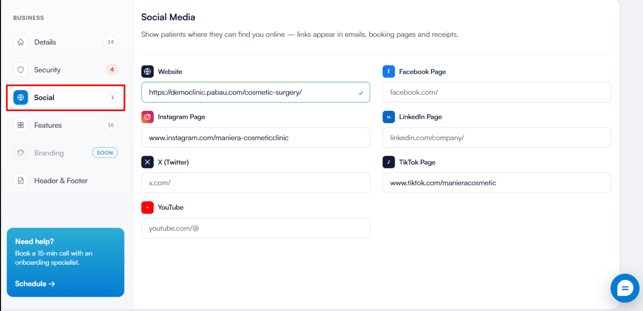
Within the "Business Details" section, click on the "Social" tab. Here, you'll find fields for adding various social media links.
Add your social media links to their respective fields, including your website, Facebook page, Instagram page, LinkedIn, Twitter/X, TikTok, and your YouTube page.
Step 3: Save Changes
Once you've added the desired social media links, click on "Save Changes" to finalize and apply the modifications.
By following these steps, you can easily add your social media accounts to your Pabau account, enabling seamless integration with client communication materials.
How to Enable Letters
Step 1: Navigate to Business Details
To begin, log in to your Pabau account. Next, navigate to Setup in the left sidebar menu. Then, click on Business Details located under the Business section.
Step 2: Navigate to Features
In the "Business Details" section, click on the "Features" tab on the left side.
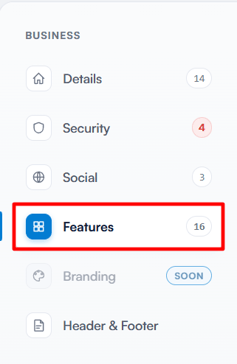
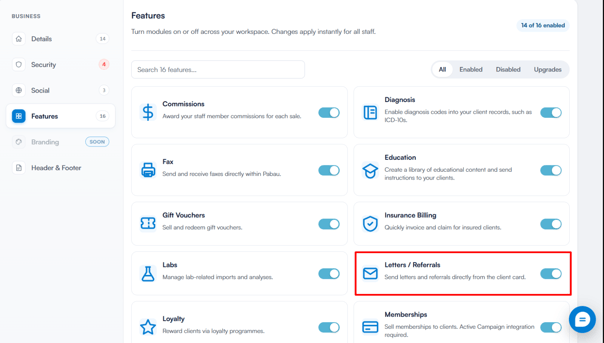
Step 3: Turn on "Letters"
Look for "Letters" in the Features tab and switch it on. Now you can use the Letters feature to send letters to your clients.
NOTE: You can learn more about the Letters feature by reading this article.
For more guides, refer to related articles below, select additional guides, or use the search bar at the top of the page. These guides will help you get the most out of your Pabau account.
Additionally, to help you fully utilize and understand your Pabau account, we recommend exploring additional guides and resources offered at the Pabau Academy. It offers in-depth video tutorials and lessons, offering a holistic learning experience that can equip you with the essential skills for achieving success with Pabau.