
Zapier is the easiest way to automate your work and one of the most used tools nowadays. Create Zaps and establish an automated workflow that connects your favourite apps and services!
With the Advanced Marketing Upgrade you will be able to integrate Zapier with Pabau and in that way establish an automated connection between Pabau and your most used apps. Again, saving you time in your busy work schedule by transferring information between different platforms. You'll love it!
Before connecting the two apps, first you need to make sure you’re logged on both and have them open in two different tabs.
1. In order to begin, in Zapier you need to click on the orange + New Zap button on the upper-left corner.

The first step is to create a Trigger.
In the search bar you need to type in ‘Webhooks by Zapier’ and select it as the app of the zap.

Afterwards, you need to select the event you want to perform with this Zap.
Here you need to select ‘Catch Hook’, which means you will be pulling information from somewhere (in this case - Pabau).

The last step is to test the trigger, but before we do that we first need to set up the webhook in Pabau.
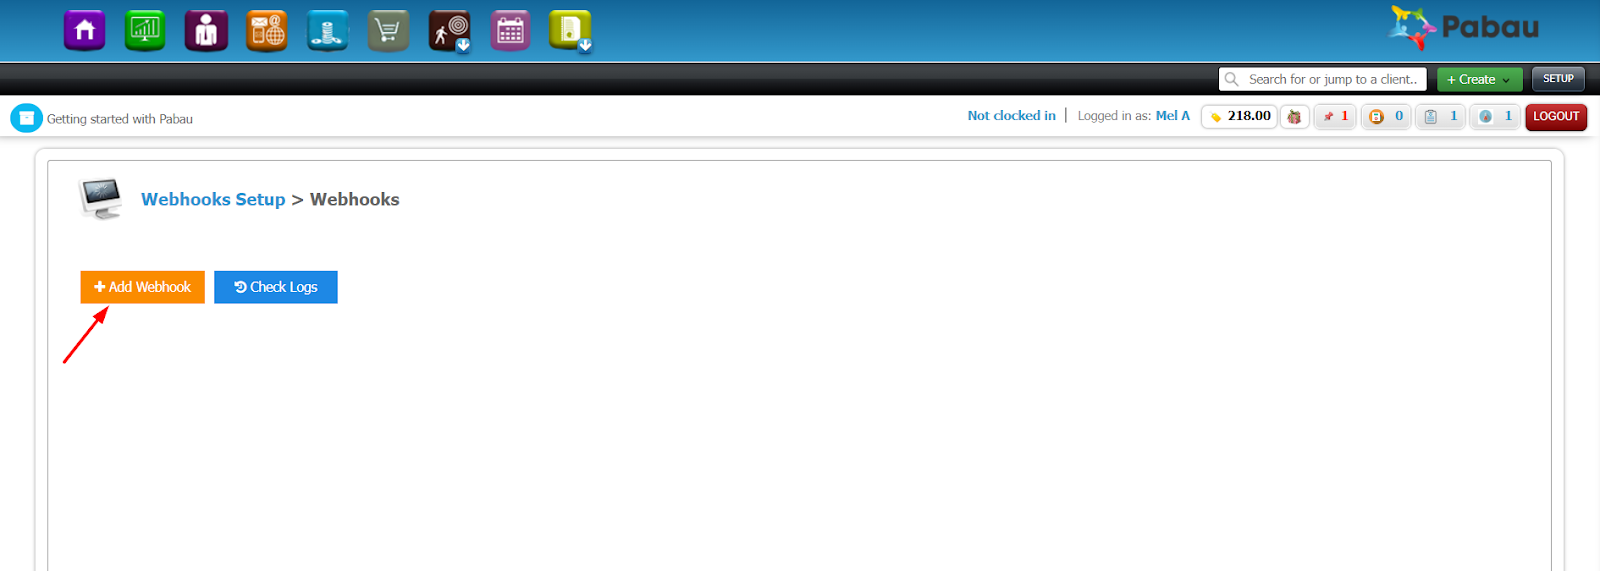
2. In Pabau, you can find the Webhooks by going to Setup > Developers > Webhooks.

Once you reach that point, you need to add a new webhook.
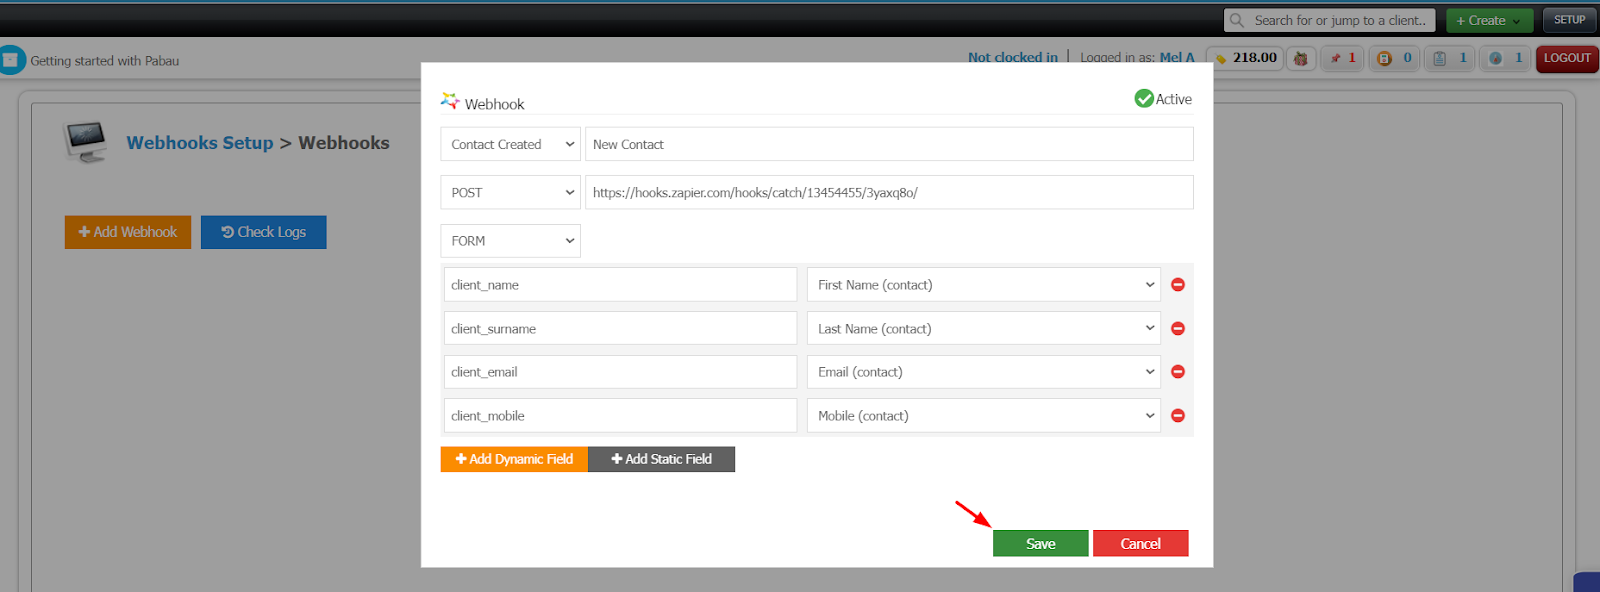
On the new window that opens, first you need to make sure that the webhook is active.
Then, you need to choose your action, or what type of information you want to transfer with this webhook.
In this case, we are going to create a new contact.
Once you select the action, you can give it a name that is easy for you to recognize and remember:


The next tab allows you to choose whether you want to receive information from another application - GET, or send information to another application - POST.
In this case we will select POST.

The field next to the POST tab will require from you to post a URL link to which you would like to send the information from Pabau.
You can get that URL link if you go back to Zapier and copy the link given to you in the third step named ‘Test Trigger’.
Once you copy the link, you need to paste it in the URL field in Pabau.

In the next tab you need to select ‘FORM’ and then proceed to add a ‘Dynamic Field’.
With the dynamic fields you choose which information gets transferred from Pabau through webhooks to the other application.

As we are creating a webhook for the creation of new clients, the ‘Value’, where we select the information that’s going to be transferred is going to be linked with the basic details of your clients.

Here you can proceed to add more dynamic fields and link them with the values of information you want to transfer over to Zapier.

On the left-hand side you need to add a key, or a name, for the fields.
When typing the keys, make sure to not use space to separate the words, but instead use an underscore ‘_’.
You can use the following examples:
Once you are done adding all of the values you need, you can save the webhook in Pabau.

3. Now that we have set up the webhook and the trigger, it’s time to test them to see if the information will pull through.
Make sure that you are testing the action that you have selected when creating the webhook.
Therefore, in this case we will be testing the creation of a new client and adding the values we have added in the picture above.

Once you have filled in all of the fields you need you can save the new client.
Then we can go back to Zapier to test the trigger and see whether the information will pull through correctly.

If you have received this response, it means that the webhook was successfully created and the information has pulled through to Zapier.


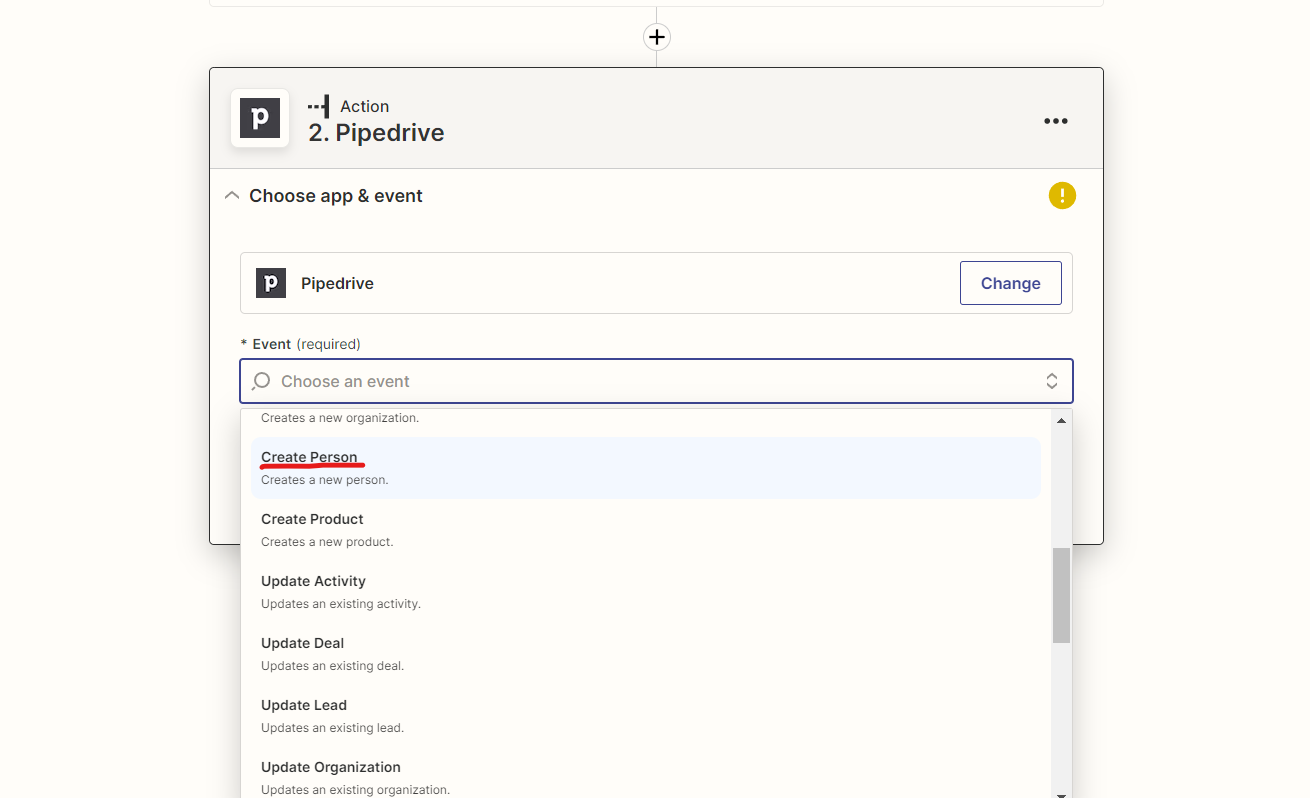
In the second step, you need to type in the name of the application to which you wish to send the information from Pabau.

Once you have selected the app, you need to choose the event that should happen once the trigger pulls information from Pabau.
Make sure that the event matches the webhook you have created. In this case, we are going to select ‘Create Person’.
Once you have done that, you need to click on Continue and sign in to your account on the application which you wish to connect with Pabau.


Once you have logged on to your application, you can publish your zap and start transferring information from Pabau!