
Follow these steps on how to enable Social Survey Feedbacks and to that you customise your website widget.
-
The first thing to do is to create a template that your clients will receive upon their appointments.
Please go in Setup - Data - Template Archive - +New Template and choose the proper type of communication (Email/SMS.)
Please note* When creating the template, please insert [SOCIALSURVEY] merge tag in the body of the SMS/email for the feeback form to be successfully sent to the client.
(An example on how to create an email feedback form)

Once you've entered the merge tag (pointed out in yellow), the next thing to do is to hyperlink this merge tag by selecting the whole merge tag and clicking on the above button also pointed out in yellow. Add the same merge tag into the "URL" field, as shown on the screenshot below. In the "Text to display" field you can write basically anything you would like your clients to see (some examples are: "Click here to leave us a review" "Click Here" etc.)

(An example of an SMS feedback form)

2. After you've created your prefered type of feedback form and saved it, please navigate to Setup - Data - Client Notifications.

On the left-hand side, please click on "Social Survey" and enable the preferred feedback form.
If you prefer to send a feedback form through email, please enable "Email Social Survey" and into "Select Template to Use" please select the one previously created.
Same goes for the SMS Social Survey. At the end, please click on "Save".
Now let's navigate to the feedback form and adjust the settings to our preferences.
3. Go to 'Marketing' tab.

(If you are unable to see the "Marketing" icon from the main menu that means you haven't got an access yet. Please ask a person who has Admin permissions in your account to grant you this access, or if you are an Admin, please head on to Staff - Staff Manager - select your profile on the left - Manage Permissions - Web Permissions and tick the checkboxes next to Marketing and Social Survey.)
4. Click on 'Social Survey'.

Here you will see a list of all reviews received so far. If you click on them, you will be able to see more details about them.
5. Now click on 'Social Settings', from the right-hand side.
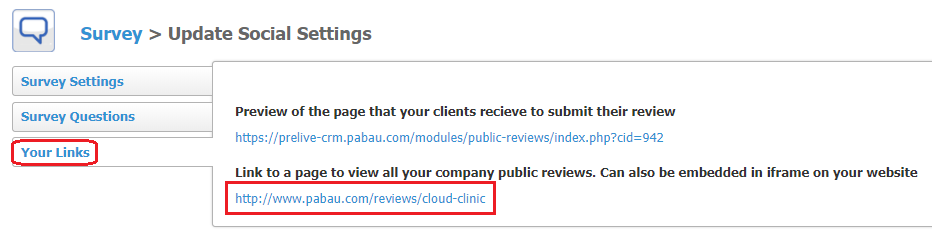
6. In this page, go to 'Your Links' tab. The second link is to a page to view all your company public reviews. This link can also be embedded in iframe on your website.
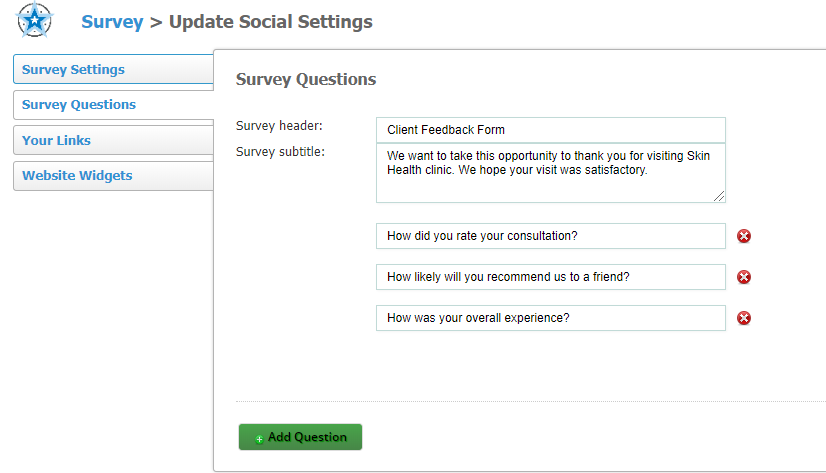
7. Please click on "Survey Questions" button to add the questions you would like your clients to answer.
(An example of our test survey questions)
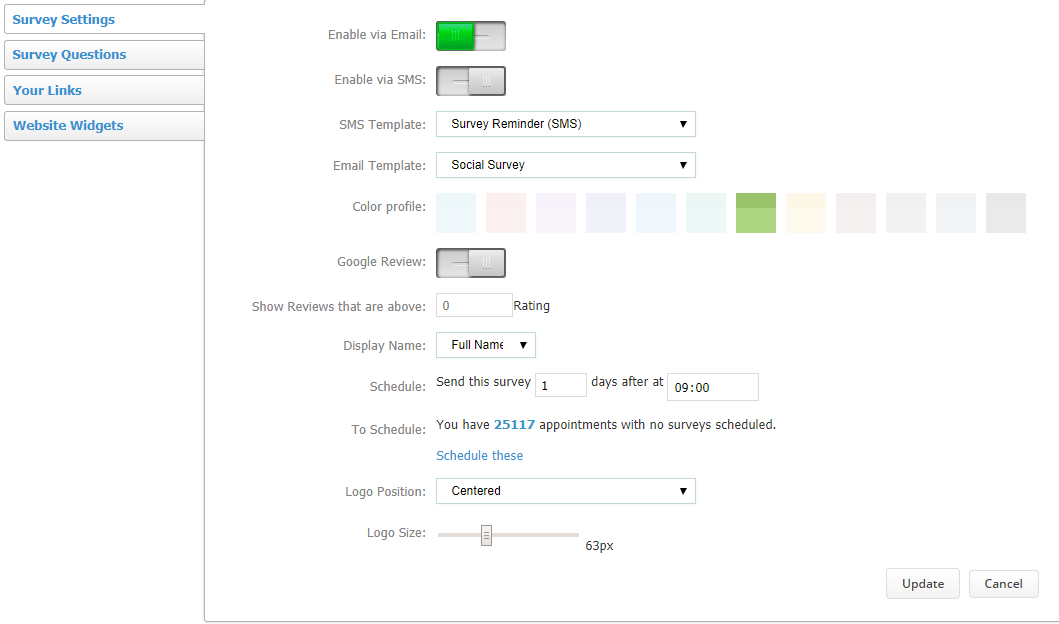
8. After you've done with creating the questions, please click on "Survey Settings" to finish with setting up the social survey. In here, enable the preferred communication type and choose the previously created template.
You can also enable "Google Reviews Redirection" (for ex.: if a client leaves you a 5* review to be automatically redirected to your Google Review page - that way they could leave you a Google Review as well and all in one go!)
Schedule the review (how many days after the appointment and at what time to be sent out as well as adjust the logo size, its position and the color - this can be checked if you click on the "Your Links" button on the left, and click on the first link at the top.)
After you've finished with the setup, you are ready to send out social survey feedback form to your clients!
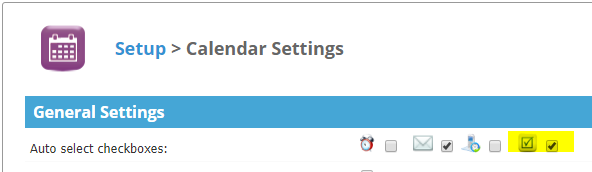
You can have this notification enabled by default from Setup - Settings - Calendar Settings, by ticking the checkbox next to "Social Survey" - Update.
Once you've marked an appointment as "Competed", the social survey will be automatically scheduled and sent X days after the appointment at X time, based on your settings.
Did this answer your question?