
I hope you enjoyed the training session with one of our account managers!
You've now got your login details so you are free to start using your account!
Please use this guide to go back on areas that were covered in the training session.
-
Logging in:
It's really important that you use Google Chrome as your browser when accessing Pabau.
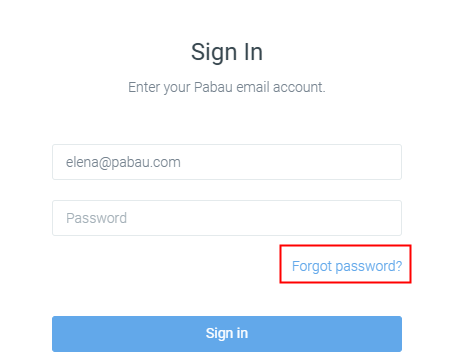
To log into your Pabau account, please enter crm.pabau.com in the URL tab, enter your email address and password, this will then take you to the home page.
If you are unsure of which password to use, or you haven't set up one yet, after entering the email address, please click on "Forgot my Password" for a reset password link to be sent to your email address.
Log into your email address and click on the link to reset your password. Once you have done that, return to the login screen and proceed with entering your new password.
2) The Home Page

The home page is a great area for you to see updates done by employees or customers. You can post messages for other employees to view on the buzzfeed, see when customers have made online bookings through the connect portal, when they have left reviews if you have social survey setup (In the "Marketing" tab) and will inform you when someone has registered a friend referral on a clients profile. In the top right hand corner of the home page there is a green "Create" button. Here you can create new contacts, services, products, sales etc. You can also search for your existing clients in the white search bar.

3) The Practise (Diary/Calendar)

Diary management can be one of the most important features of the system. We will now cover the basics from scheduling shifts, booking appointments, looking at communications sent. Lets go ahead and look at some of the different buttons within the calendar. If this is your first time accessing this page then it may be a white page that says "None of your staff are scheduled to work", this just simply means you need to go into schedule manager and enter shifts:

1) This button is used to search for customers in your database
2) This button is used to open the epos(till) system
3) This button is used to bring up various other options in the calendar (which includes schedule mananger)
4) This button is to get back to the home page or other pages of the system
5) This button is used to lock your screen, to unlock it you will need to enter a 4 digit code (same code as used with the iPad/iPhone)
4) Schedule Manager

To get to the schedule manager go to Tools and select Schedule Manager, Now the "Rota" screen will appear. To pick the desired day/week, use the date bar at the top.

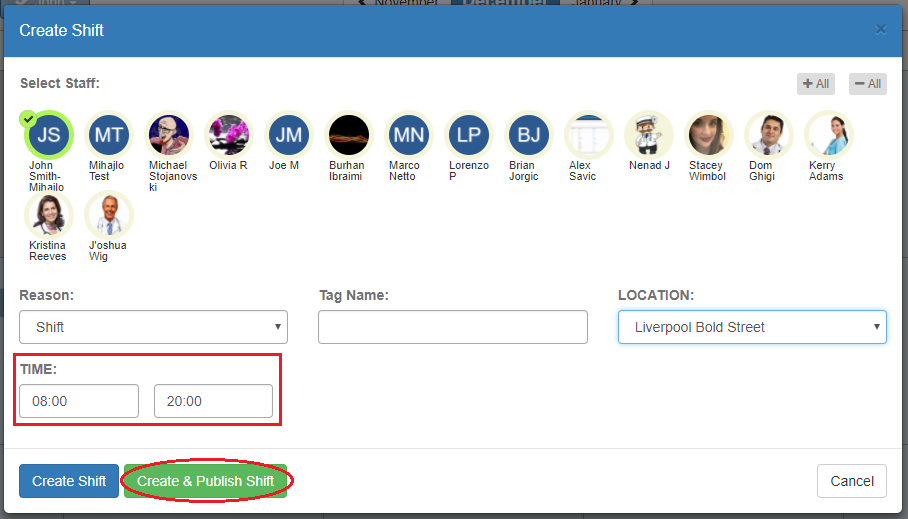
Click on a box where you want to create a shift for that staff member. Select time for the shift and click on 'Create & Publish Shift'.
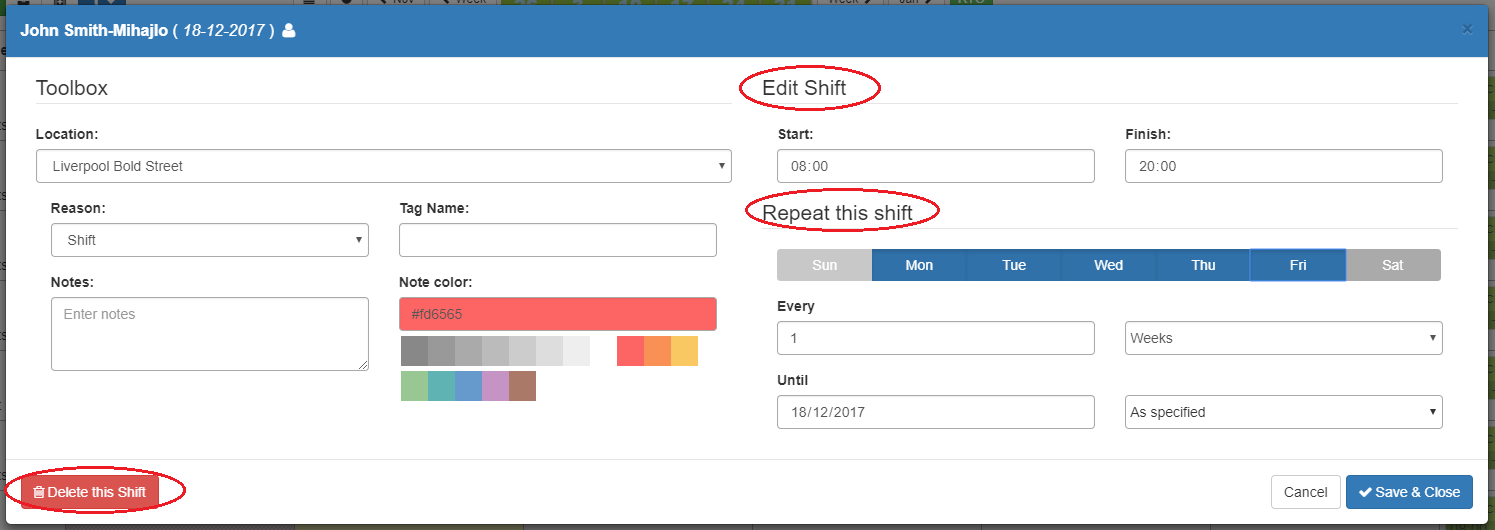
You can edit this entry by left clicking it and the menu will appear again. Here you can edit the shift time, add notes, tags and select a branch.
You can also make this shift repeat. Below you can select for how many weeks/months/years should that week be repeated and if you want to create the shift bi-weekly once every 4 weeks etc.
Please note: If you wish to repeat a shift you can only repeat one day at a time.
If you would like to delete this shift, click Delete this Shift button on the down left corner.
5) Booking Appointments
Now that you have scheduled in a shift(s) you should see the diary open. The dark grey area is when the employee is not working, light great area is the open shift for that day. You will see the times of the diary on the left hand side, click on the block you wish to book the appointment for, a box will hover near your mouse saying "+create new appointment".
Once you've selected the time a side menu will appear on the left asking you to search for a client or add a new one, this is also the place where you can block out time for meetings, lunch, travel etc, to do that go to the bottom where it says bookout slot.

Once you have selected the client or created a new client it will bring you to a page like this. You now need to select the service (treatment) they are coming in for, and if you have multiple rooms or locations you can also select them, if you don't you will not see that options under service, you can also adjust the length of the appointment and write any notes which will appear on the block.
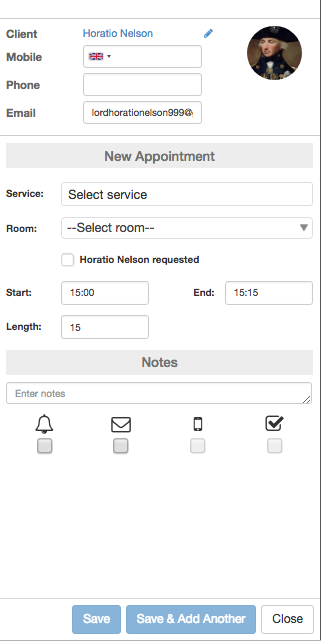
The communication preferences are the last 4 tick boxes down the bottom and they do the following:

= Send email confirmation - they will receive an email instantly confirming the appointment

= Schedule sms/email reminder - this will send them a reminder 1-5 days before the appointment, you decide how many days before

= Send sms confirmation - they will receive an sms instantly confirming the appointment

= Schedule feedback - this will send them the social survey how over many days after their appointment you wish it to go out
6) Ringing through a sale
the training after booking the appointment we practised how to log the sale through the epos system, we have another guide on ringing through a sale, check it out with this link:
https://pabau.zendesk.com/hc/en-us/articles/115004346085-Ringing-through-a-Sale
7) Running reports

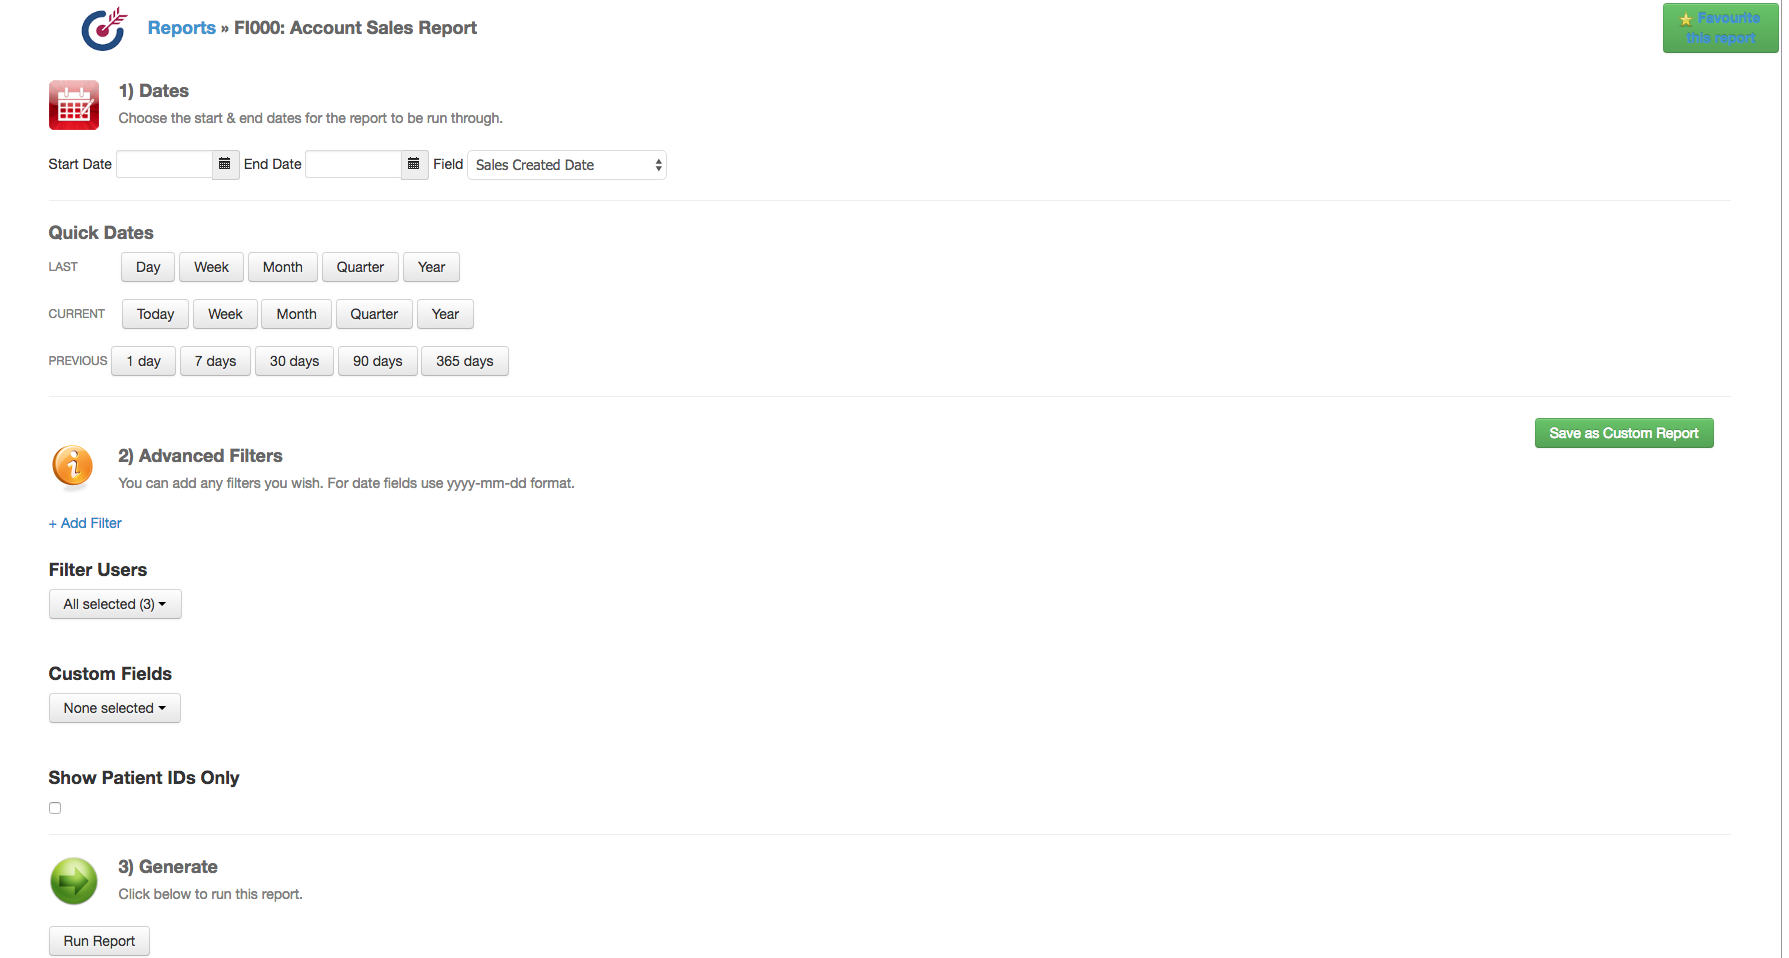
So you managed to navigate back to the home page by clicking on number 4 of the earlier screen shot which is the burger menu (three little bars) we are now going to look at running reports. Choose which kind of report you would like to run (e.g finance, contact etc) remember that there are almost 200 different reports here so it may take a while to find your favourite ones but don't worry you can favourite reports and also save custom reports.
Check the screenshot below, all we need to do is put the dates we are wanting the report to be run through then go to 3) generate and run the report, it will then generate the report below. Just above the generated report there are buttons like excel,pdf,csv if you wish to export the data to any of the files just simply click the button and it will download ! We have a guide on most of our reports all you need to do is search the number in search bar of the guides for example: FI000
8) Settings Area (Setup)

Now we know how to schedule in shifts, book appointments, ring through sales, send out automatic reminders and confirmations, run reports its time to have a look through the settings area. Go to the home page and at the top right hand corner you will see the setup button, we are going to show you the areas of most interest:
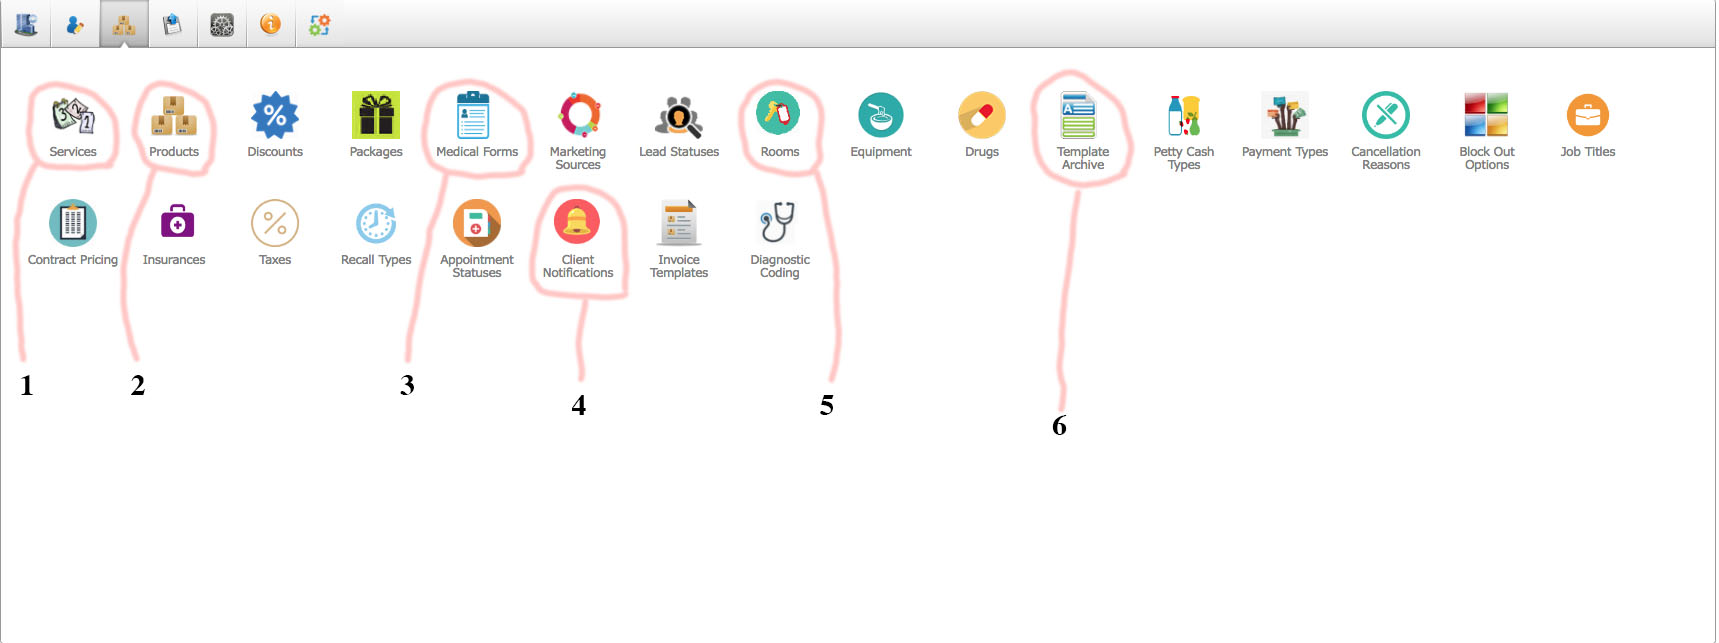
1) Services:
You will now see a list of all services currently active. Click '+Create Service' in the top right corner.
-
Details - Here you can enter a name for the service, link it to a category, enter a service code and service price, duration of the service, tax, is it available for book, sell or both and choose a colour for the service.
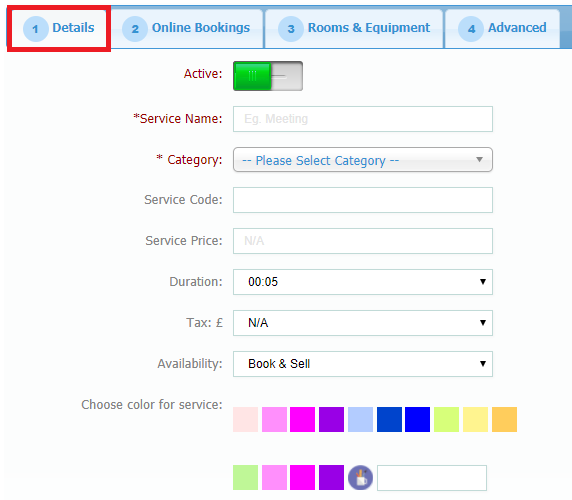
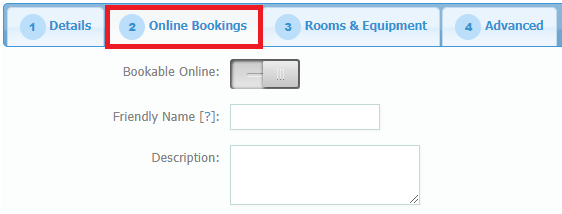
Online bookings - choose is this service Bookable Online.
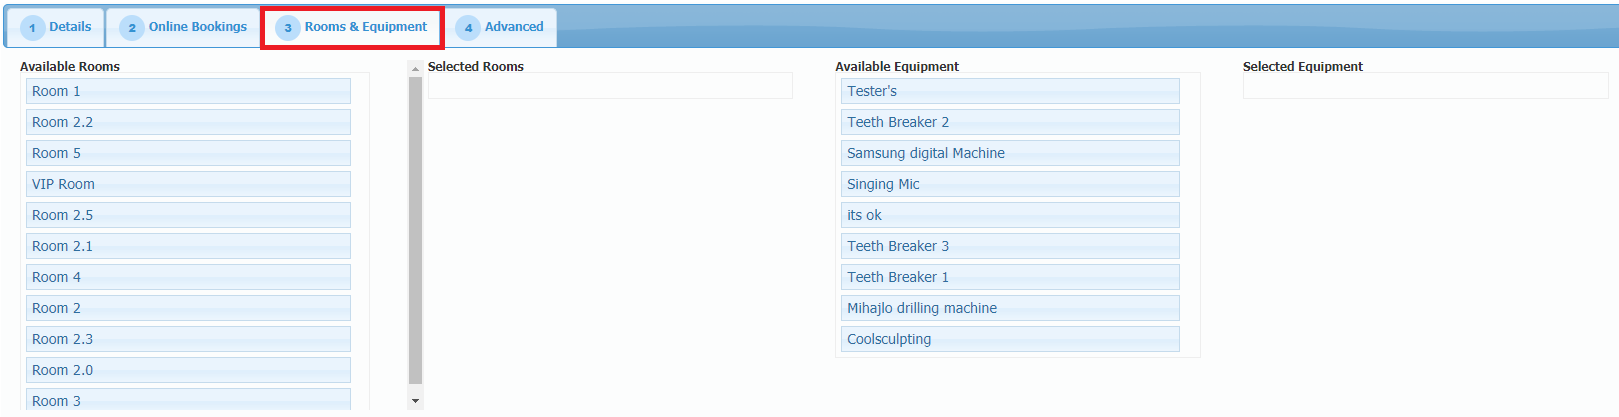
Rooms & Equipment - If you want a services to be performed in a specific room you can drag the room from Available Rooms to Selected Rooms. The same goes for Equipment.
Advanced - Here you can choose the prep finish time, add an item needed for the service, select precare and aftercare templates, enter a deposit price, required minimum clients and maximum models and choose force credit payment.
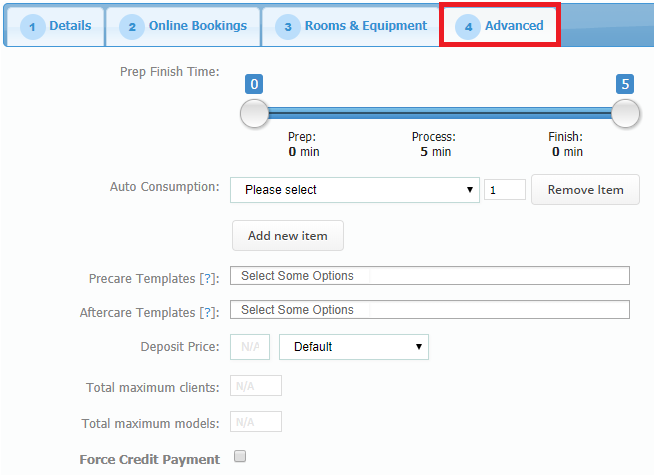
At the bottom you can choose who can perform this service as well.
When done with all of this, just click 'Save'.
*Note: Once you connect the Service with the Service Category you previously created, you can now Edit the Service Category and connect it with a master catagory.
2) Products:
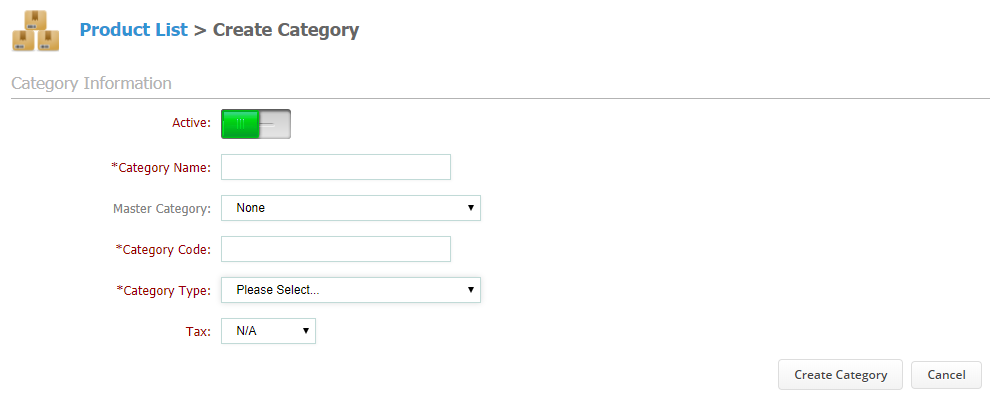
If you don't have a category for the product you are about to create, first you need to create one. To do so click '+ Create Category', from the right-hand side.
Here you can add details for your category, like name, link it to master category (if you have previously created one), code and type. At the end click on 'Create Category'.
Now we can create a product. First, we need to click on the category from the list and in there click on 'Create Product', from the right-hand site.

Here you can enter all the details for the product, like name, barcode, sage nominal code, SKU, choose a category, suppliers name, size.
There also options to add price, notes for the product and stock levels (Current level is what you have counted on a shelf, maximum levels is a number we should not exceed and the minimum is a number we should not be below, or the system will indicate that and advise you to restock on that item. The maximum, minimum and current numbers are of great help when running the Pabau inventory count.)
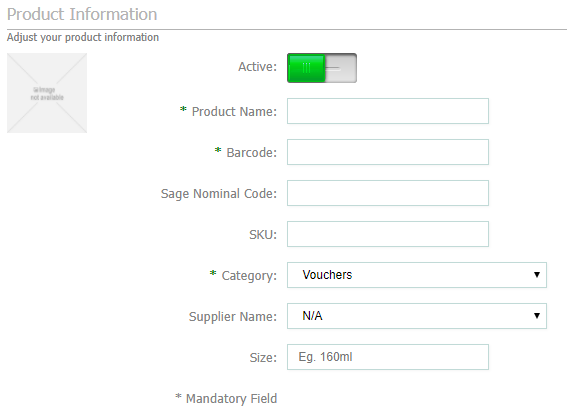
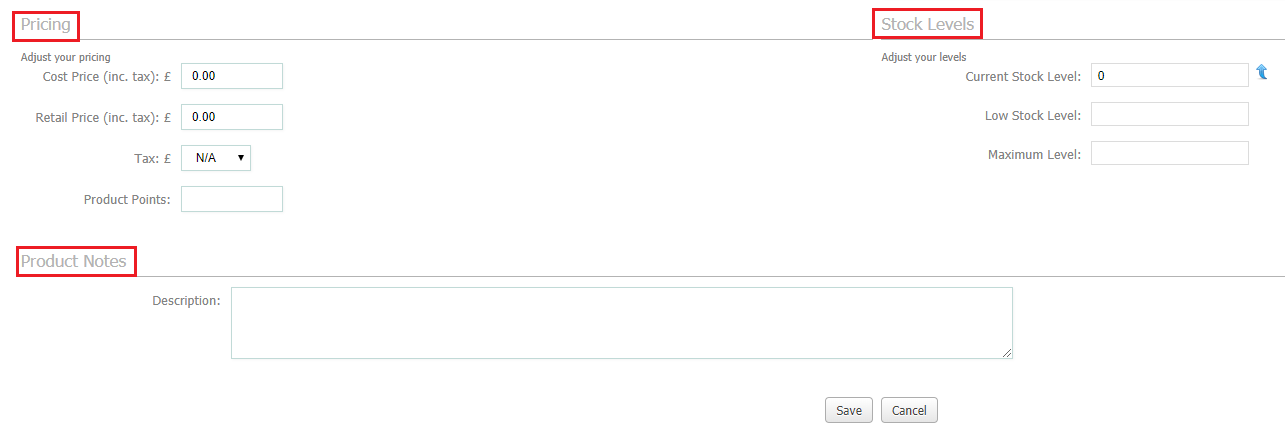
At the end, don't forget to click on 'Save'.
3) Medical forms:
We have another guide on how to build/edit a medical form (consent,questionaire,treatment) check it out with the link below:
https://pabau.zendesk.com/hc/en-us/articles/206379859-Medical-Forms-Treatment-Templates
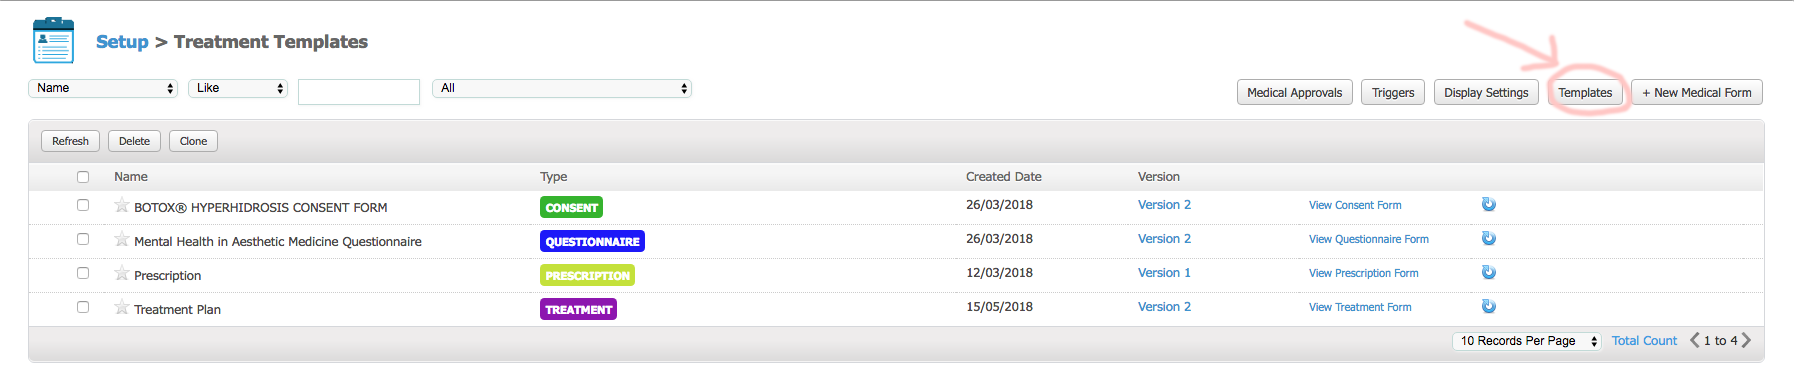
If you wish to access our template store where there are over 180 different templates then click on the button highlighted in the screenshot below.
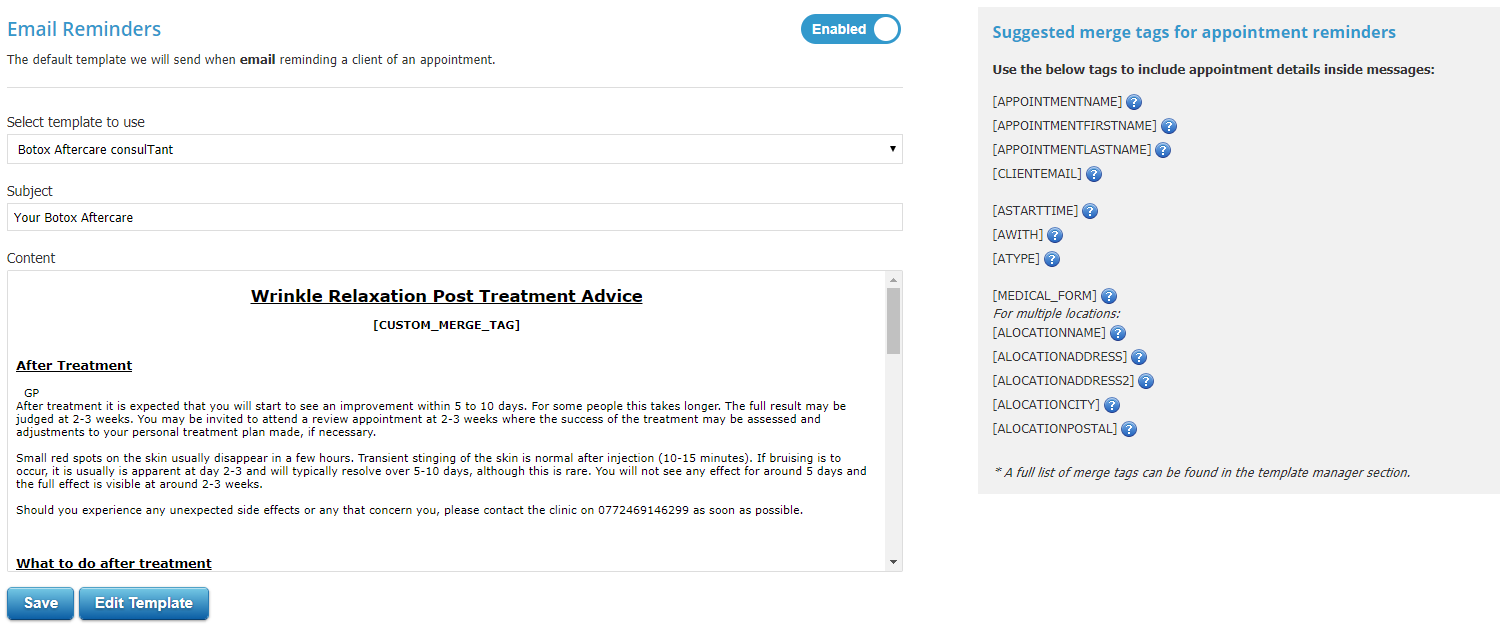
4) Client notifications:
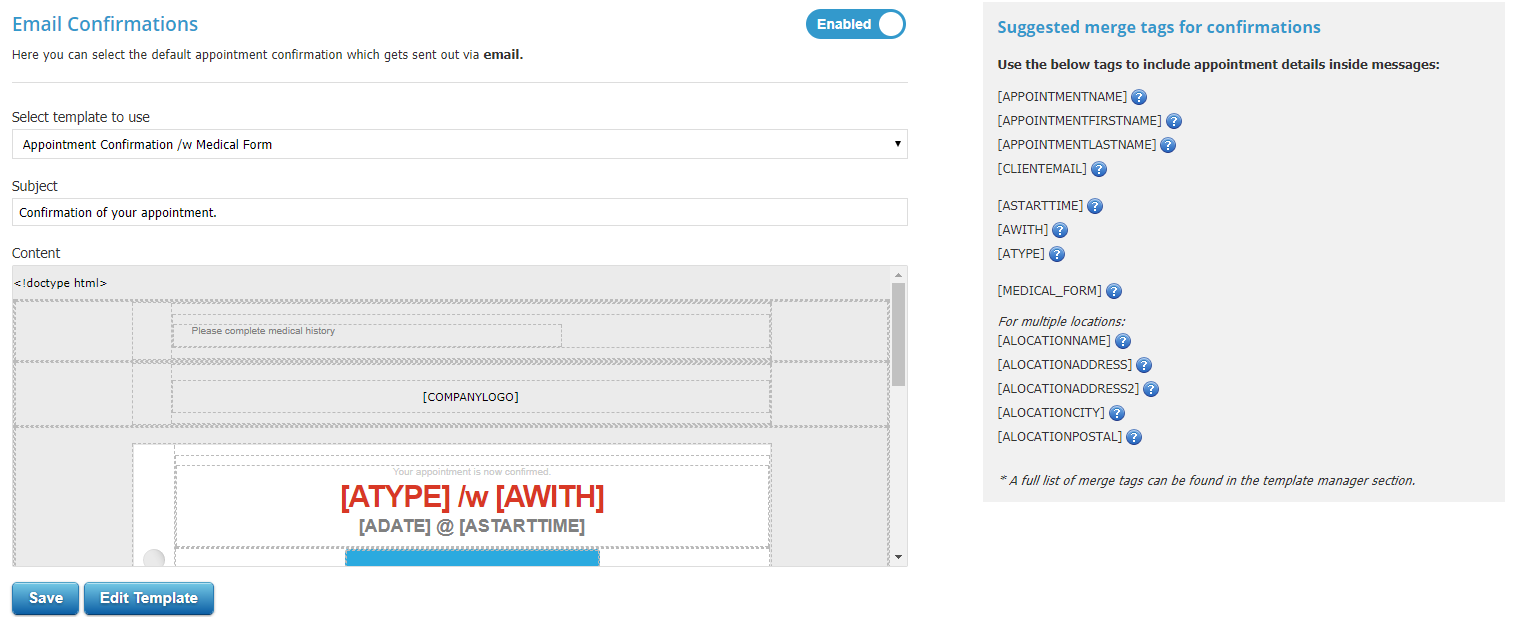
Here you can choose a notification from the left-hand side, and after you have Enabled it, select a Template from the drop-down menu, and create a Subject. Edit the template, by clicking on the Edit Template button.
From the right-hand side menu, use the suggested merge tags for confirmations.
We will give a couple of examples below but feel free to check out our guide on client notifications with the below link:
https://pabau.zendesk.com/hc/en-us/articles/115003972934-Client-Notifications
1. Confirmations
Here you can select the default appointment confirmation which gets sent out via email/sms.
2. Reminders
In this field you can see the default template we will send via email/sms reminding a client of an appointment.
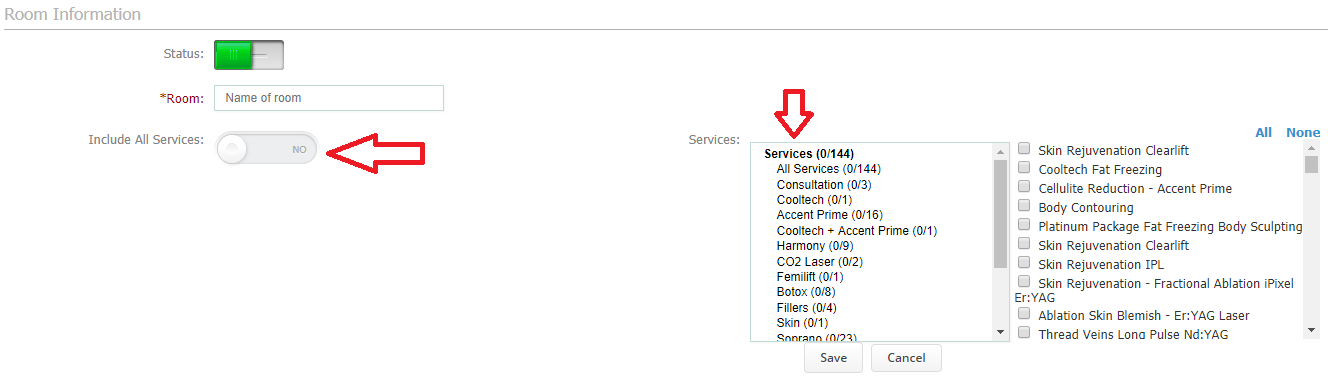
5) Creating Rooms
You can now select 'New Room'.
You can now proceed to enter a name for your room. You can also select which services can performed in a room (great for clinics with call handlers).
9) App Help
Now that we have covered all the basic functions of the desktop its time to look at the app. We are currently on iOS so you can download the app on your iPhone or iPad.
Once you have downloaded our app proceed to enter your email address and password to login. You will now be presented with the following page, the different features of the app are down the bottom and they are:
-
Journey
-
Calendar
-
Sales
-
Contacts
-
Leads
-
More (inc reports and schedule manager)
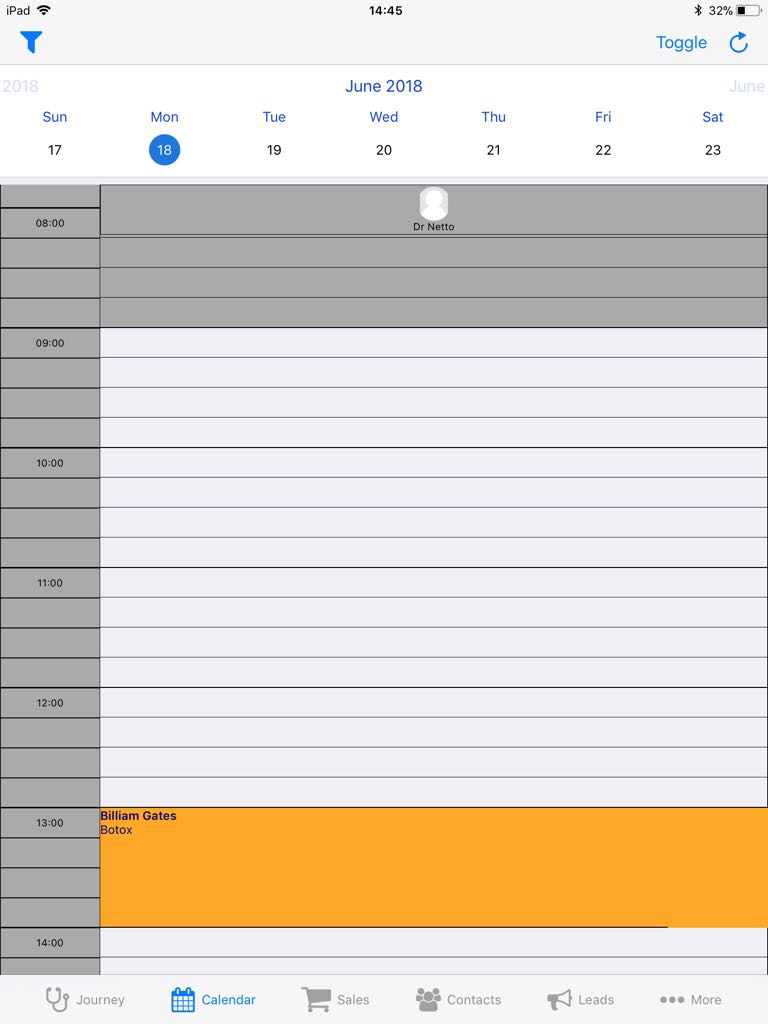
1) Calendar - To book an appointment just simply select the time and choose the clients name and service, down the bottom are your confirmations and reminders like on the desktop.
2) Journey - Will have a list of clients that are in that day, this is a 5 stage journey for you to get any relevant forms signed/photos done, notes written.
3) Sales - Like the epos system on the desktop this is where you can log sales
4) Contacts - To view all contacts in your database, you can also view their profile and choose an individual section (journey goes through all 5 sections)
5) Leads - Have a look at all enquiries you have in your system
6) More - Run all reports and schedule in shifts
10) The end !
Did this answer your question?