
In this guide, we will outline how you can setup medical custom fields and later pull the data in a report.
To setup a medical custom field:
1. Click on 'Setup'.

2. Next, choose 'Data'.

3. Click on 'Custom Fields'.

4. On the top right, select 'Reports Custom Field'.

5. Click on '+ New Medical Custom Field'.

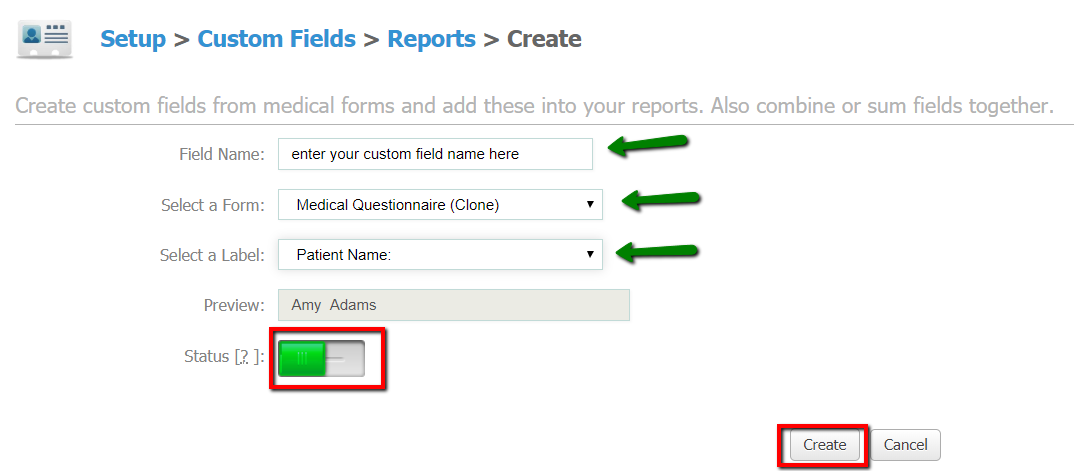
6. Fill out the details in the Create screen.
-
Field Name - input the name of your medical custom field.
-
Select a Form - drop down list of all your clinic's medical forms found under Setup --> Data --> Medical forms. Please select the one you will use to input data.
-
Select a Label - drop down list where you can choose the corresponding question from the selected medical form.
-
Status - toggle to Enable (green if enabled).
When done, confirm the setup by clicking on 'Create'.
Once the medical form has been filled out (in the above example the 'Medical Questionnaire (Clone) form' and a custom field created to pull data from that label/question, go to:
1. 'Reports'.
*NOTE* this can be applied for any report containing an appointment ID meaning the client should have an appointment in the selected date range. An example below.

2. 'Staff Reports'.

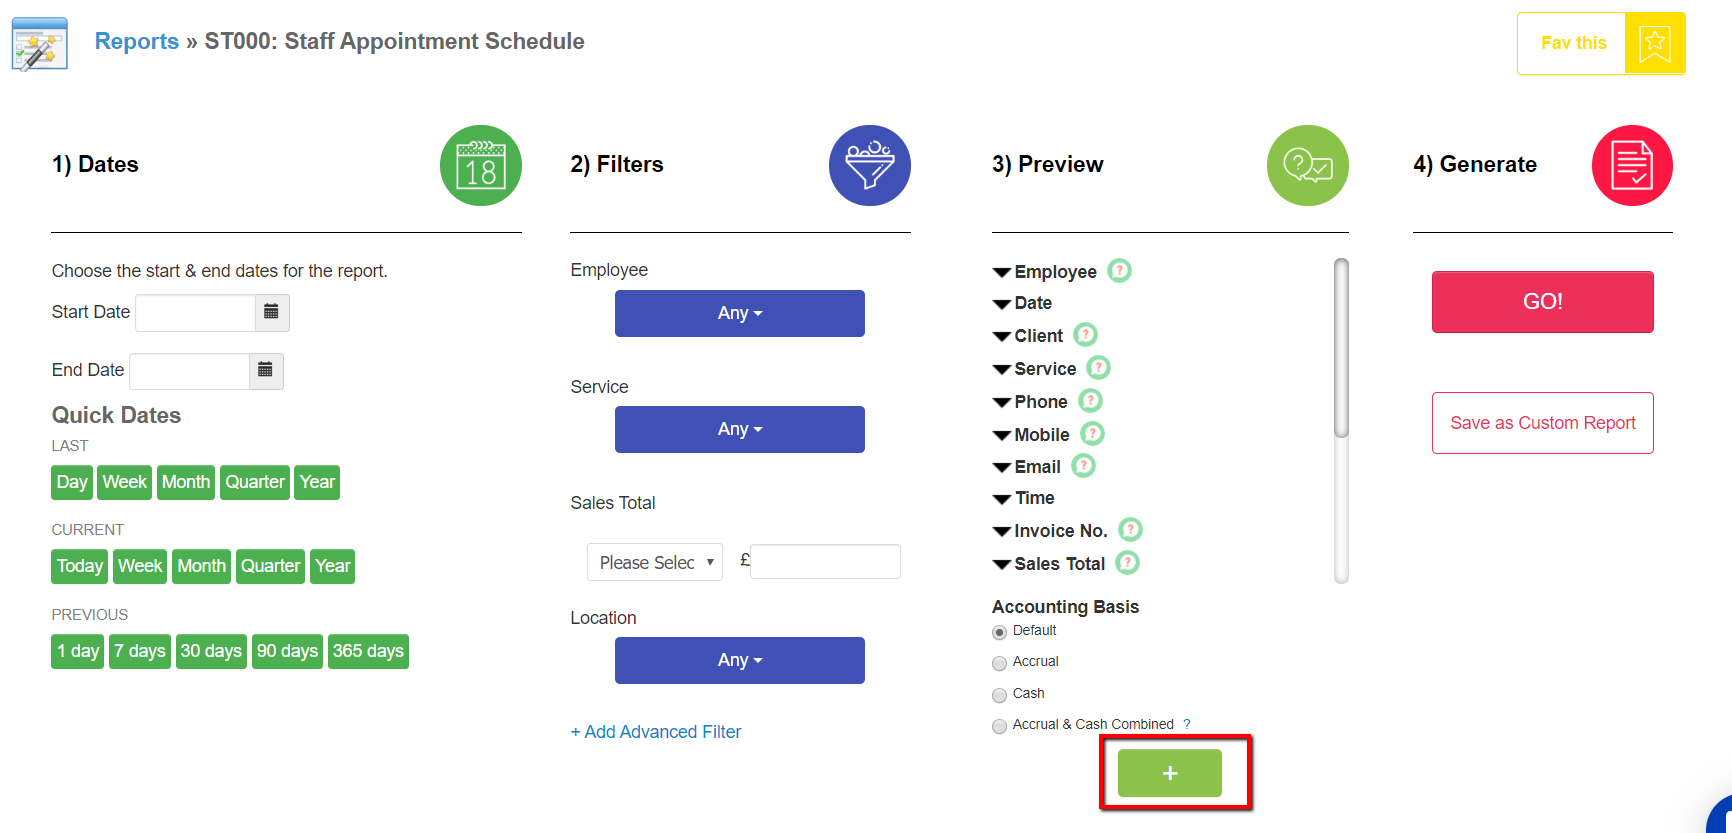
3. Choose the 'Staff Appointment Schedule' report.

-
Click on the '+' button highlighted below.
-
Scroll to the right and you will see all your medical custom fields under 'Medical Data'. Tick the check box in front of the one you wish to add, select the date range and any applicable report filters and click 'GO!'.
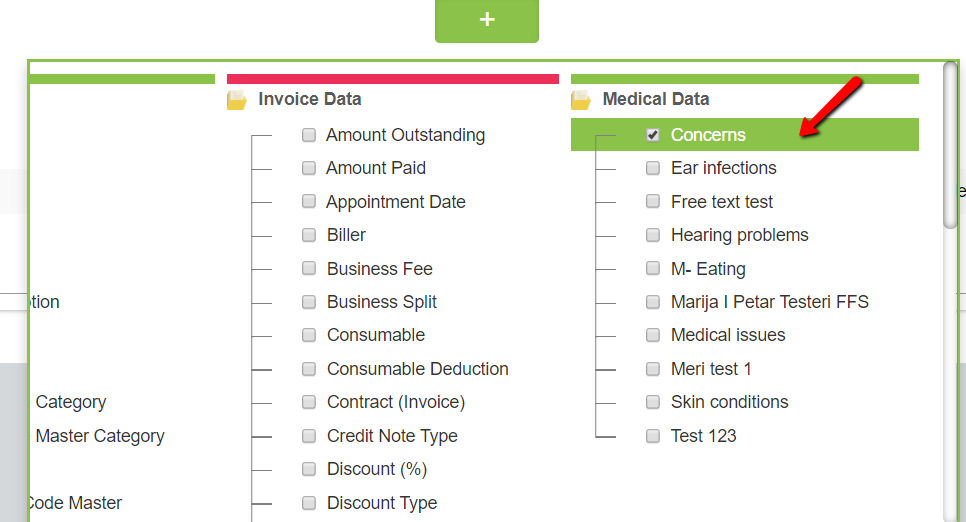
If the medical form has been filled out in the selected date range, the report will bring up the following result with the populated custom field.

Combine your medical custom fields
Another useful feature is the option to combine custom fields. To do that, go to:
1. Click on 'Setup'.

2. Next, choose 'Data'.

3. Click on 'Custom Fields'.
4. On the top right, select 'Reports Custom Field'.

5. Click on '+ Combine Custom Field'.

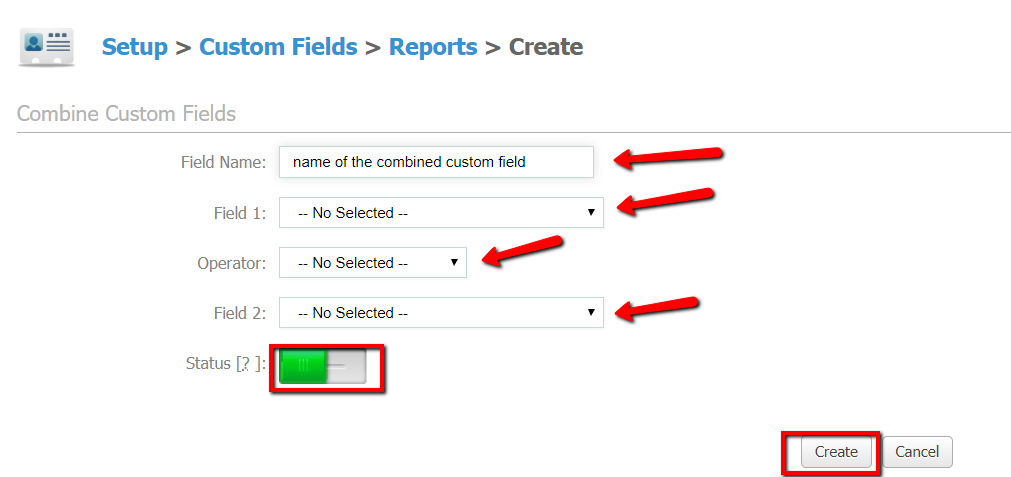
On the next screen, fill out the fields:
-
Field Name - the name of your combined medical custom field.
-
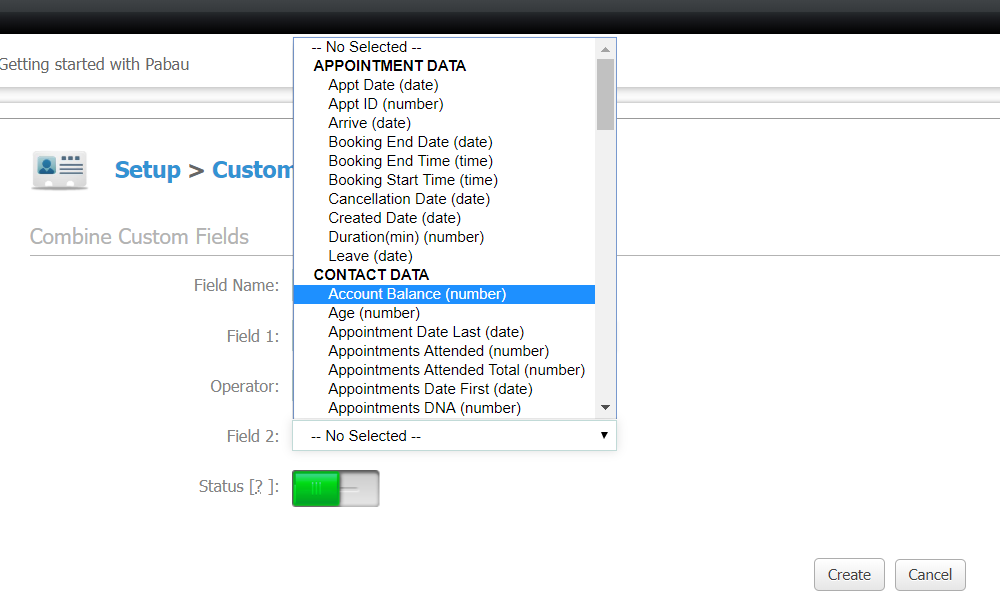
Field 1 - drop down of fields, select the first one you wish to combine.

-
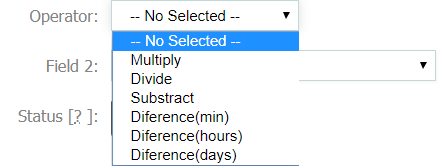
Operator - drop down to set the formula for the custom fields you are combining.
-
Field 2 - the second field you are combining with the selected formula.
-
Status - toggle to Enable (green if enabled).
When done, confirm the setup by clicking on 'Create'.
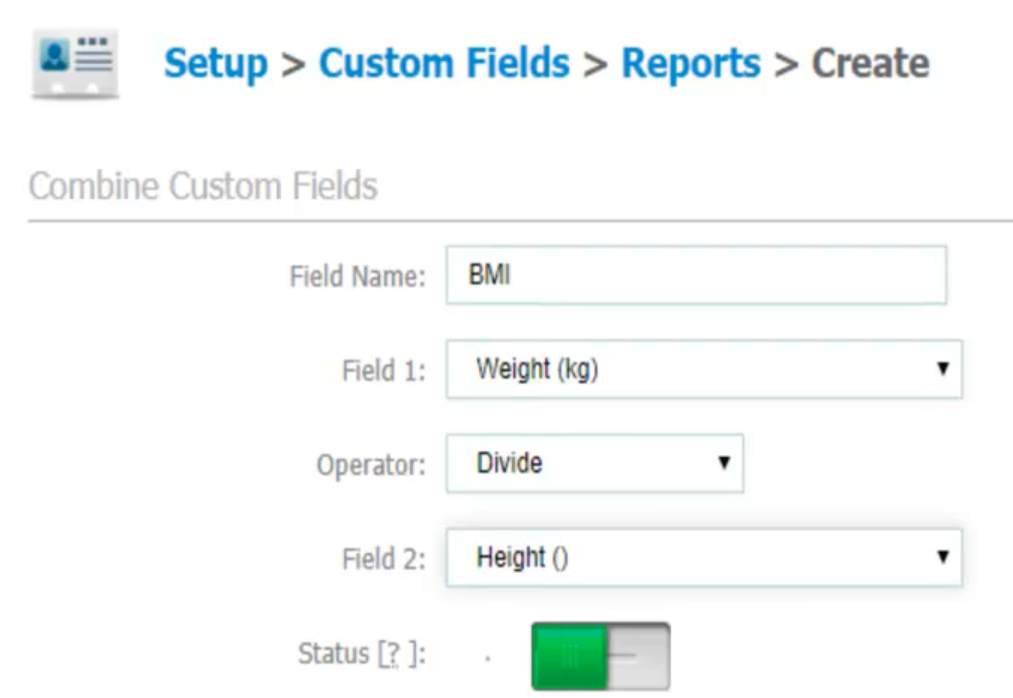
An example of a combined field where we will use the weight and height to get the BMI below.
In the report, look for the Combined data header and tick the 'BMI' box.

Generate the report for the desired date range by clickin on 'GO!' and the BMI will be calculated.

Medical custom fields are a powerful tool for your reporting, follow the above steps to set them up.
Did this answer your question?