In this article, you will find out how to enable/disable and set regular fields and custom fields to be mandatory when creating a lead or a contact.
*This needs to be done by a user that has ADMIN permissions.
-
Head on to setup

-
Next, press on the Settings icon

-
Next press on the icon Field Capture Labels

-
Once in there, choose whether you would like to make changes to the fields for Contacts or Leads

-
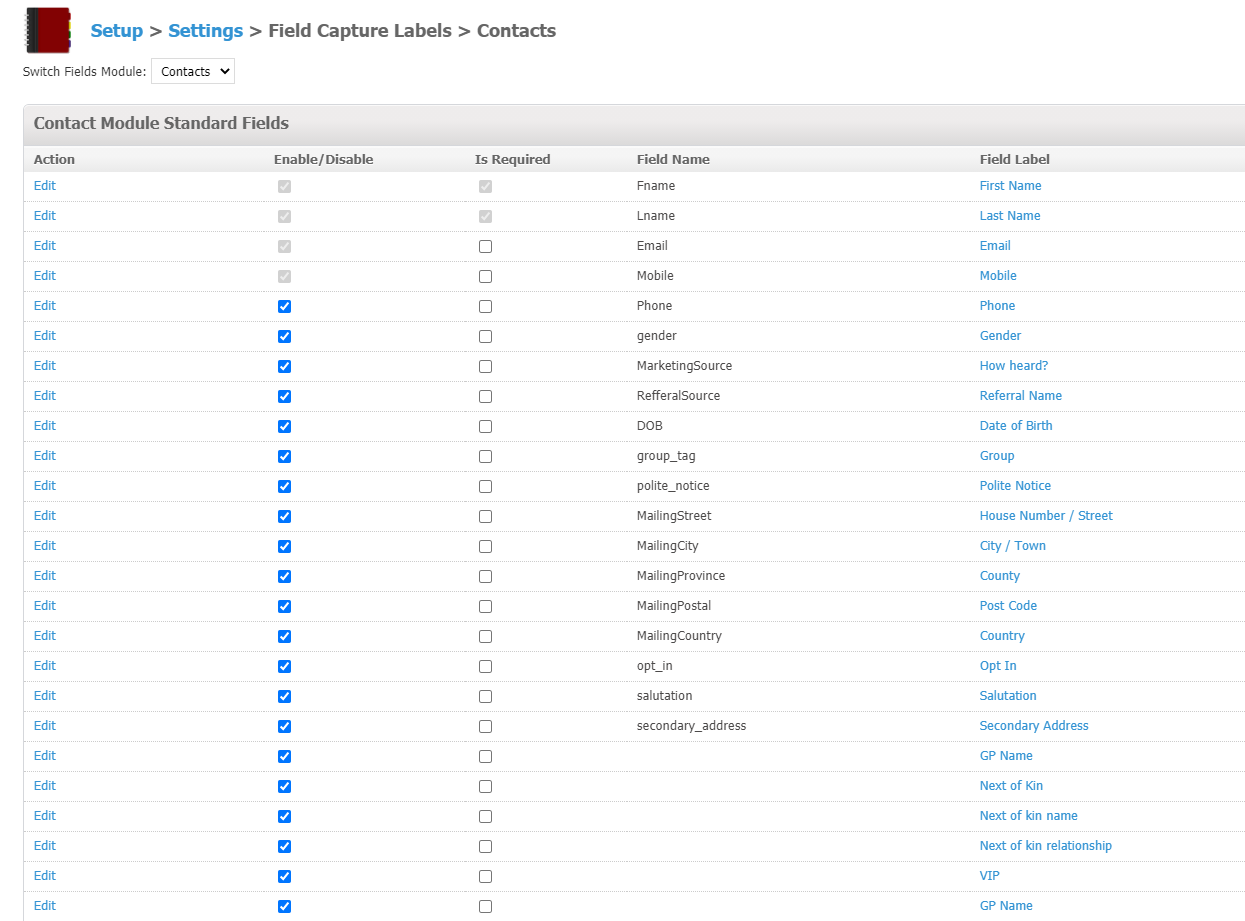
After that is done, below the primary and custom fields for Contacts/Leads will load

-
The Enable/Disable column states whether the field will be enabled or disabled.
What this means is that if the checkbox is selected, that means that that field is enabled and will show when created a client/lead
If it's disabled, it will not appear at all on the point of creating a client/lead -
The Is Required column states whether that particular field will be mandatory (can't be skipped) or not mandatory where in this case you would not need to complete it in order to crate a client/lead.
-
By pressing on the Field label column on any field, you are able to quickly update the heading of that field meaning change the name of that field.
Once you do any change to any part in the Field capture label settings, you DO NOT need to press on SAVE anywhere, the fields are updated automatically as soon as you make the change.
Did this answer your question?