
A User Group is a great feature to group users by location and grant them access only to their clients and their calendar.
How to Create a User Group
To create a user group you need to have Admin rights.
If you are an Admin, please follow the steps below:
-
Click on "Setup" in the top-right corner of the Home Page.

-
Next, click on "Business."

-
Choose "User Groups."

-
To create a new user group, please click on the "+New User Group" button in the top-right corner.
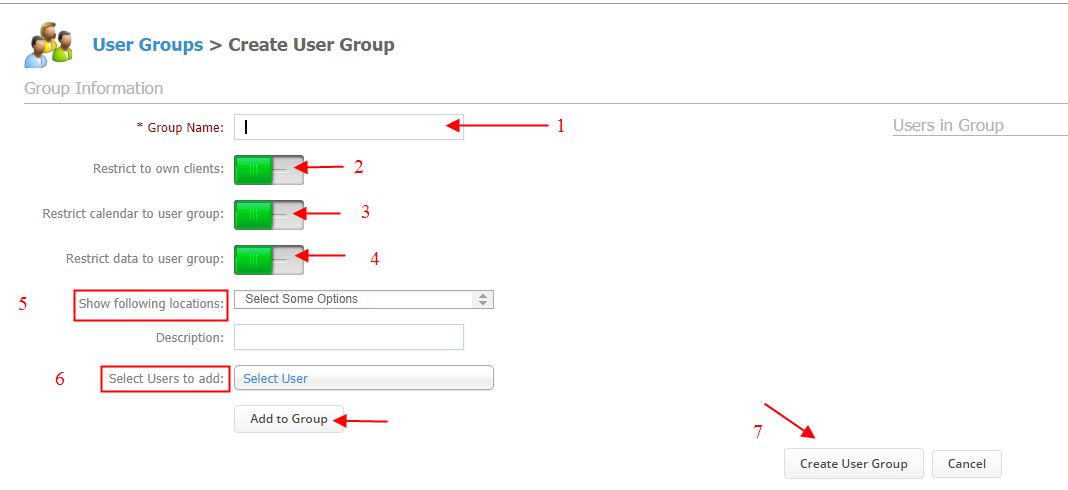
On the next screen, you would be able to:
-
Restrict users to own clients;
-
Restrict calendar to user group;
-
Restrict data to user group;
-
Select which locations you would grant users access to.
-
Name the User Group.
-
If you Toggle the "Restrict to own clients:" button ON, users added into this user group will be able to search for, view and access ONLY the clients they have CREATED/ADDED into the system.
(For example: If a User Group has 2 Users added into it and User 1 created a contact, User 1 and User 2 will be able to search for that contact and access his/her client card.) -
If you Toggle the "Restrict calendar to user group:" button ON, users added into this user group will be able to view shifts and appointments of users part of this user group ONLY.
PLEASE NOTE* You will have to update users' permissions in Staff Manager, in order for this user group's setting to work correctly. Follow the steps below to ensure the user has the correct permissions:
-
Click on "Staff" from the main menu.

-
Choose "Staff Manager."

-
Choose the user on the left and click on "Manage Permissions."
-
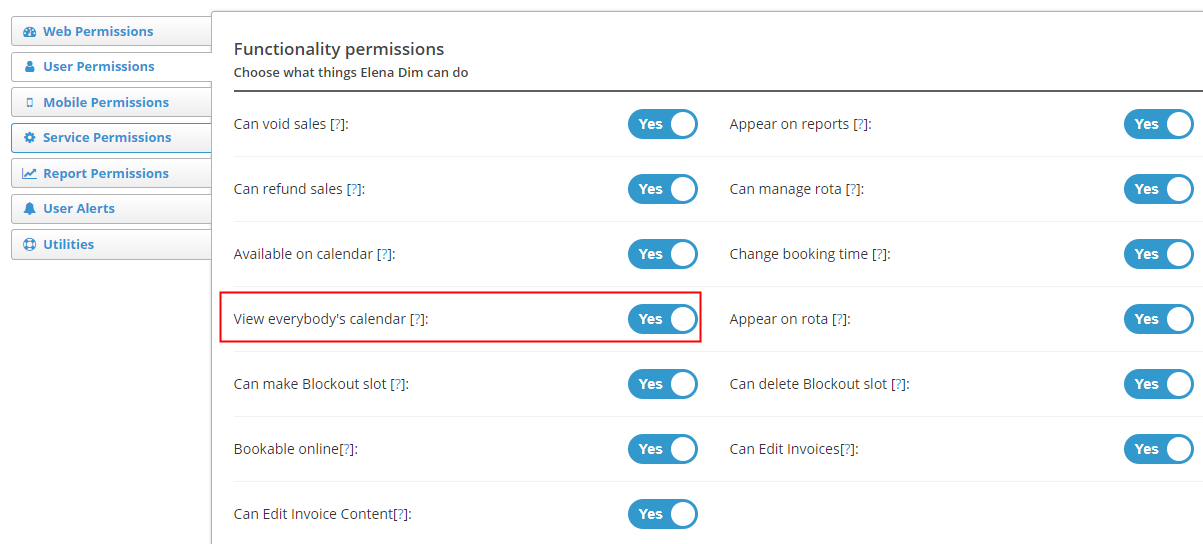
Under "User Permissions", Toggle ON the button for "View everybody's calendar."
4. If you Toggle the "Restrict data to user group:" button ON, users added into this user group will be able to access and open EMR created ONLY from the users who belong to the user group.
EMR are all medical forms (questionnaires, consent forms, treatment notes, as well as prescriptions, photos and other documents, and are stored into each client card.)
5. In this field, you can select which locations would users be allowed to view and have access to. You can select one or more (if you have more than 1 location in the system.)
6. The last step would be to select the users you want to add in a user group. In the "Select User" field, enter the name of the user, select him/her and click on "Add to Group." One user group can consist of 1 user or more than 1 user.
7. Click on "Create User Group."
Did this answer your question?