
You've set up your insurance essentials (Part 1), added your client's policy (Part 2), and connected the visit to their payer (Part 3). This final phase turns that finished visit into a clean electronic claim — validated before it leaves Pabau, submitted through the Claim.MD clearinghouse, and tracked all the way to remittance.
NOTE: Insurance billing is currently available for practices in the United States. Claims are submitted electronically through the Claim.MD clearinghouse.
1. Open the claim from the visit
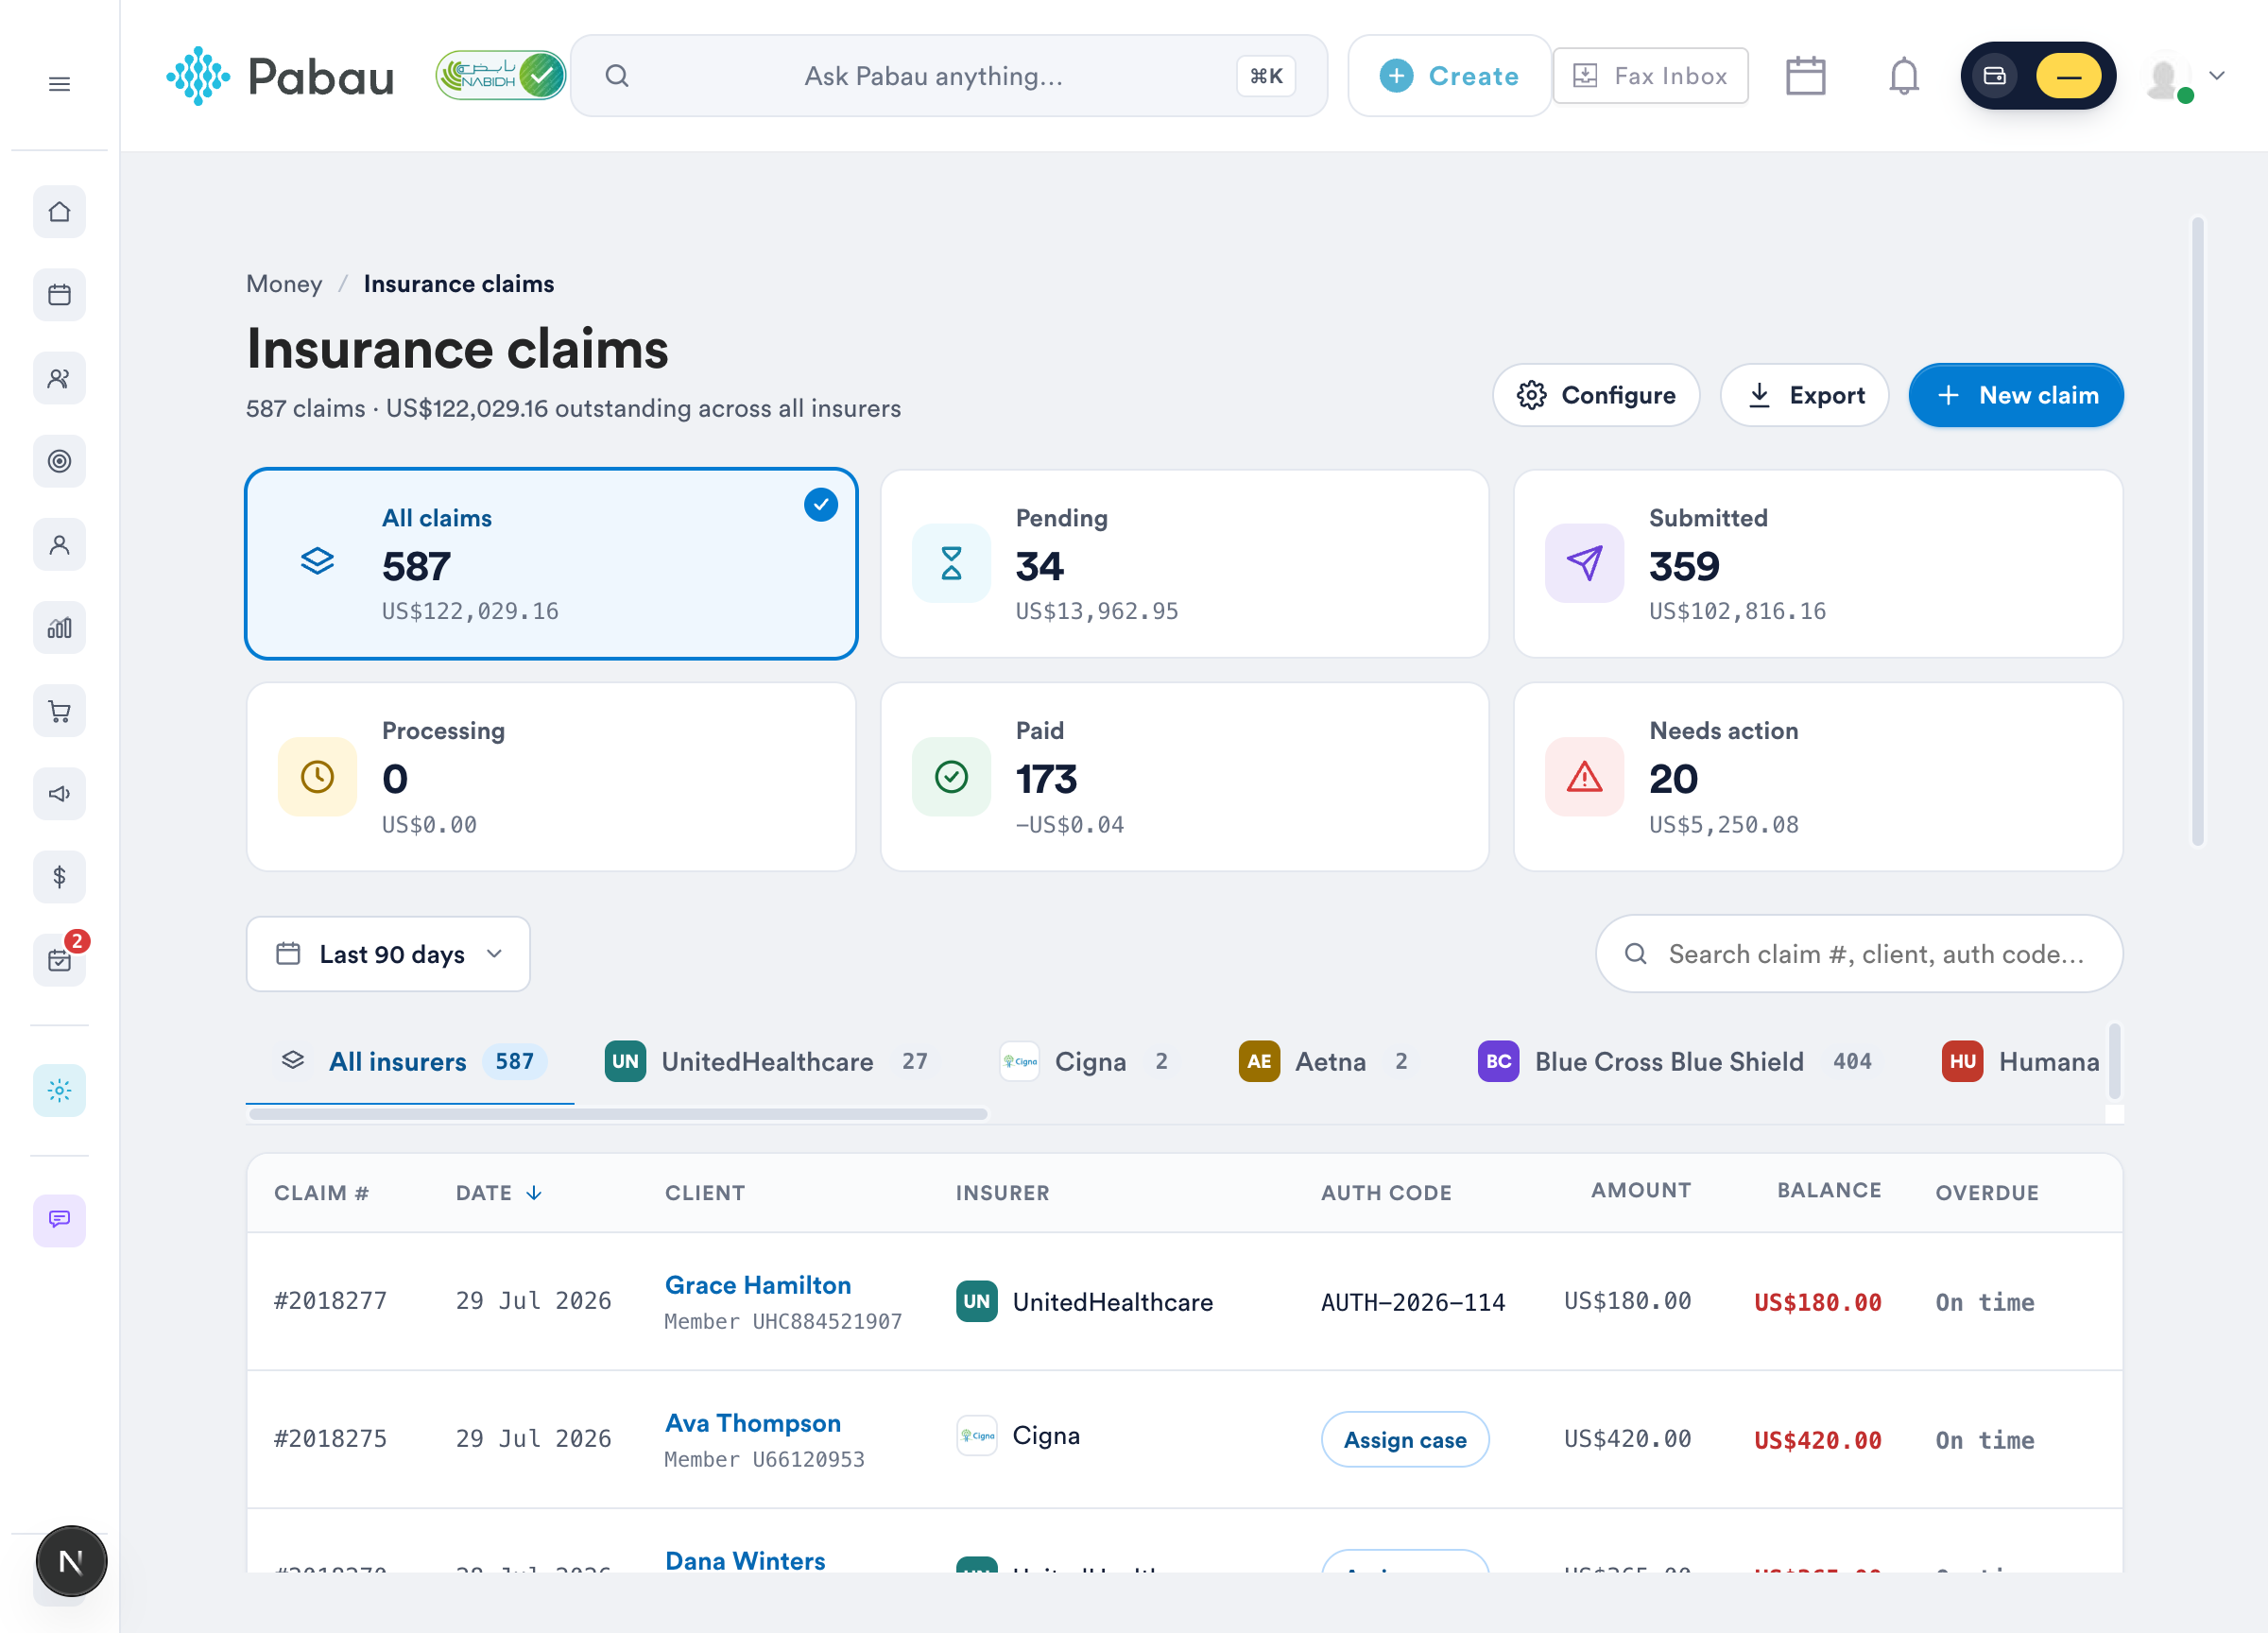
Every invoice issued to an insurer automatically appears on the claims dashboard - there's nothing extra to create:
- Go to Money → Claims (or open the invoice and click the Claim.MD button in its header).
- Find the visit - the row shows the invoice number, client, member ID, payer, the authorization number from the visit's case, and the amounts.
- Click the row to open the claim workspace.
Because the appointment already carried the payer (Part 3), the claim opens against the right insurer with no re-keying:
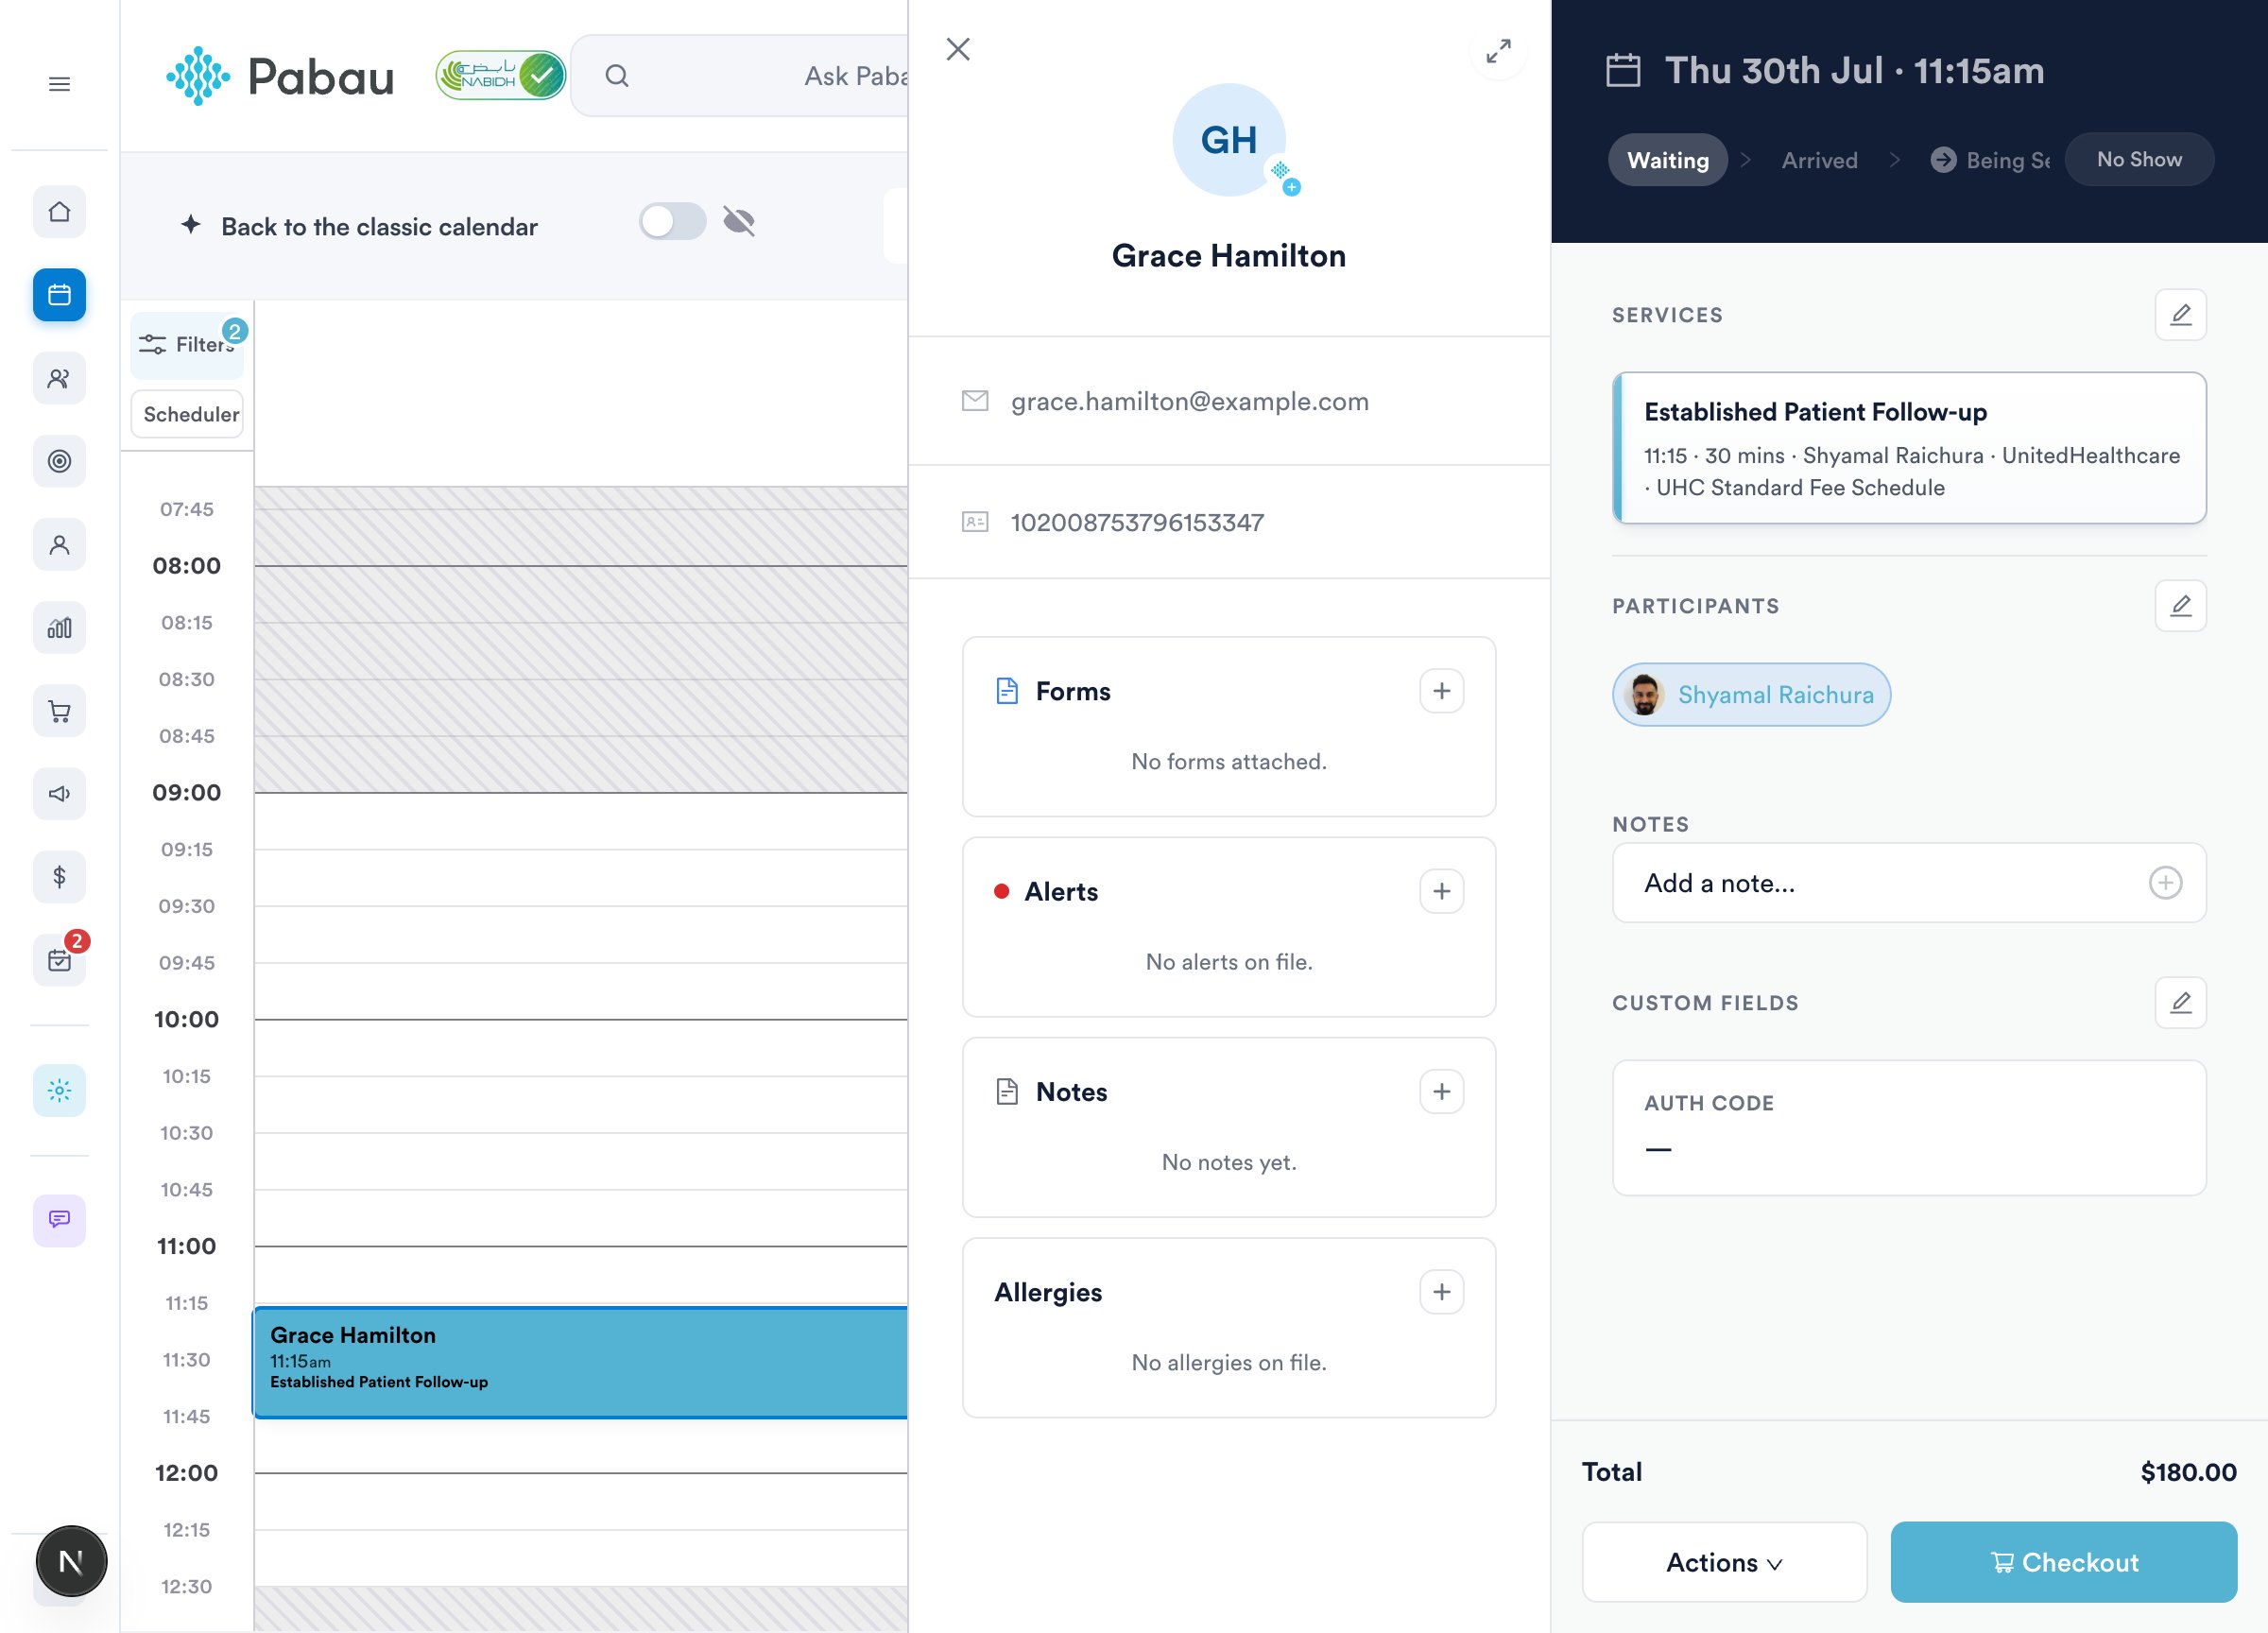
2. Review the pre-filled CMS-1500
The claim workspace is the full CMS-1500 field set, and everything you set up earlier arrives pre-filled:
- Patient & insurance - name, date of birth and address from the client record; the member ID and group number from their policy (boxes 1a–11).
- Diagnoses - the client's active problems seed the ICD-10 slots (box 21). Our demo client's Acne vulgaris problem arrived as L70.0 in slot A.
- Charge lines - one line per invoice item (box 24), with the charge, units and dates of service — and the CPT code you attached to the service in Part 1 already in place (99213 in our example).
- Prior authorization - the authorization number from the case you attached at booking prefills box 23 under Claim details.
- Rendering provider - pick from the NPIs you added in Setup → Claims → Claim.MD → Providers (box 24J).
Anything can still be edited before submission - the search icons on the diagnosis and procedure fields open the full ICD-10-CM and CPT/HCPCS lookups.
3. Validate with Claim.MD
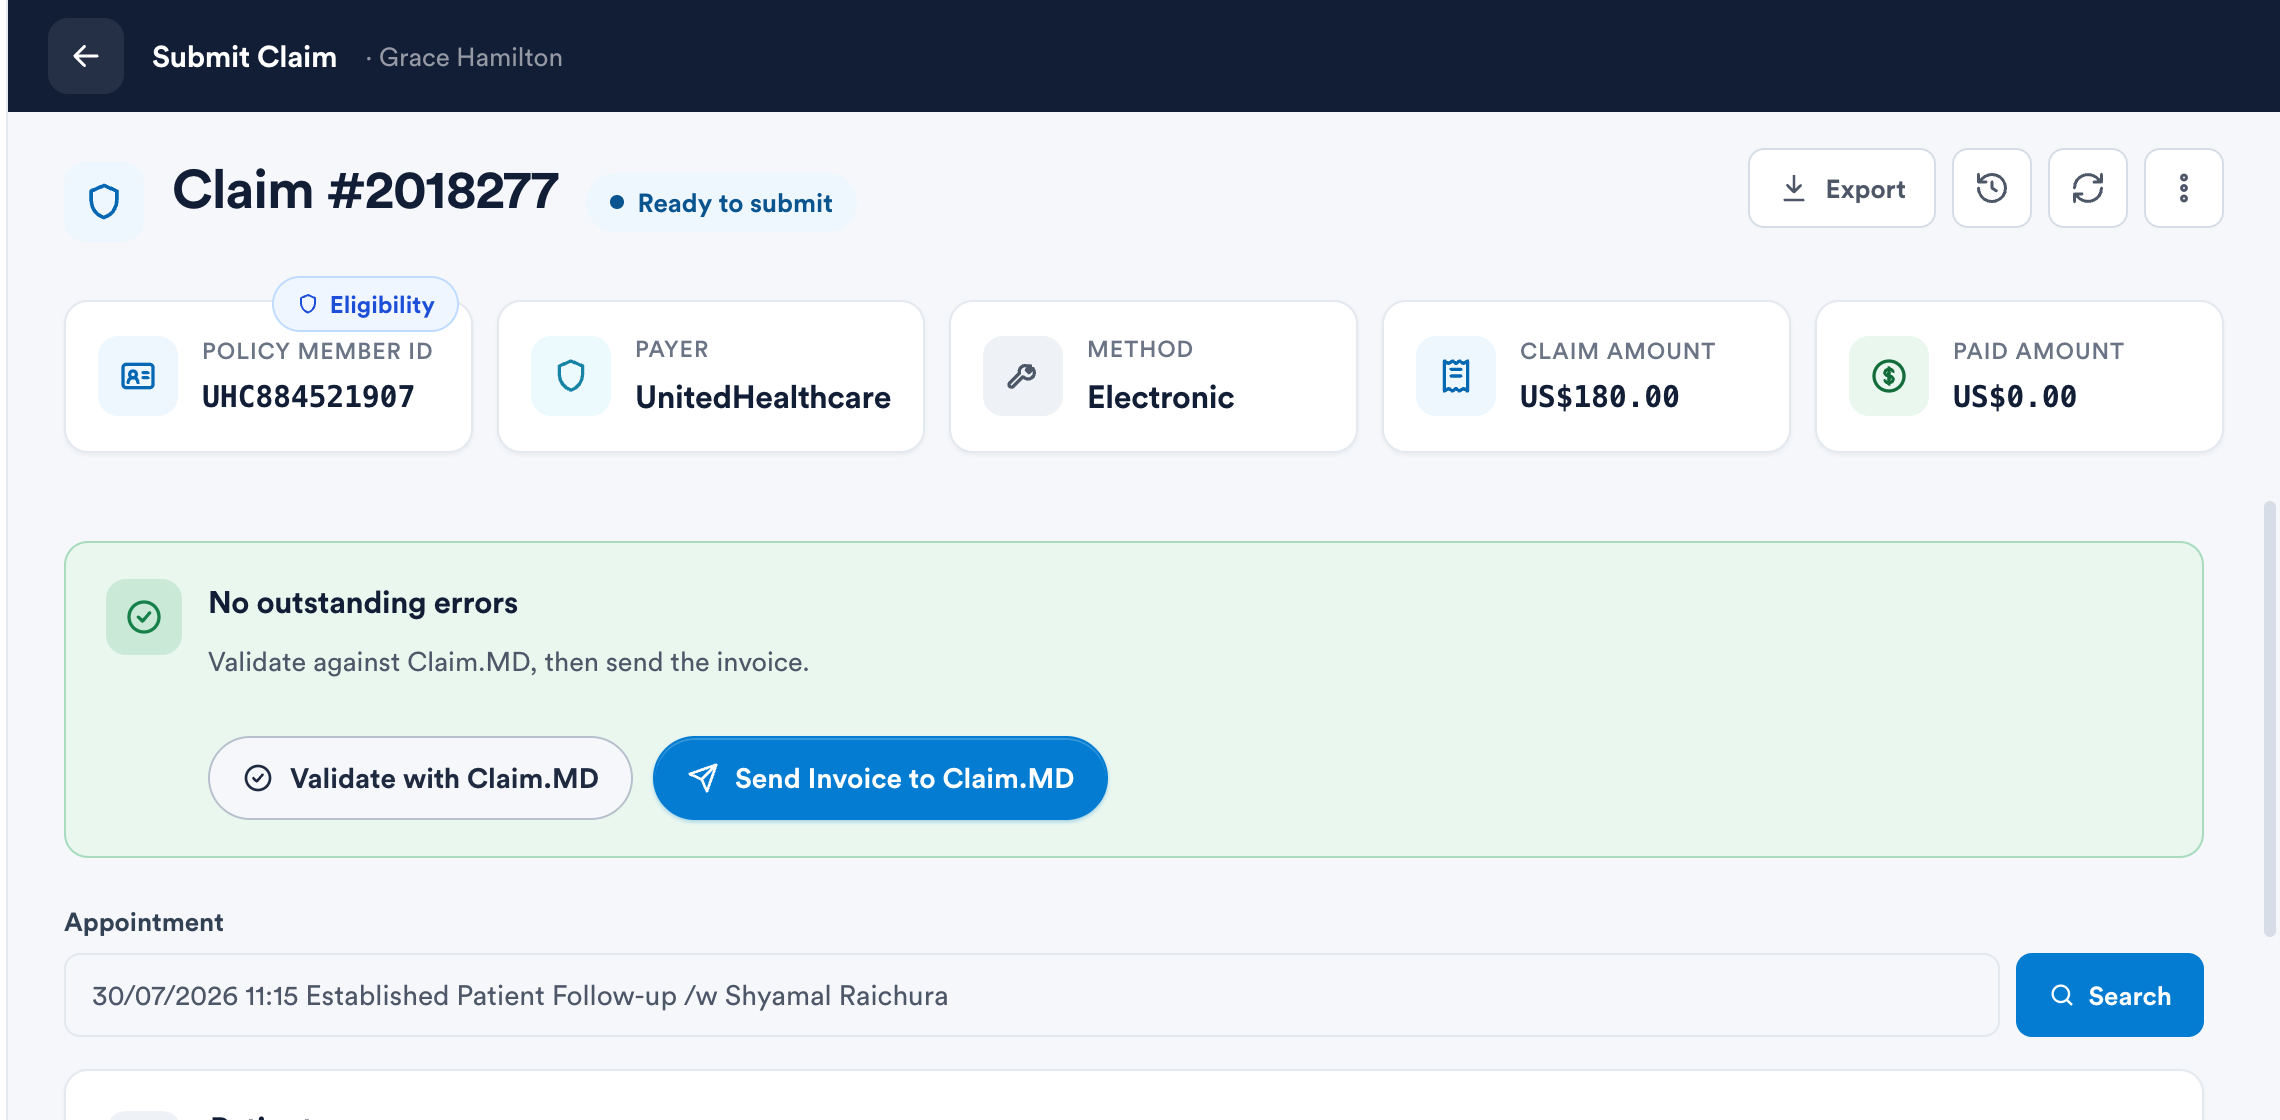
Click Validate (or Validate with Claim.MD in the banner). Pabau first checks the required fields client-side, then builds the exact claim Claim.MD will receive and confirms it passes. When everything is clean you'll see No outstanding errors and the claim flips to Ready to submit:
4. Submit the claim electronically
Click Send Invoice to Claim.MD. The claim uploads to the clearinghouse, receives a Claim.MD reference, and is forwarded to the payer:
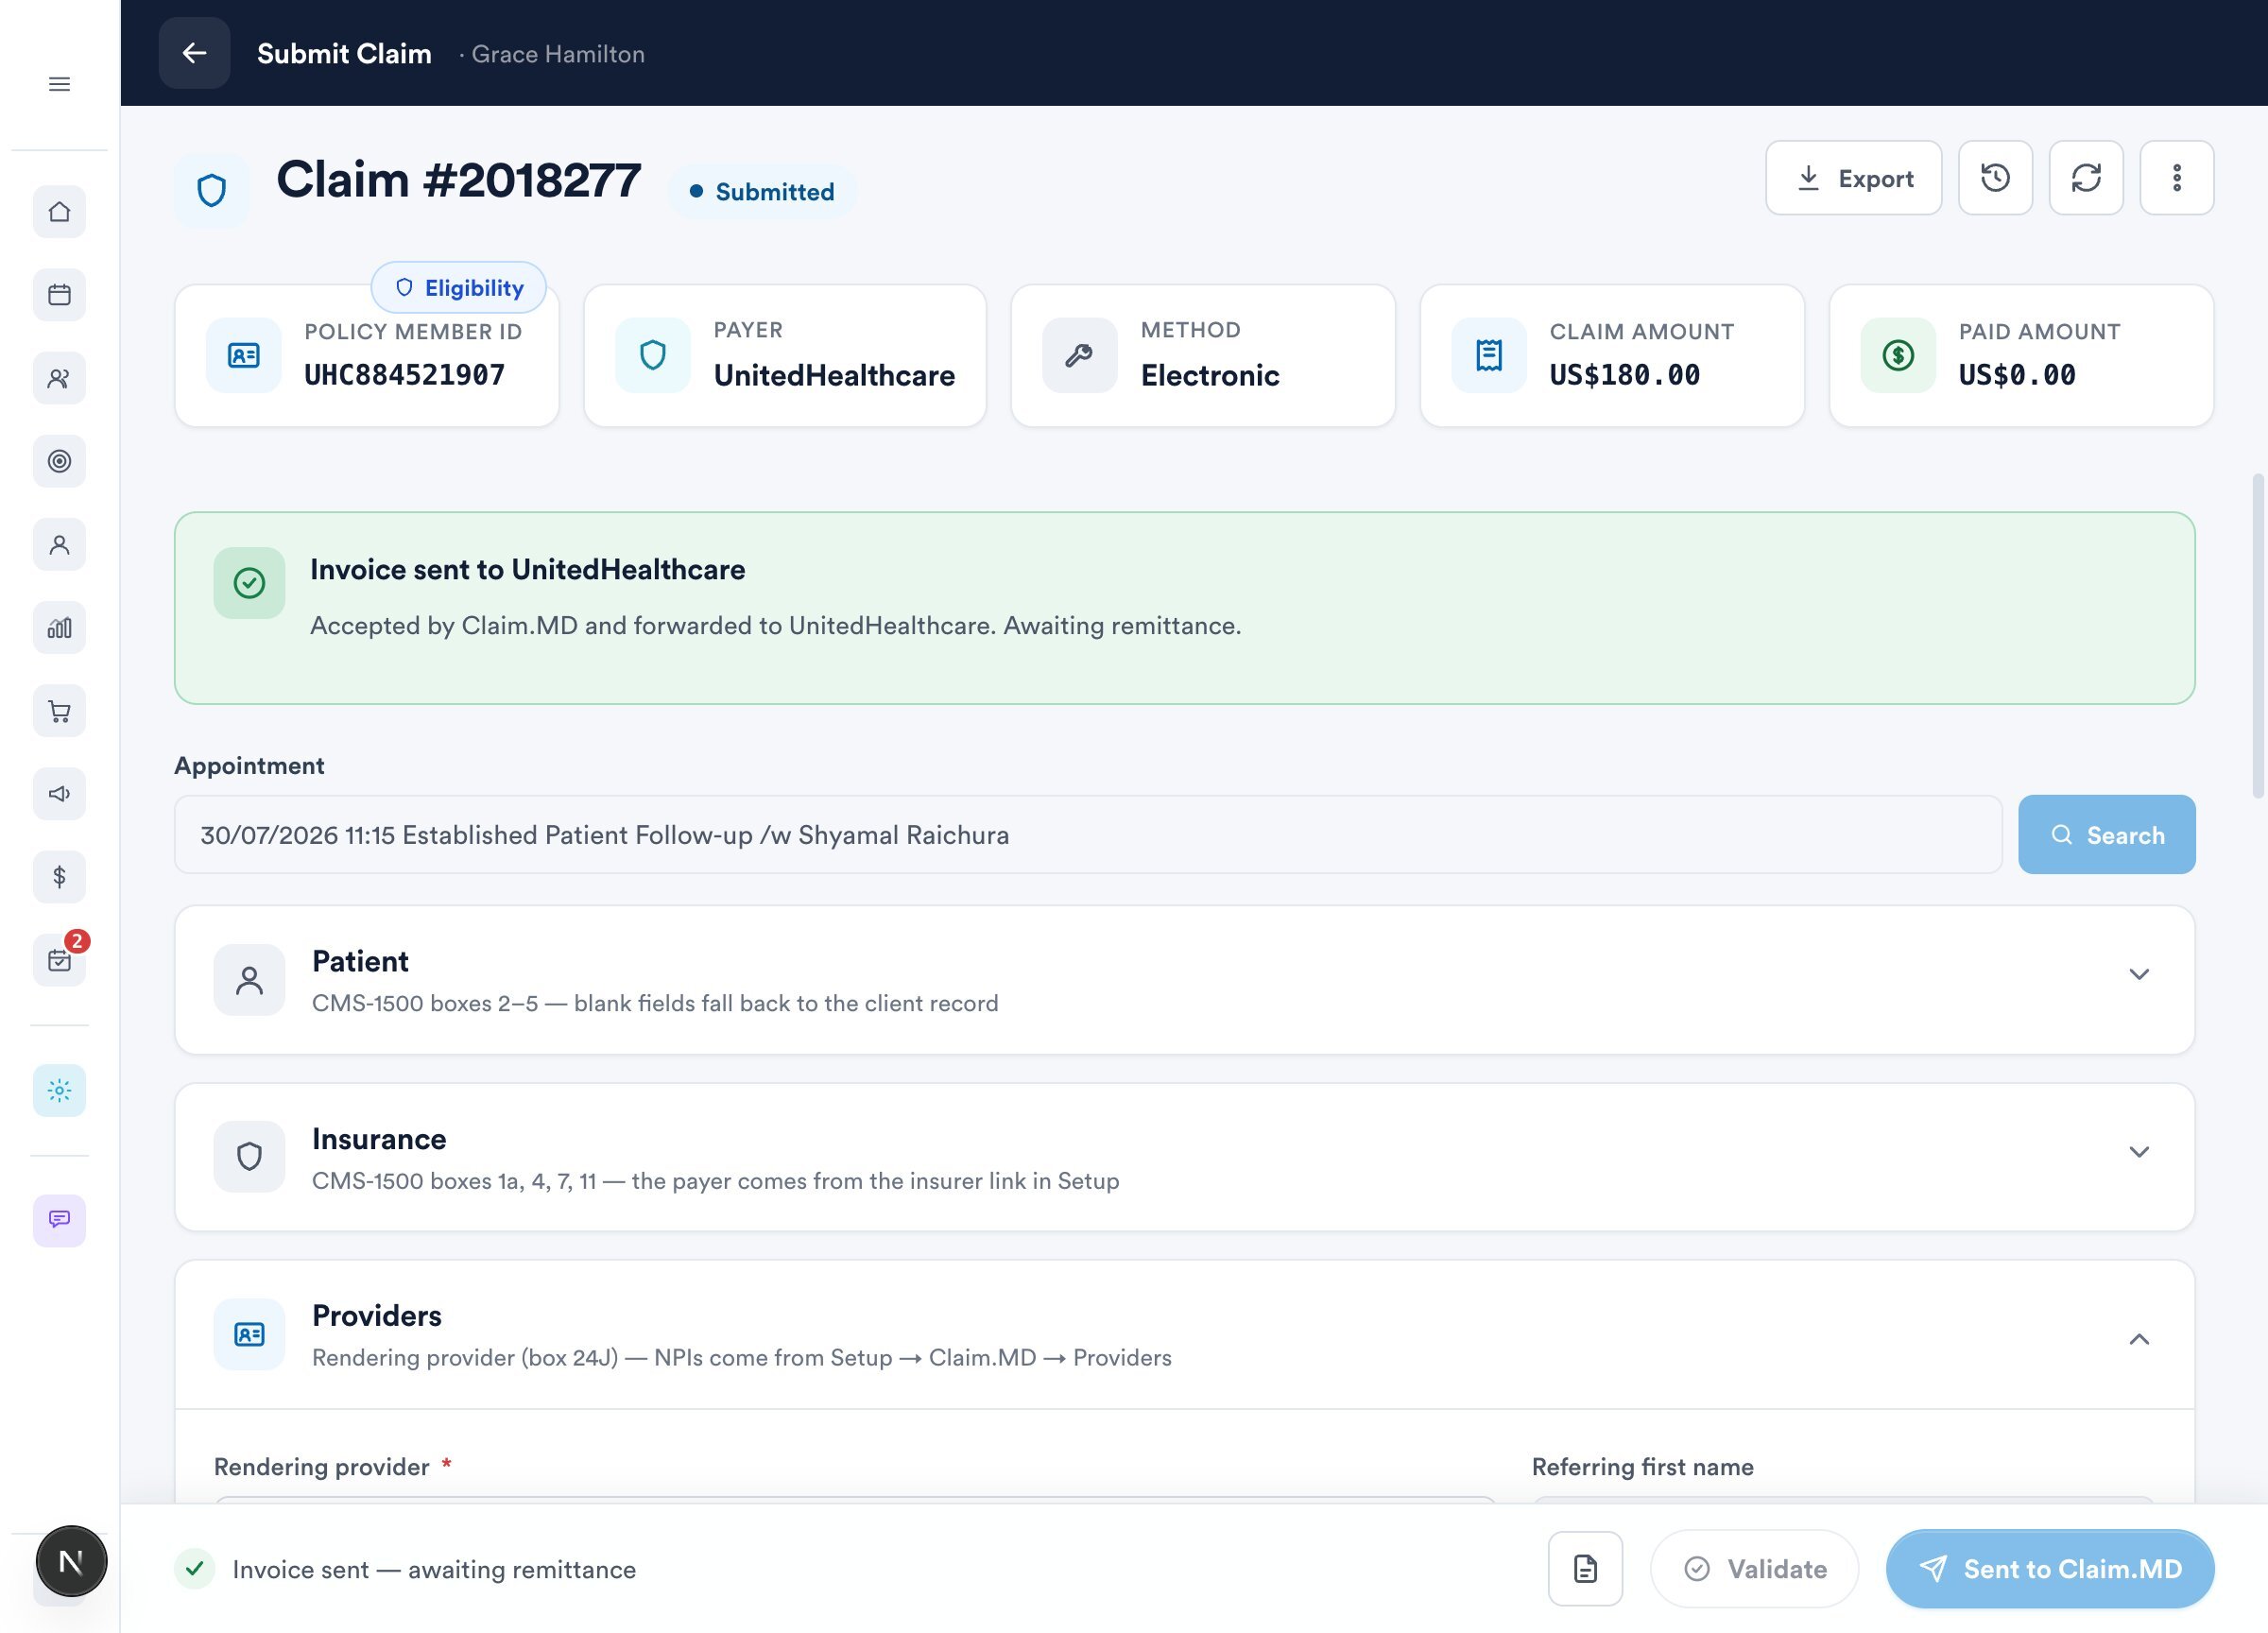
The status pill changes to Submitted and the footer reads "Invoice sent - awaiting remittance". Resubmitting the same claim later (after a correction) updates the original at the clearinghouse - it never creates a duplicate.
5. Track claim statuses
Pabau tracks each claim through six statuses. Use Sync on the dashboard (or the sync icon on the claim) to pull the latest updates from Claim.MD and the payer.
| Status | What it means |
|---|---|
| Draft | The invoice is issued to an insurer but the claim hasn't been worked yet. |
| Ready to submit | Validation passed - the claim is clean and waiting to be sent. |
| Submitted | Accepted by Claim.MD and forwarded to the payer. Awaiting adjudication. |
| Held | Claim.MD has the claim but is holding it until the document it declares arrives. Nothing has been refused and no payer has seen it yet - attach the note and it transmits on its own. |
| Rejected | Stopped before adjudication (by Claim.MD or the payer's front end). Fix the listed issues and resubmit. |
| Denied | Adjudicated and not paid. Review the payer's reason codes, then correct and resubmit - or appeal. |
| Paid | The remittance (ERA) arrived and payment was posted against the invoice. |
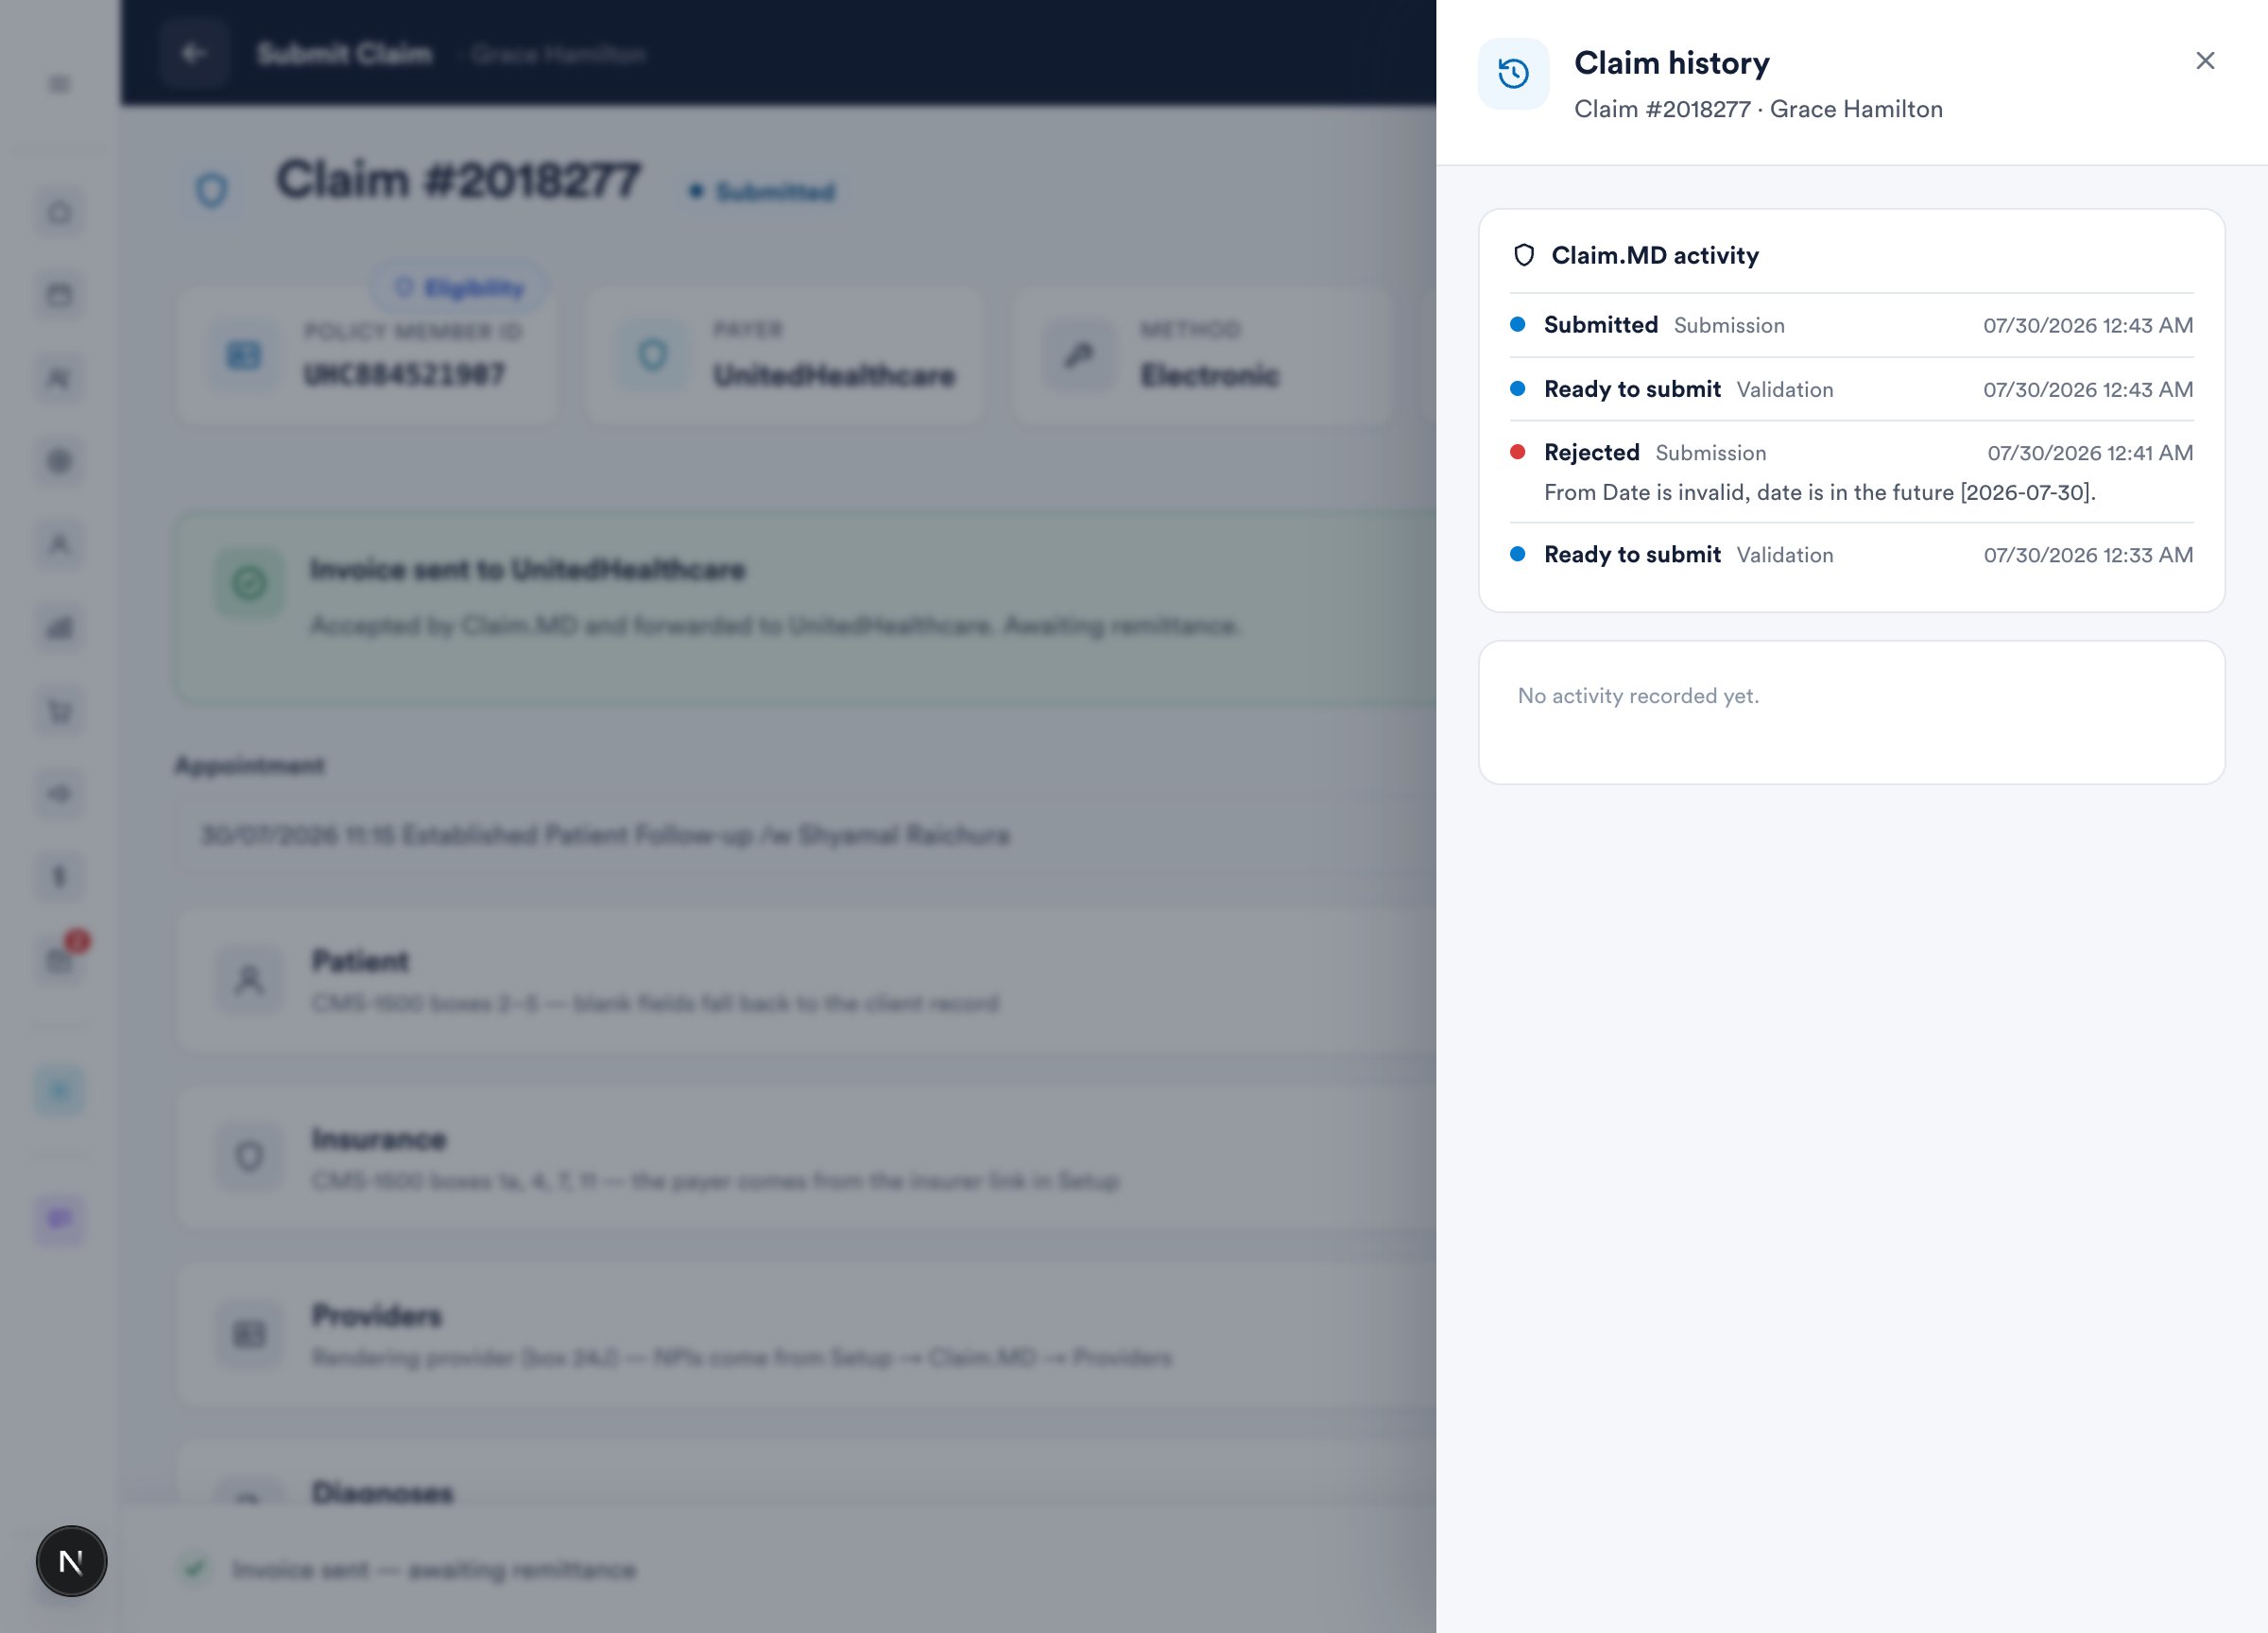
Every step is recorded in the claim's history - open it with the clock icon in the claim header. You'll see each validation, submission, rejection reason and payer update with its timestamp:
6. When a claim is rejected
If Claim.MD or the payer rejects the claim, the errors come straight back onto the claim - each with the exact message and, for common issues, a plain-English explanation and fix:
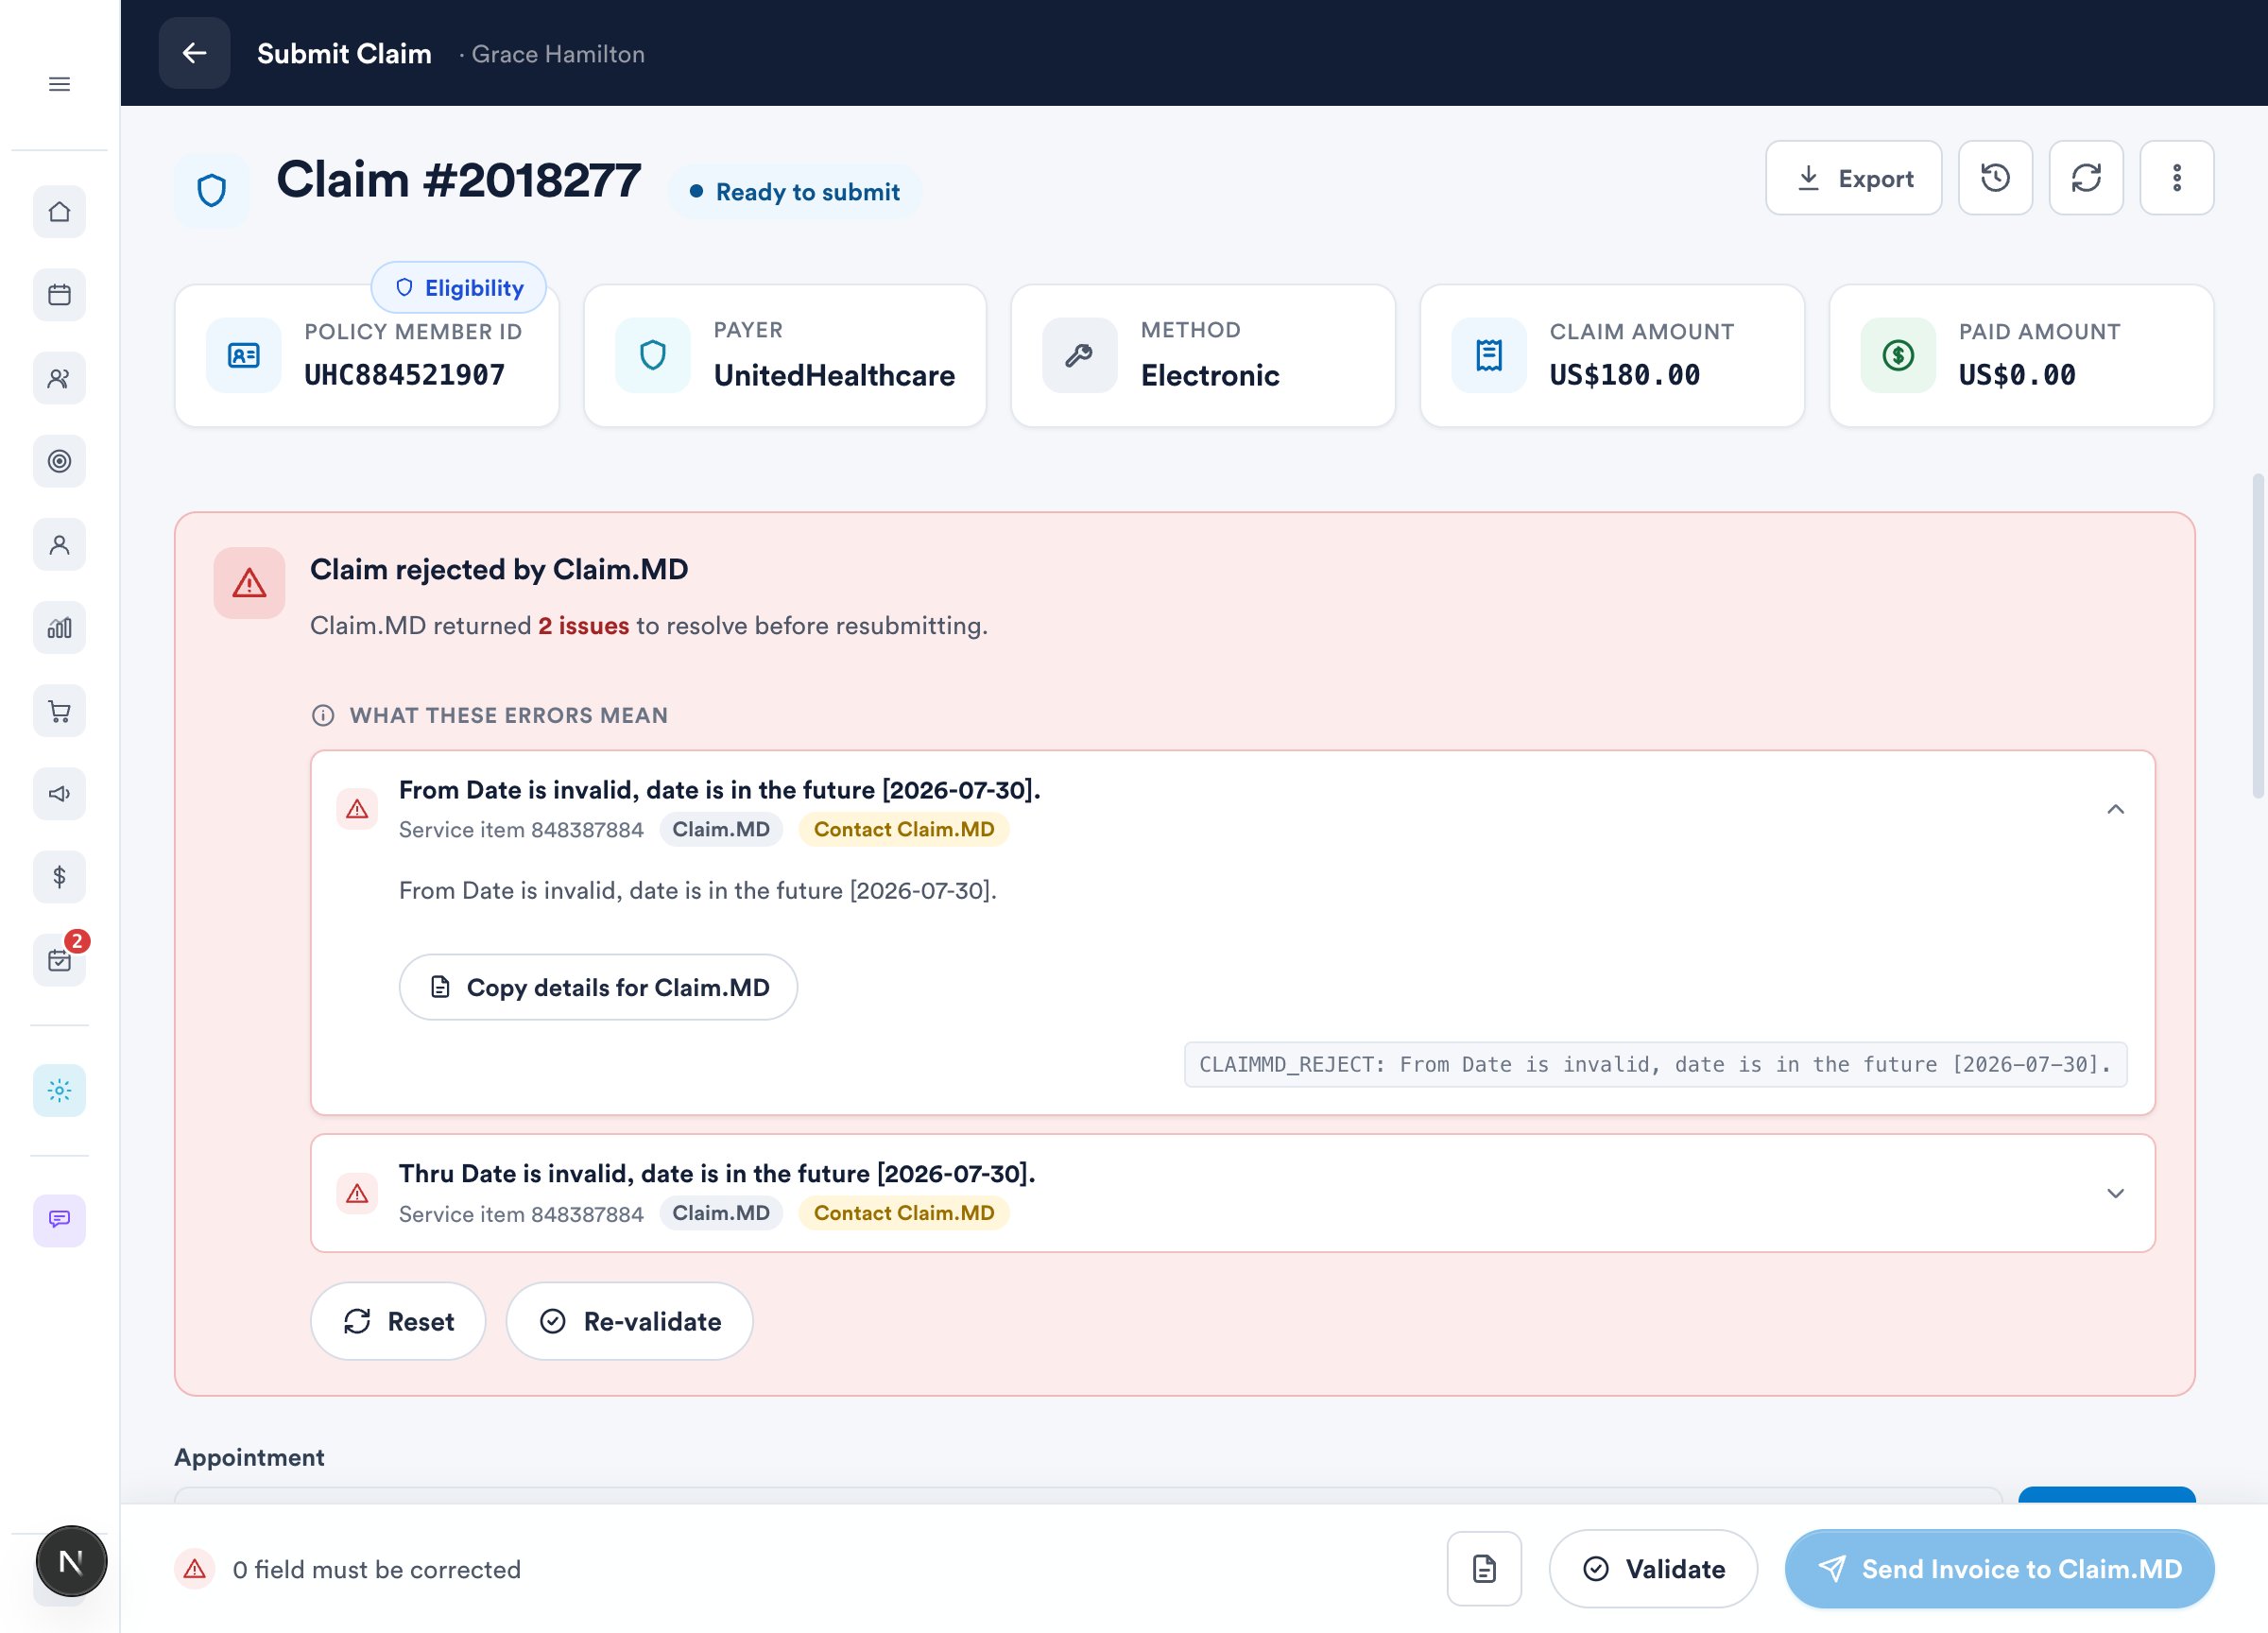
- Read each error card - Copy details for Claim.MD copies the technical reference if you need to contact support.
- Fix the fields it names (in our example the sandbox flagged a date of service, which we corrected inline).
- Click Re-validate, then Send Invoice to Claim.MD again. The resubmission updates the same claim.
Submitting several claims at once
When a batch of visits is ready to bill, you do not have to open each claim:
- On Money → Claims, tick the claims you want to send. The checkbox at the top of the column selects every sendable claim on the page.
- A bar appears showing how many are selected. Click Submit selected.
- Pabau validates each claim, sends the ones that pass as a single batch, and reports how many went and how many need attention.
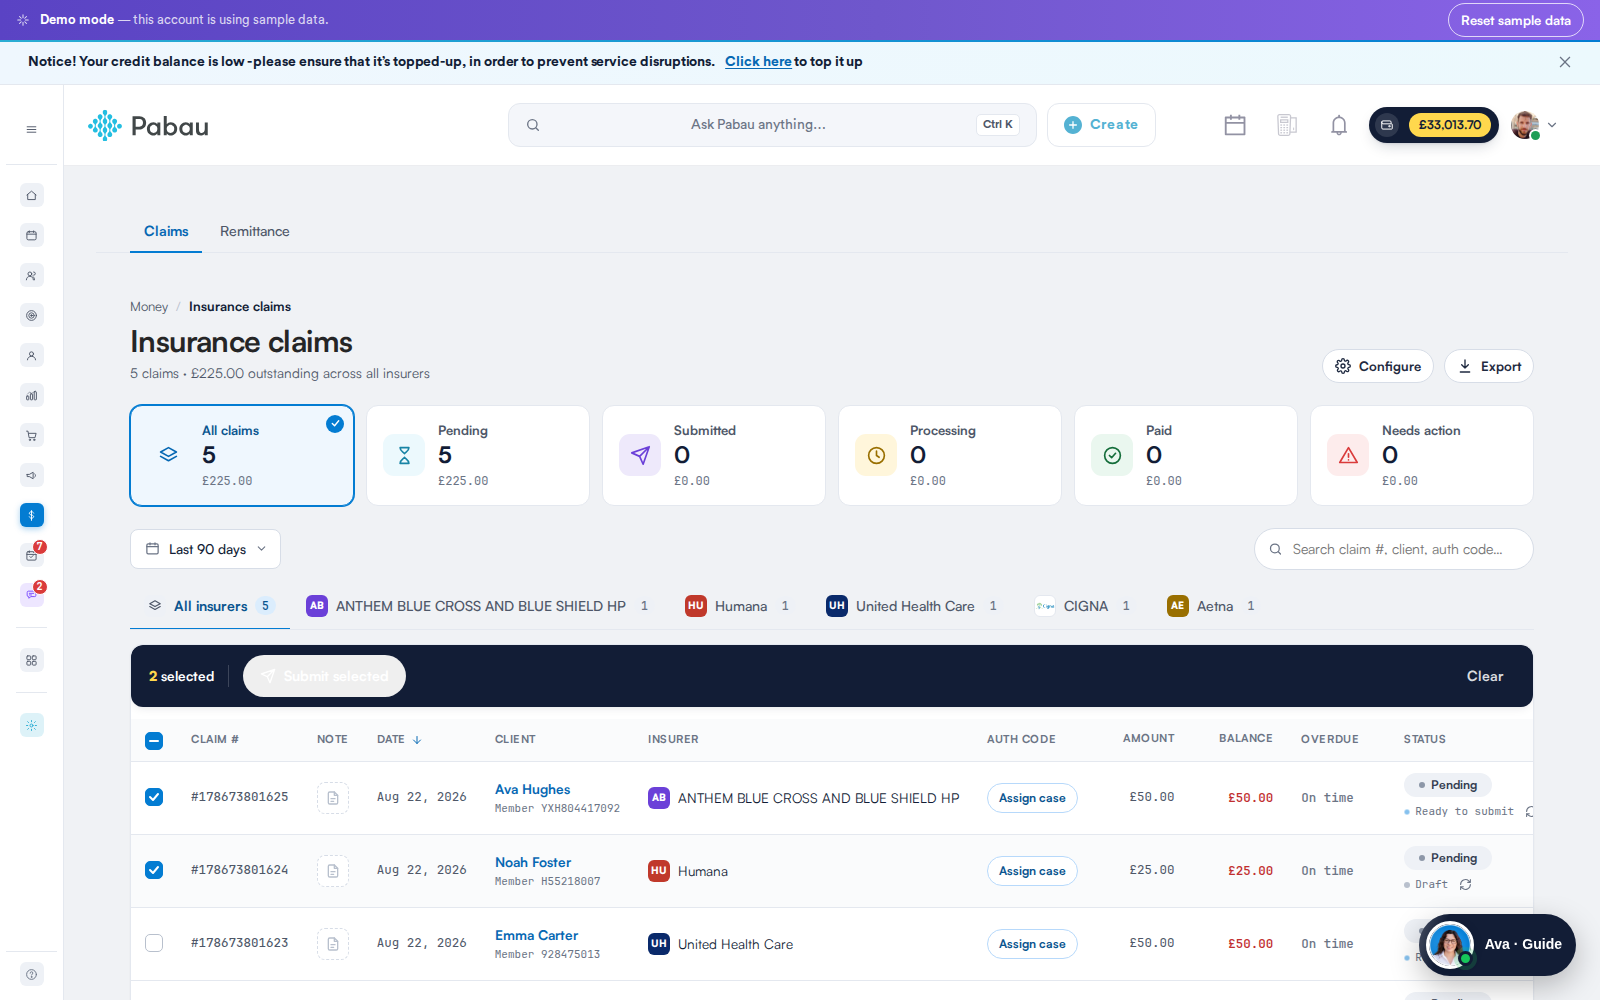
A claim that fails validation is left out of the batch with its reason listed, rather than stopping the others from going. Claims carrying a chart note are sent individually instead, because Claim.MD holds an attachment claim until its document arrives.
NOTE: Batch send covers claims that have not been submitted yet. A claim you have already sent and corrected is resubmitted from the claim screen, where your edits are kept.
What about payments?
When the payer settles, the electronic remittance (ERA) arrives in Money → Payment remittance — pull it in, match it to the invoice, and the claim flips to Paid (or shows the payer's denial detail) with the payment posted to the insurer automatically. Patient co-pays stay on the client's side of the ledger.
What's next?
That's the full cycle - from a booked visit to a paid claim. The complete Insurance Guide series:
- Part 1: Set up the insurance essentials
- Part 2: Client insurance setup
- Part 3: Connect appointments to insurance
- Part 4: Submit and track insurance claims (this article)
Questions? Reach us any time via the in-app chat - we're happy to help you get your first claims out the door.
Was this guide helpful? Let us know by voting below - your feedback helps us write clearer articles.
For more guides, browse the related articles below or use the search bar at the top of the page. You can also watch our video learning series, the Pabau Academy, or visit the Support page for additional help.