
The Aged Debt report shows every outstanding balance owed to your clinic — by patients and by insurers or funds — aged by how old each unpaid invoice is. It is the quickest way to see who owes you money, how long they have owed it, and which debts to chase first, and it is especially handy for keeping on top of unpaid insurance claims.
Step 1: Open the Aged Debt Report
Go to Reports, search for Aged Debt (listed under Sales), and open it. The report loads showing balances as of today.
Step 2: Read the Ageing Buckets
Each debtor appears on one row, with their outstanding balance spread across six ageing buckets by invoice date — ≤ 30, 31 – 60, 61 – 90, 91 – 150, 151 – 300 and 300+ days — followed by their Total Debt. A totals row across the bottom sums every column.
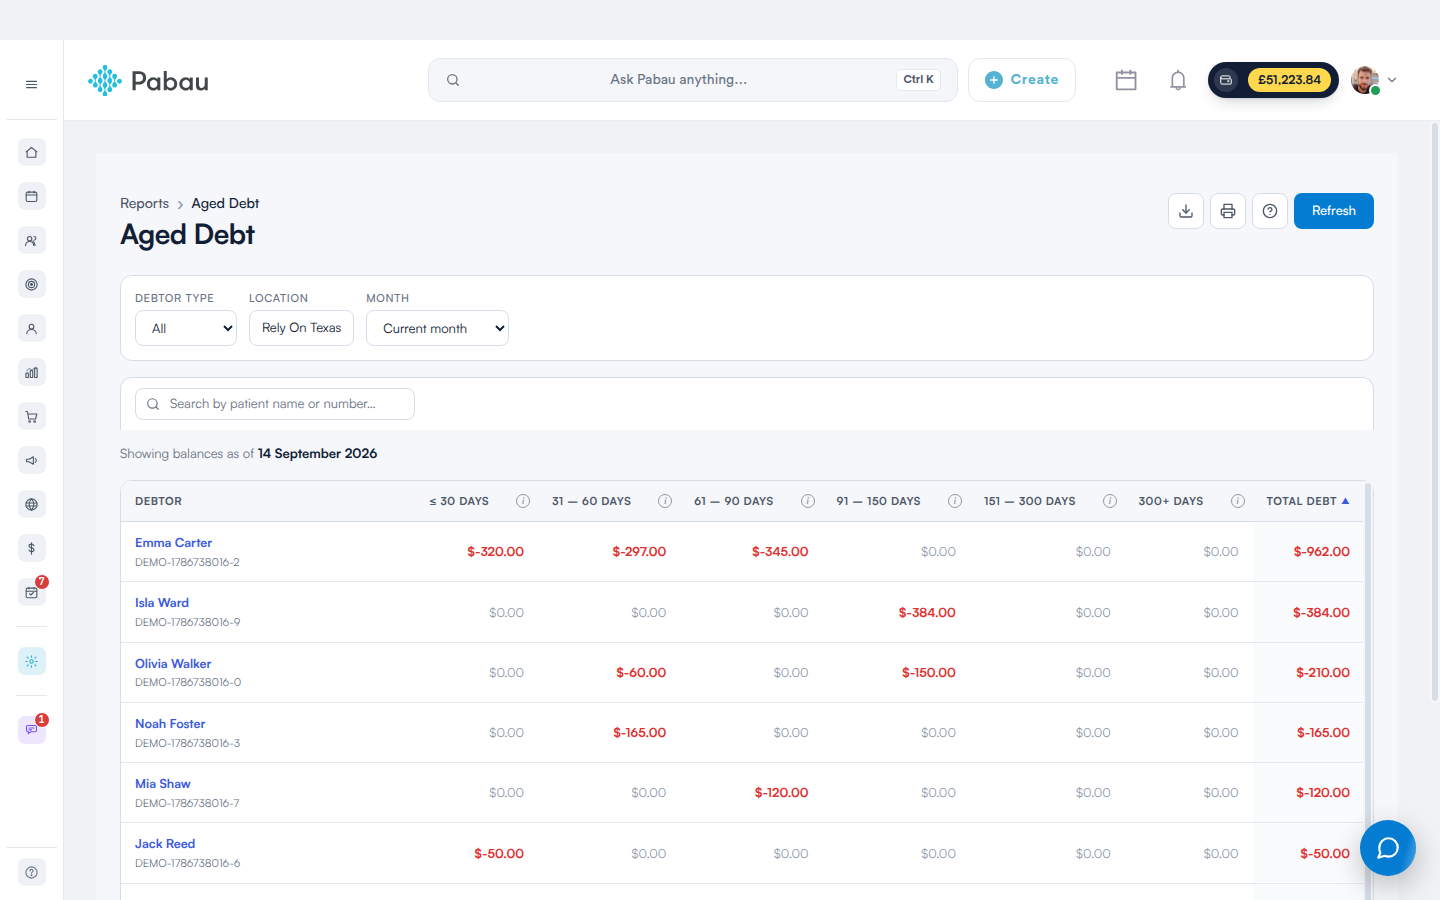
Reading the numbers:
- A figure in red is money the debtor owes you — an outstanding invoice.
- A black positive figure is money the debtor holds on account (a credit).
- The ⓘ next to each bucket heading shows the exact invoice dates that bucket covers.
NOTE: A Total Debt of zero shown in black (rather than greyed out) means the debtor's account credit exactly offsets their outstanding invoices — money sitting on the account that hasn't been applied to the open invoice, worth tidying up.
Step 3: Focus on Insurance Debt
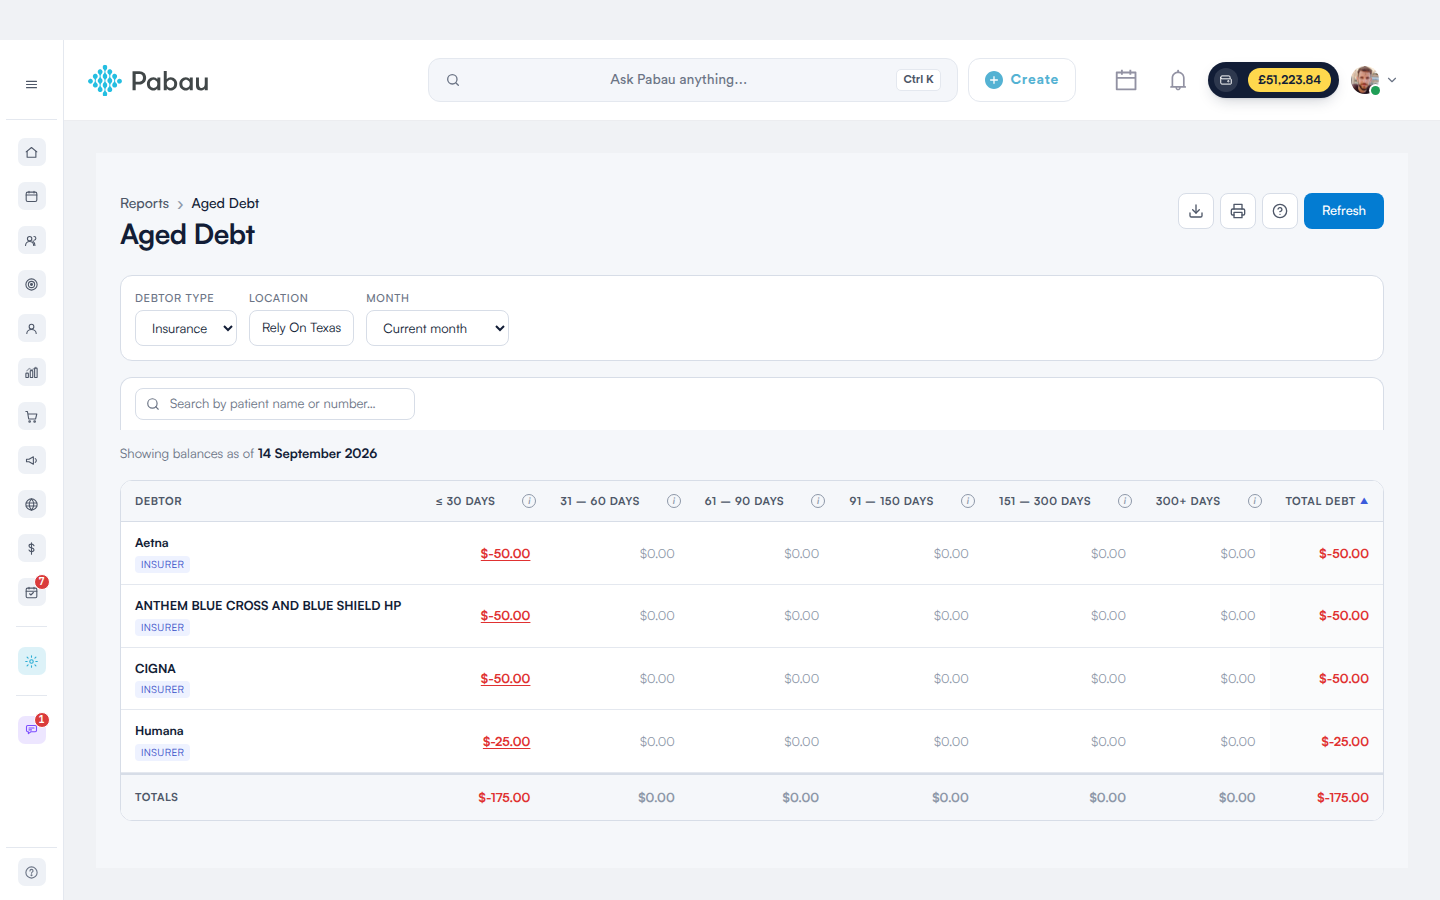
- Set Debtor type to Insurance. Balances regroup per insurer or fund — each row is tagged Insurer — instead of per patient.
- Use Location to scope to one clinic. It defaults to your own primary location; switch it to All locations to see every location you have permission to view.
- Pick a Month to age the invoices as of the end of that month — the debt position exactly as it stood then.
Step 4: Drill Through to the Claims
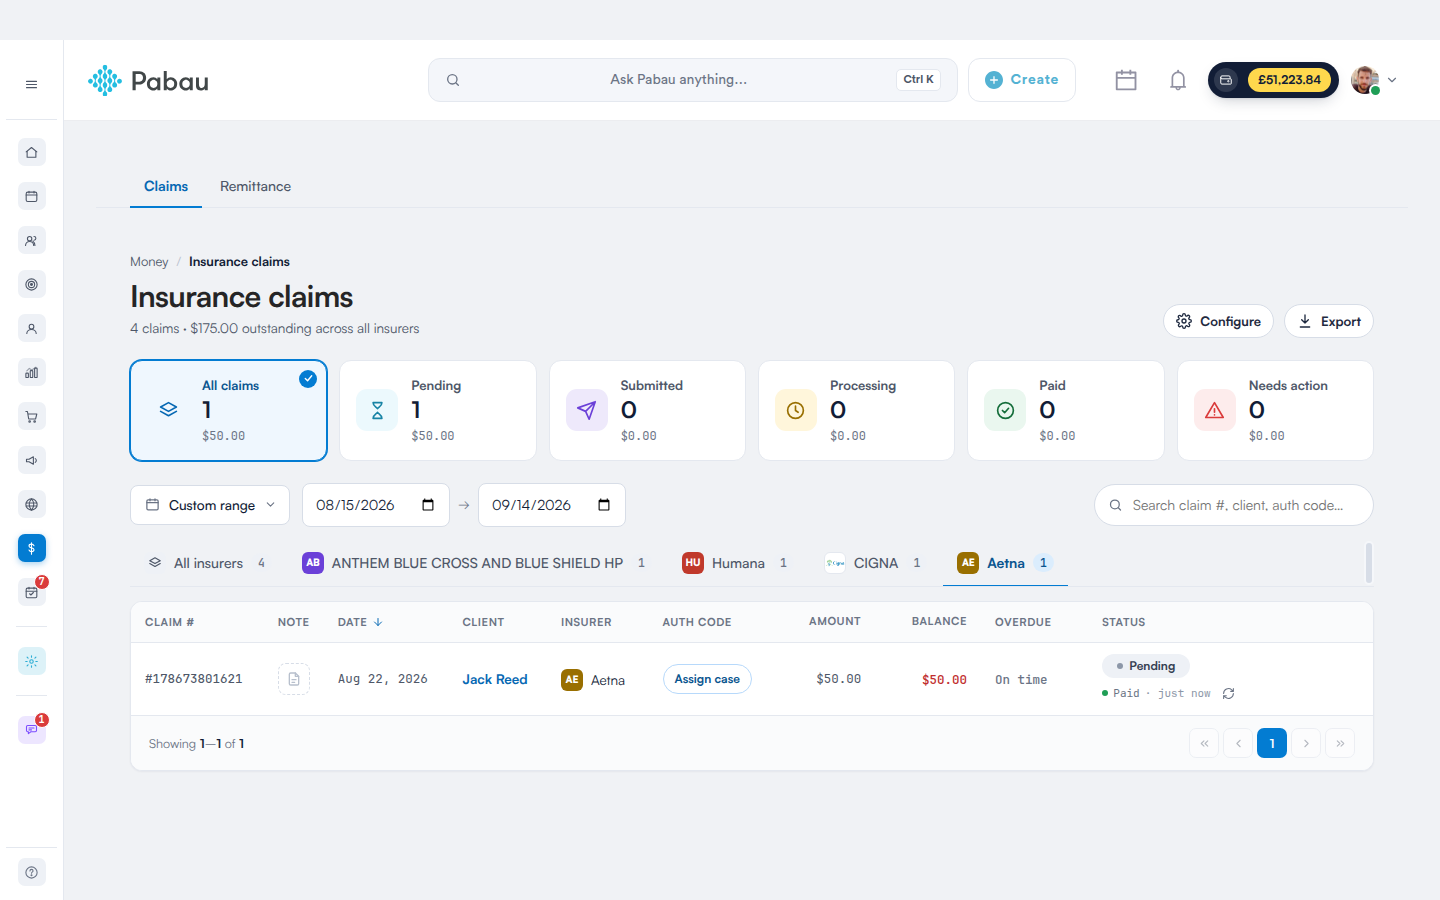
On an insurer row, every amount is a link. Click it and your Claims list opens in a new tab, pre-filtered to that insurer and that bucket's invoice-date window — so the claims listed add up to exactly the figure you clicked. From there, work through each claim: check its outcome, correct and resubmit a declined one, or follow up with the fund. The full claims workflow is covered in Insurance Guide Part 4 (Australia): Submit and track claims with Tyro Health.
TIP: Clicking a patient's name on a client row opens their quick-view card, so you can check their balance and contact details without leaving the report.
Step 5: Search, Sort, Export and Print
- Search by patient name or number to jump straight to a debtor.
- Sort by clicking any column header — sorting by 300+ Days surfaces your oldest unpaid claims first.
- Export downloads the entire filtered report as a CSV — every debtor, not just the rows on screen — which makes a quick month-end review of insurer balances.
- Print produces a landscape copy that keeps all six buckets on the page, and Refresh re-runs the report against the current filters.
New to insurance billing in Pabau? Start with Getting started with insurance billing (Australia) and the four-part Australian Insurance Guide.
Questions? Reach us any time via the in-app chat — we're happy to help.
Was this guide helpful? Let us know by voting below - your feedback helps us write clearer articles.
For more guides, browse the related articles below or use the search bar at the top of the page. You can also watch our video learning series, the Pabau Academy, or visit the Support page for additional help.