
This article covers the new Client Card, available to selected clinics from August 2026. If your Client Card looks different, see the How to Send an Email from the Client Card (Classic) guide instead.
Step 1: Locate the Client
Start by searching for the client you wish to send an email to. Use the search bar at the top of the screen for quick access.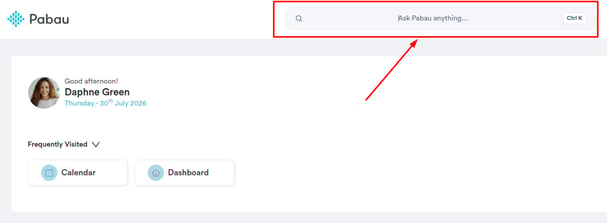
NOTE: For more information on how to manage the client card, please refer to this article.
Step 2: Open the Email Composer
Click the "+" button in the bottom right corner of the client card.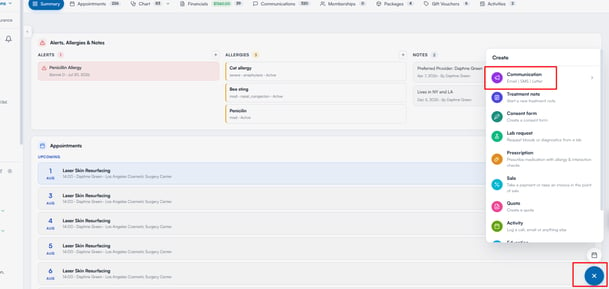
From the Create menu that appears, select "Communication", then choose "Email" from the sub-menu.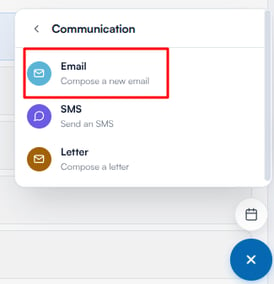
NOTE: If the client has no email address on file, the Email option is unavailable until you add one to their details.
Step 3: Compose the Email
The "New mail" composer will open as a floating window.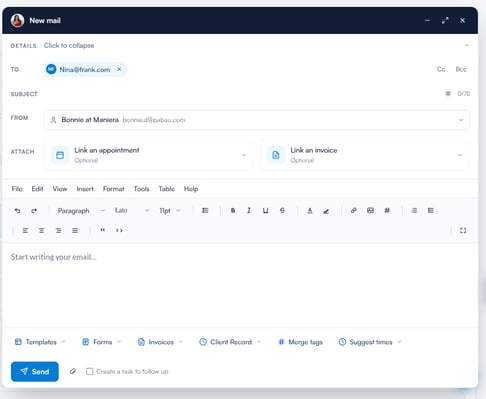
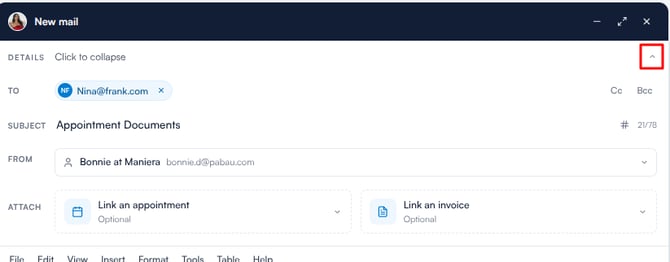
At the top, the Details bar shows the recipient and a "What is this about?" field. Click the Details bar to expand it and reveal the following options:
- To: The client’s email address, pre-filled automatically. You can also add Cc and Bcc recipients.
- Subject: Enter the subject line of the email. A character counter on the right shows the length against the recommended 78-character limit.
- From: Select which sender email address and name the email will be sent from.
- Attach: Optionally link an appointment or invoice to the email. Both fields are optional.
In the main body area, write and format your email using the text editor. A full formatting toolbar is available at the top of the composer, including options for font, size, bold, italic, alignment, links, and images.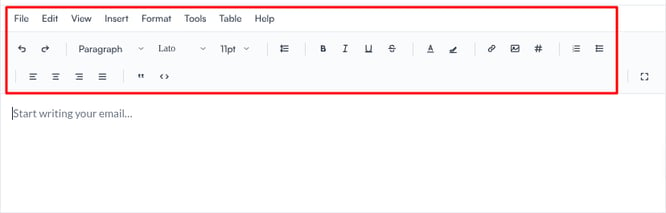
Step 4: Use the Toolbar Options
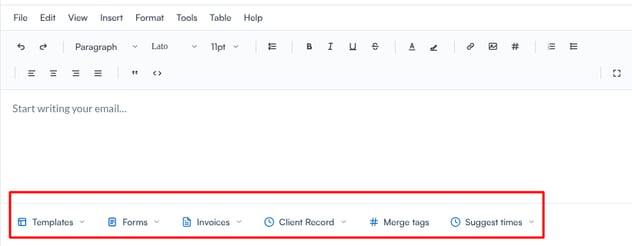
Along the bottom of the composer, you’ll find the following tools to enhance your email:
-
Templates: Select from your saved email templates - such as pre-care, aftercare, or recall emails. Click to open the list, choose a template, and it will be inserted into the email body ready to edit.
-
Forms: Insert a completed form from the client’s record, or switch to Request to insert a link the client can use to complete a form online through the client portal.
-
Invoices: Choose one of the client’s invoices, then either insert a payment link into the email or attach the invoice as a PDF. The client can click a payment link to view and pay the invoice online.
-
Client Record: Pull in information from the client’s record - such as appointment details, medical history, allergies, problems, medications, labs, invoices, or forms - and insert it directly into the email.
-
Merge tags: Insert dynamic fields that automatically populate with the client’s real details when the email is sent, such as their name, appointment date, or booking link.
-
Suggest times: Check a service or team member’s availability and insert proposed appointment slots directly into the email for the client to choose from.
Step 5: Attach Files
To attach files to the email, click the paperclip icon next to the Send button.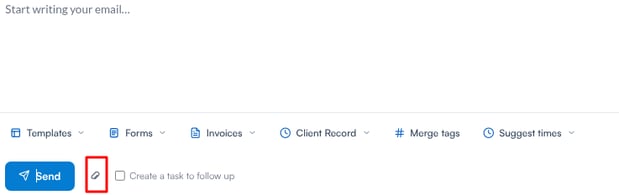
The "Attach files" modal will appear with two sections:
-
Upload files: Drag and drop files from your computer directly into the upload area, or click "Browse files" to select them manually.
-
Browse Pabau: Browse files already stored in the client’s record. Use the search bar to find specific files, or filter by category on the left — including Forms, Documents, Invoices, Letters, and Photos. Files are displayed as cards on the right with their name and date. Click on one or more files to select them. The counter at the bottom shows how many files are selected.
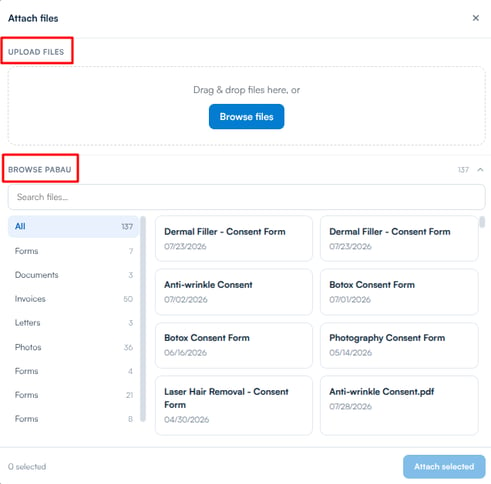
Once you’ve made your selection, click "Attach selected" in the bottom right corner to add the files to your email.
Step 6: Send the Email
Once your email is ready, you can optionally tick "Create a task to follow up" and choose when to be reminded - from one business day up to a year. Then click the "Send" button in the bottom left corner to send the email.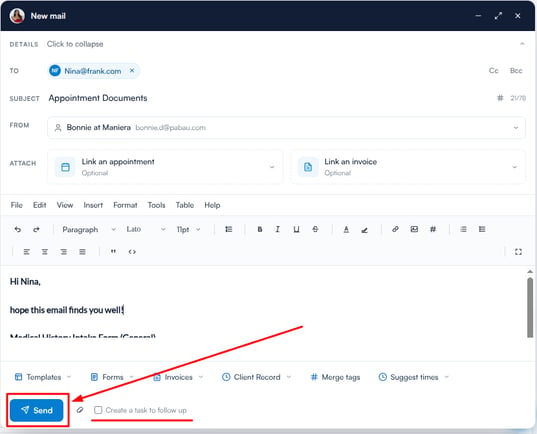
Step 7: View the Sent Email
Once sent, the email will appear in the "Communications" tab of the client card, where you can view all emails, SMS messages, letters, and other communications logged for this client.
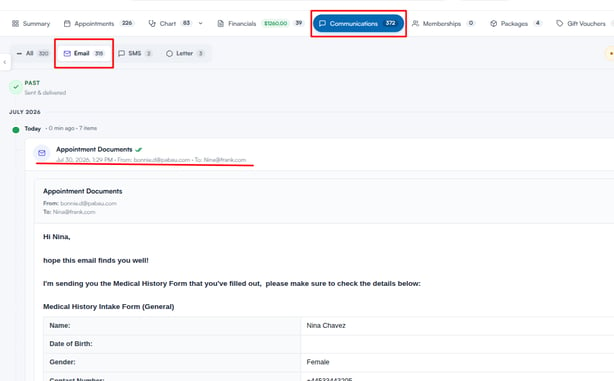
With your email sent, all communication is logged automatically against the client’s record, keeping your team’s interactions organised and trackable.
Was this guide helpful? Let us know by voting below - your feedback helps us write clearer articles.
For more guides, browse the related articles below or use the search bar at the top of the page. You can also watch our video learning series, the Pabau Academy, or visit the Support page for additional help.