
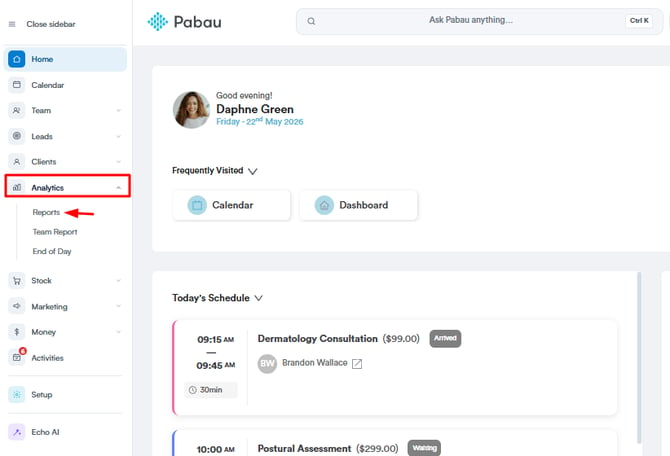
Step 1: Navigate to the Analytics feature
Log in to your Pabau account, and in the left sidebar menu, go to Analytics, then click on the "Reports" button. If you land on the legacy Reports page, click Try it now on the "Try our new suite of reports" banner to open the new reports experience.
Step 2: Open a pre-built report and customize it
Open a pre-built (standard) report from the reports catalog and customize it so that it matches your requirements — adjust the filters, add or remove columns, or change the sorting.
If you want any of your filters to stay fixed in the saved copy, click the padlock icon next to that filter condition before saving. Locked filters are carried over into the custom report and can’t be adjusted by people viewing it (except the date value on date-based filters, which stays adjustable).
Step 3: Click on the "Save as" Button
As soon as you change something in the report — a filter, a column, or the sorting — a "Save as" button appears in the top right corner. It is only shown once you have made a change; an unmodified standard report doesn’t display it.
.webp?width=670&height=178&name=image-png-Dec-13-2023-03-52-06-9558-PM-3%20(1).webp)
Step 4: Name the Report and Choose Who Has Access
Clicking "Save as" opens the "Save as new report" dialog with three things to set:
- Report name — pre-filled as "Copy of [report name]" (e.g. "Copy of Appointments by Location"); the name must be at least 3 characters long.
- Description — an optional note explaining what the report shows.
- Who has access? — a button showing the current setting ("Only me" by default). Click it to open the Manage access panel, where you can keep the report private, share it with everyone, or pick specific users or teams — with each individual set to Hidden, View only, or View & edit.
When you’re done, click "Save" to store the new custom report with the specified configuration.
.webp?width=363&height=338&name=image-png-Dec-13-2023-04-21-32-5628-PM-3%20(1).webp)
NOTE: There is no "Lock Filters" checkbox in this dialog — filter locking is done with the padlock icon next to each individual filter condition, set before you click "Save as" (see Step 2).
Step 5: Access the Saved Report
After saving, Pabau takes you straight into your new custom report — you are not returned to the standard report you started from. The original standard report remains unchanged in the catalog.
Your saved custom reports are also conveniently stored under "My reports" in the reports sidebar. Locate the specific report you wish to access and click on its name to open it, allowing you to view and analyze the data it contains.
.webp?width=372&height=293&name=image-png-Dec-13-2023-04-27-55-5537-PM-Jan-26-2024-10-44-41-4067-AM%20(1).webp)
Saving your custom reports in "My reports" makes it quick and easy to find them later. This way, you can easily access and use your customized data whenever you need it. It’s a simple way to keep track of important insights and make better decisions for your business. To make further changes later, see How to Edit a Custom Report.
For more guides, refer to related articles below, select additional guides, or use the search bar at the top of the page. These guides will help you get the most out of your Pabau account.
Additionally, to help you fully utilize and understand your Pabau account, we recommend exploring additional guides and resources offered at the Pabau Academy. It offers in-depth video tutorials and lessons, offering a holistic learning experience that can equip you with the essential skills for achieving success with Pabau.