
Step 1: Navigate to Analytics
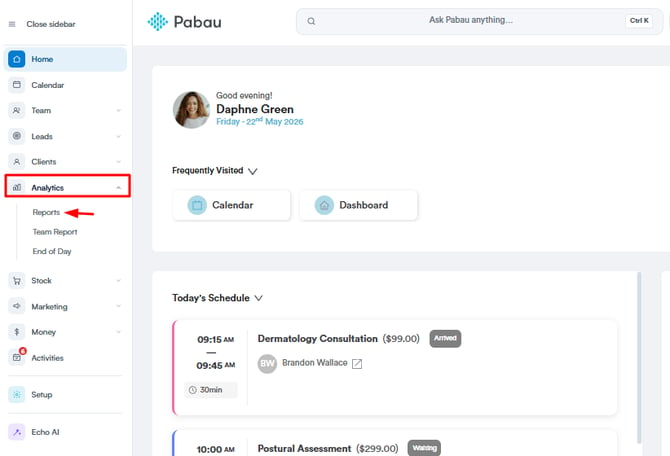
Start by logging into your Pabau account using your login credentials. Next, go to the left sidebar menu and expand the "Analytics" section. Then, click on "Reports" to open the reports page. On the "Try our new suite of reports" banner, click "Try it now" to open the new reports view.
Step 2: Build a Custom Report
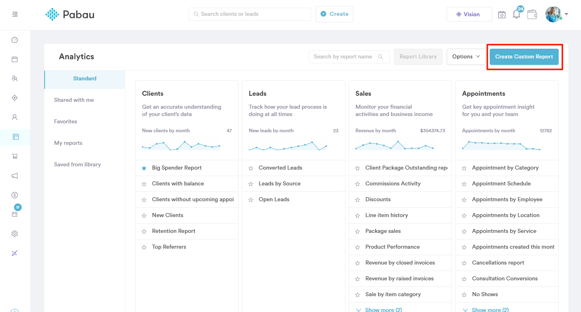
To generate a recall report, click the "Build a custom report" button. This opens a full-screen window where you choose the data object your report is based on.
Step 3: Choose Data Object
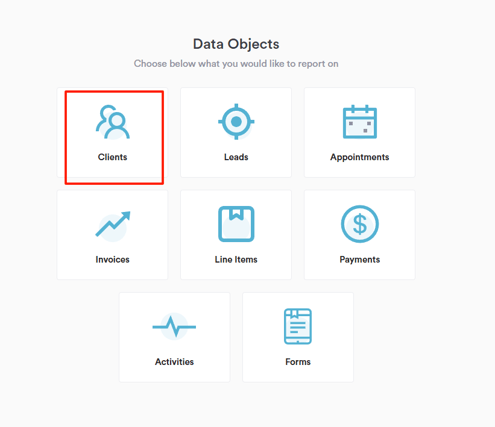
You will be prompted to select a Data Object. In this case, choose “Clients” — since the goal is to identify which clients are due for a recall based on the services they’ve received. Then click "Start from scratch" to open the report builder.
Step 4: Adjust Filters
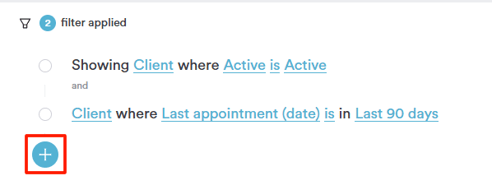
The builder starts with one filter already added, which you can change by clicking on its parts. To generate a recall report, set the following filters:
- Showing Client where Active is Active
- Client where Last appointment (date) is in _______
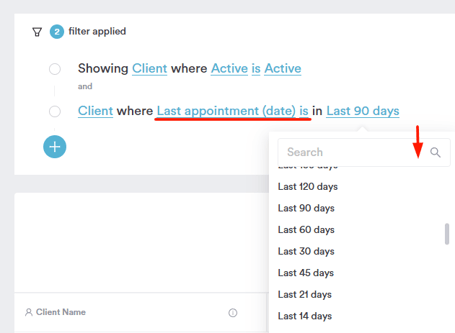
To pull a list of clients who booked a specific service and may need a recall, click the blue plus icon to add a filter, then choose the service you want to report on.
Proceed to add the following filters:
Client where last appointment service is _________
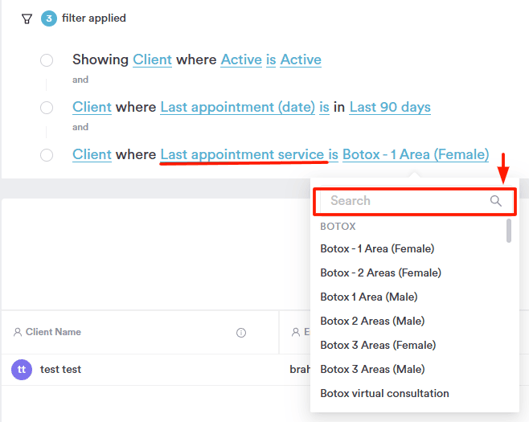
The results below refresh automatically as you adjust the filters — there is no separate button to run the report.
TIP: Each filter has a lock icon. Locking a filter prevents it from being edited or removed (for date filters, the value can still be adjusted), which is useful when saving a recall report as a reusable template for your team. Filter locking is part of the Insights+ add-on.
Step 5: Review Results
The results will appear below. Above the results, you can switch how the data is displayed — Table, Pie, Donut, Bar, Line, or Number.
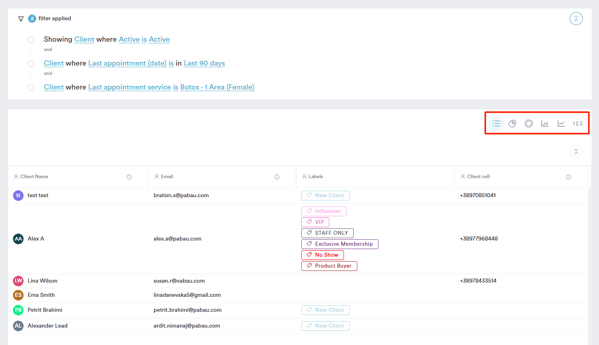
NOTE: The Bar and Line chart types are part of the Insights+ add-on — if your account doesn't include it, selecting them takes you to the subscription page.
Step 6: Save Report
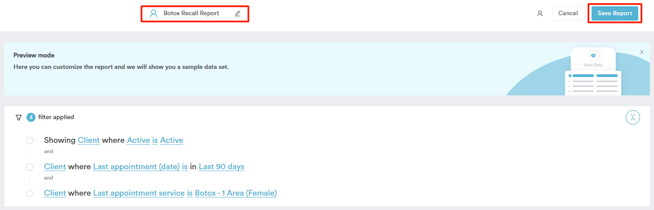
To save this report, first enter a report name at the top of the screen, so you can easily find it later. You can also add a short description and choose a folder to keep it in. Then, click the "Save Report" button in the top-right corner.
Step 7: Navigate to "My Reports"
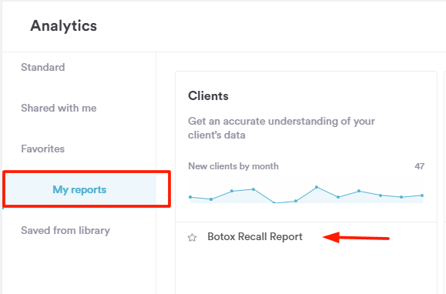
You can find your custom-created reports under "My reports" in the left sidebar of the reports view. Click a report to open it — the results always reflect the latest data, and you can adjust the date filter each time you run it.
By following these steps, you can generate a recall report.
For more guides, refer to related articles below, select additional guides, or use the search bar at the top of the page. These guides will help you get the most out of your Pabau account.
Additionally, to help you fully utilize and understand your Pabau account, we recommend exploring additional guides and resources offered at the Pabau Academy. It offers in-depth video tutorials and lessons, offering a holistic learning experience that can equip you with the essential skills for achieving success with Pabau.