
The Stale Leads report shows the open leads that have had no activity for longer than your chosen threshold — by default, 30 days. It gives you a ready-made re-engagement list: the leads who showed interest in your services but have since gone quiet, sorted so the most neglected leads appear at the top.
In this article, you will learn how to open the Stale Leads report, adjust the inactivity threshold, review the results, and export the data. For more information regarding leads, review this article.
Step 1: Navigate to Analytics
Start by logging into your Pabau account using your login credentials. Then, navigate to the left sidebar menu, where you can find the Analytics tab. Click to expand it, and it will reveal 'Reports.'
Step 2: Open the new reports view
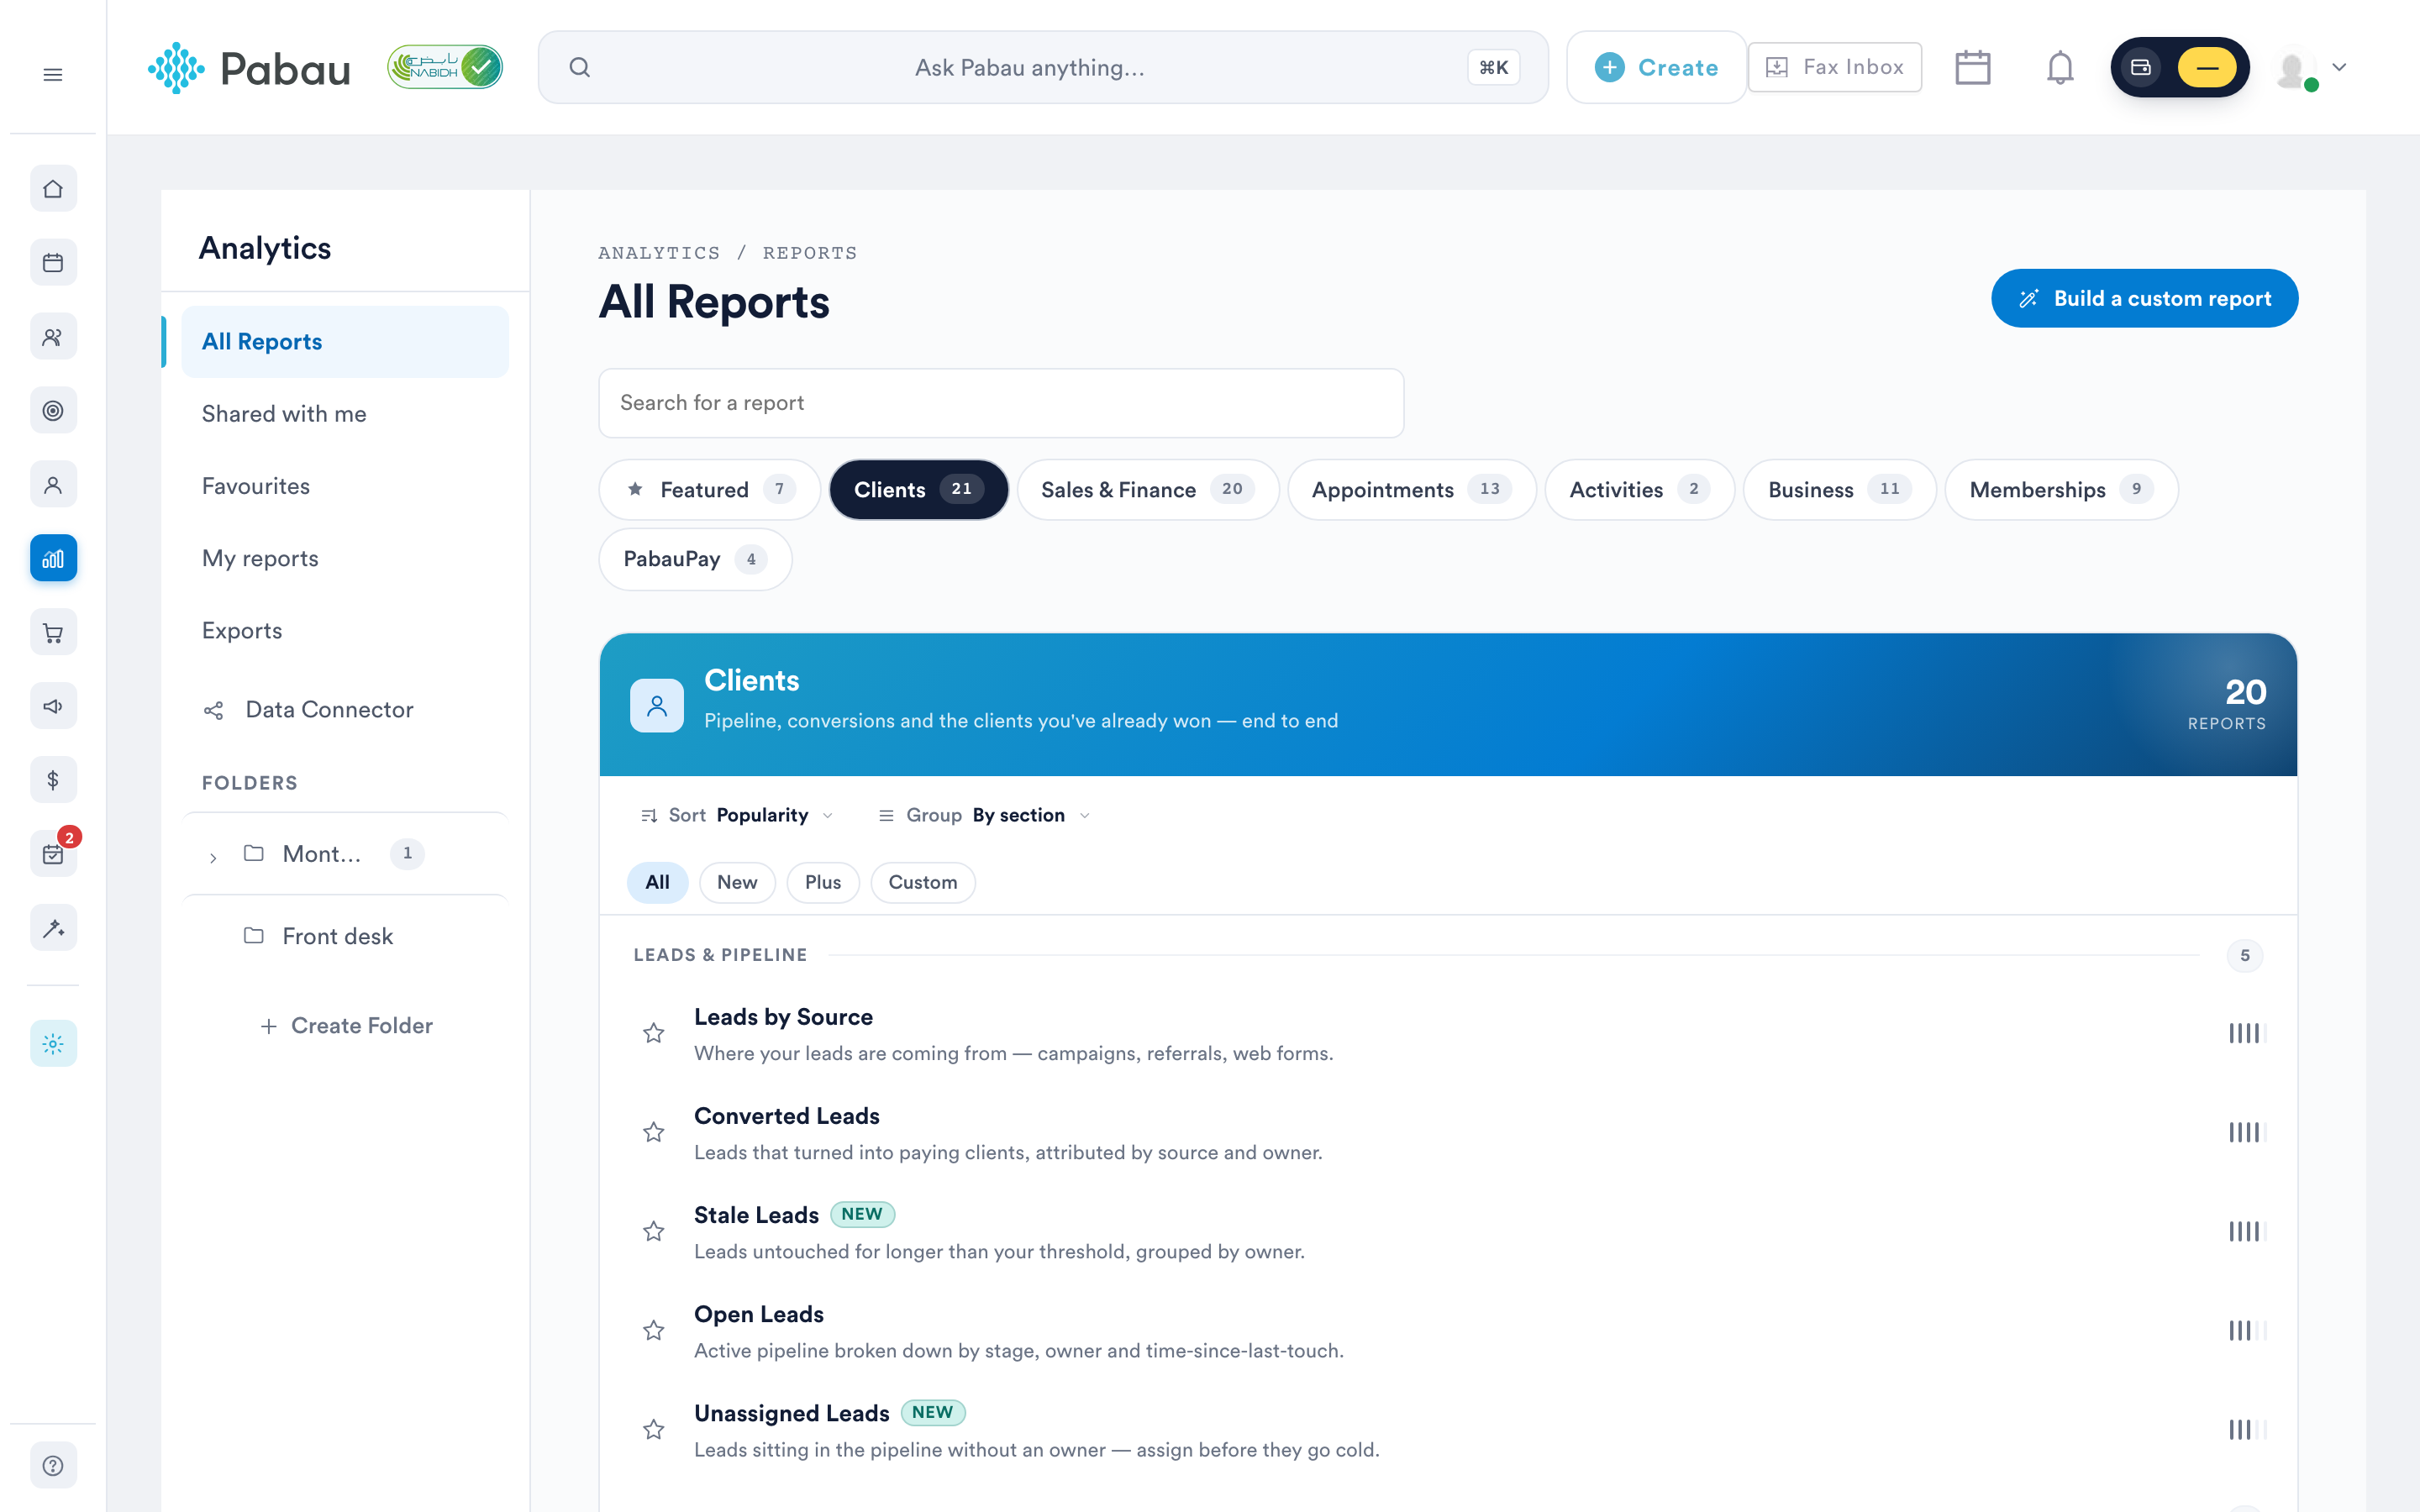
On the "Try our new suite of reports" banner, click Try it now.
NOTE: The Stale Leads report is available only in the new reports view — it does not appear on the legacy reports list, so if you normally work from the legacy page, use the banner to switch over first.
Step 3: Generate the Stale Leads Report
Once you're in the new reports view, go to the Clients section, then scroll to the "Leads & pipeline" group and click on Stale Leads to open the report. The report carries a "New" badge, and you can click the star next to its name to add it to your favorites.
Step 4: Understand the preset filters
The report opens with two filters already applied:
- Lead status is Open — only leads that are still open are included; converted and lost leads are left out.
- Lead last activity date is earlier than in Last 30 days — only leads with no recorded activity in the last 30 days are shown.
Each filter has four elements — object, field, operator, and value:
- Object: This is what you're focusing on ("Lead").
- Field: This is the specific detail you're interested in ("Lead last activity date").
- Operator: This shows how the field relates to the value ("is earlier than").
- Value: This is the specific data you're looking at ("in Last 30 days").
Each of these elements can be customized by clicking on them and choosing a different option.
NOTE: The 30-day threshold is just the default. To use a different inactivity window, click on the value of the "Lead last activity date" filter and choose a different period — for example, a longer window if your sales cycle is slow, or a shorter one if you want to catch leads earlier.
Step 5: Add, edit, and delete filters
- Adding a New Filter: To introduce an additional filter, click the plus sign (+) located beneath your current filters. Then, specify the details for your new filter. You can filter on any Lead or Client field, including custom fields.
- Editing an Existing Filter: Locate the filter you wish to modify. Click directly on the element you want to adjust (such as the object, field, operator, or value). A dropdown menu will appear; choose your desired new option.
- Removing a Filter: To delete a filter, simply move your mouse cursor over it. An "X" icon will appear; click it to remove the filter.
After changing filters or columns, click the "Run" button in the top right corner of the screen to refresh the report data.
Step 6: Review the data
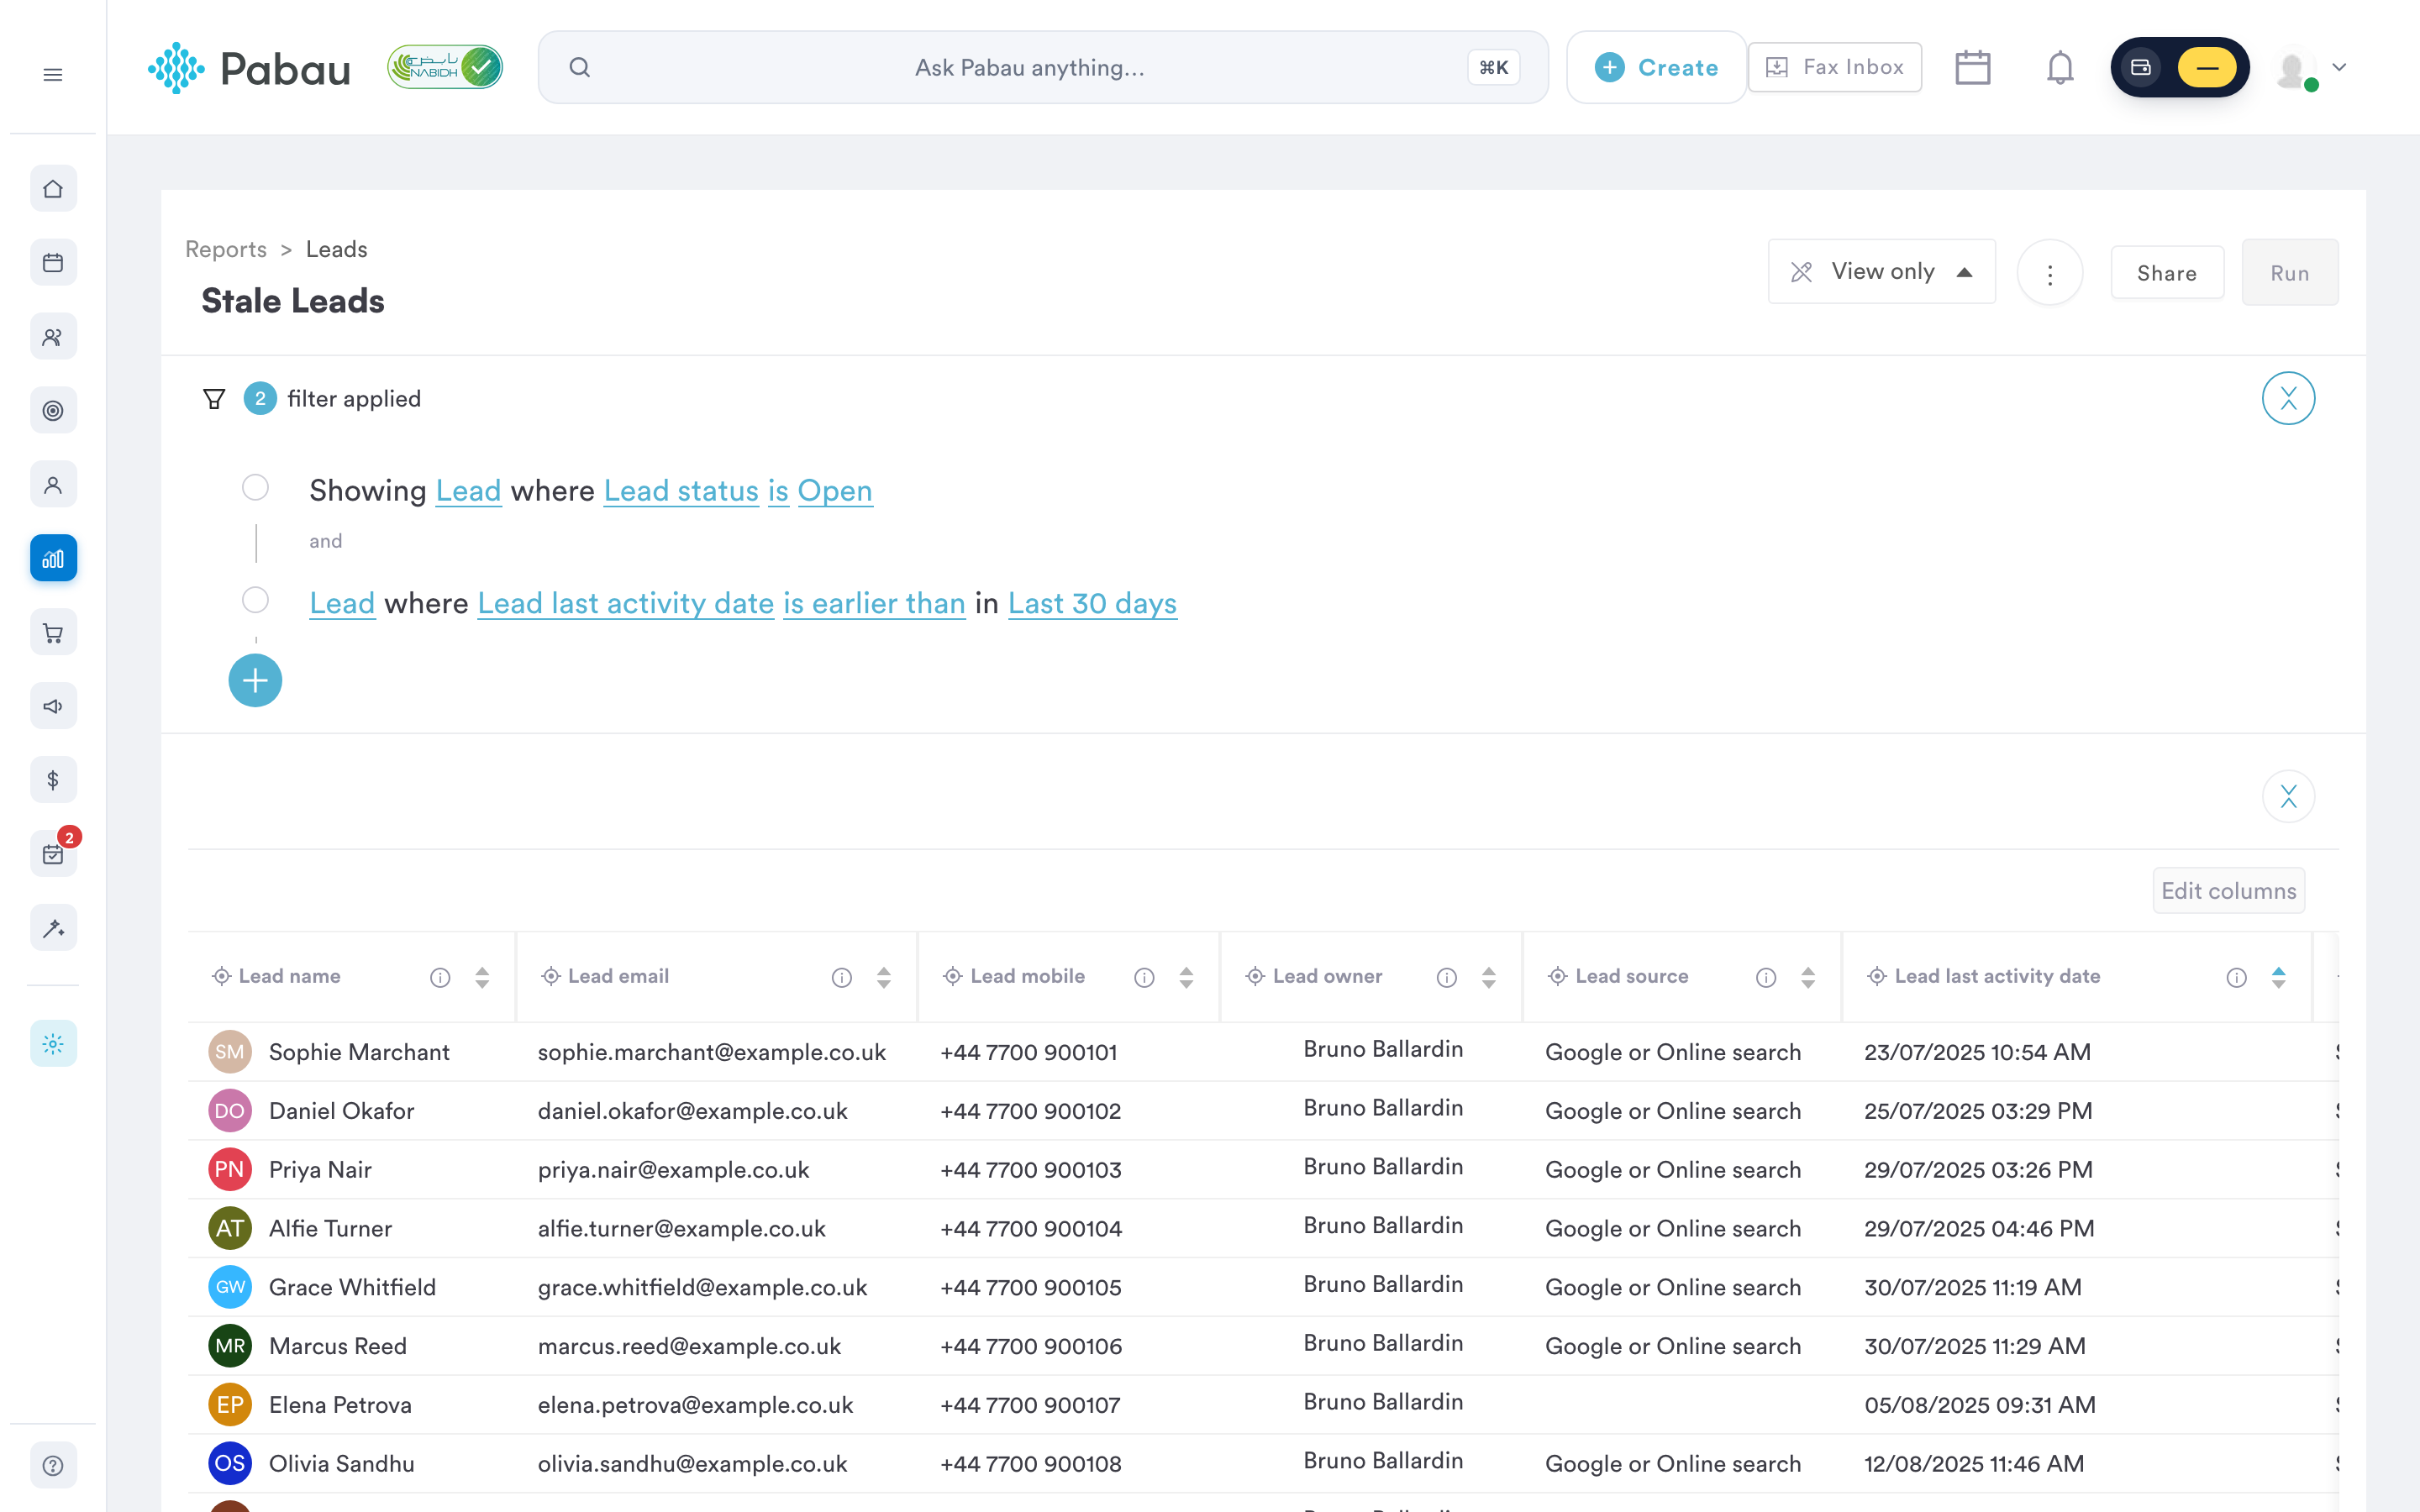
The results are displayed as a table, sorted by "Lead last activity date" with the oldest activity first — the leads that have been quiet the longest appear at the top. The rows are a flat list rather than being visually grouped by owner; use the "Lead owner" column to see who each lead belongs to.
The report includes the following columns by default:
- Lead Name: the name of the lead, through which you can access their lead card
- Lead email and Lead mobile: contact details, so you can follow up right away
- Lead owner: the team member responsible for the lead
- Lead source: the marketing source through which the lead discovered your practice. For more information regarding marketing sources in Pabau, review this article.
- Lead stage: the stage the lead is in
- Lead last activity date: the date of the last recorded activity on the lead — the value the report is filtered and sorted on
- Pipeline name and Pipeline stage: the pipeline the lead sits in and its current stage within it. For more information regarding lead pipelines, review this article.
You can also add additional columns — including custom fields — for more specific details. After selecting any additional columns, click "Save" so that they will appear on the list. You can also deselect options that are currently included in the columns.
Step 7: Save, print, and export the data
Once you have changed the filters or columns, a Save as button appears in the top right corner of the screen, which saves your customized version of the report as your own copy under "My reports", leaving the original intact. Next to it you will find the Share button, which lets you share the report with other team members.
To export the data from this report, click on the three dots on the top right side of the screen to reveal the 'Export' button. Once you click Export, a window will pop up, and you can choose to export the data as an Excel or CSV file.
NOTE: Excel export is disabled when the report contains more than 100,000 rows — use the CSV format for very large exports.
The same three-dot menu also offers Print (detailed) for printing. On reports you have saved yourself, the menu includes additional options, such as Print report (snapshot) and Duplicate, which creates a copy of the report you can adjust independently.
NOTE: Opening the new reports view requires the "Can access reports page" permission, and the Stale Leads report itself requires "Can access leads company reports". Team members who are not the account owner may additionally need "Can access financial company reports" to open pre-created reports. If you cannot see or open the report, contact your account administrator.
By following these steps, you can easily generate the Stale Leads report and re-engage leads before they go cold. You may also find these related guides useful: How to Generate the Unassigned Leads Report, How to Generate the Lost Leads by Reason Report, and How to Generate the Converted Leads Report.
For more guides, refer to related articles below, select additional guides, or use the search bar at the top of the page. These guides will help you get the most out of your Pabau account.
Additionally, to help you fully utilize and understand your Pabau account, we recommend exploring additional guides and resources offered at the Pabau Academy. It offers in-depth video tutorials and lessons, offering a holistic learning experience that can equip you with the essential skills for achieving success with Pabau.