
The Lost Leads by Reason report shows the leads your team has marked as lost, together with the reason recorded when each one was closed — for example price, timing, or choosing a competitor. Reviewing it regularly helps you spot patterns in why deals don't close, so you can address the most common objections.
In this article, you will learn how to open the Lost Leads by Reason report, understand what counts as a "lost" lead, adjust the filters, and export the data. For more information regarding leads, review this article.
Step 1: Navigate to Analytics
Start by logging into your Pabau account using your login credentials. Then, navigate to the left sidebar menu, where you can find the Analytics tab. Click to expand it, and it will reveal 'Reports.'
Step 2: Open the new reports view
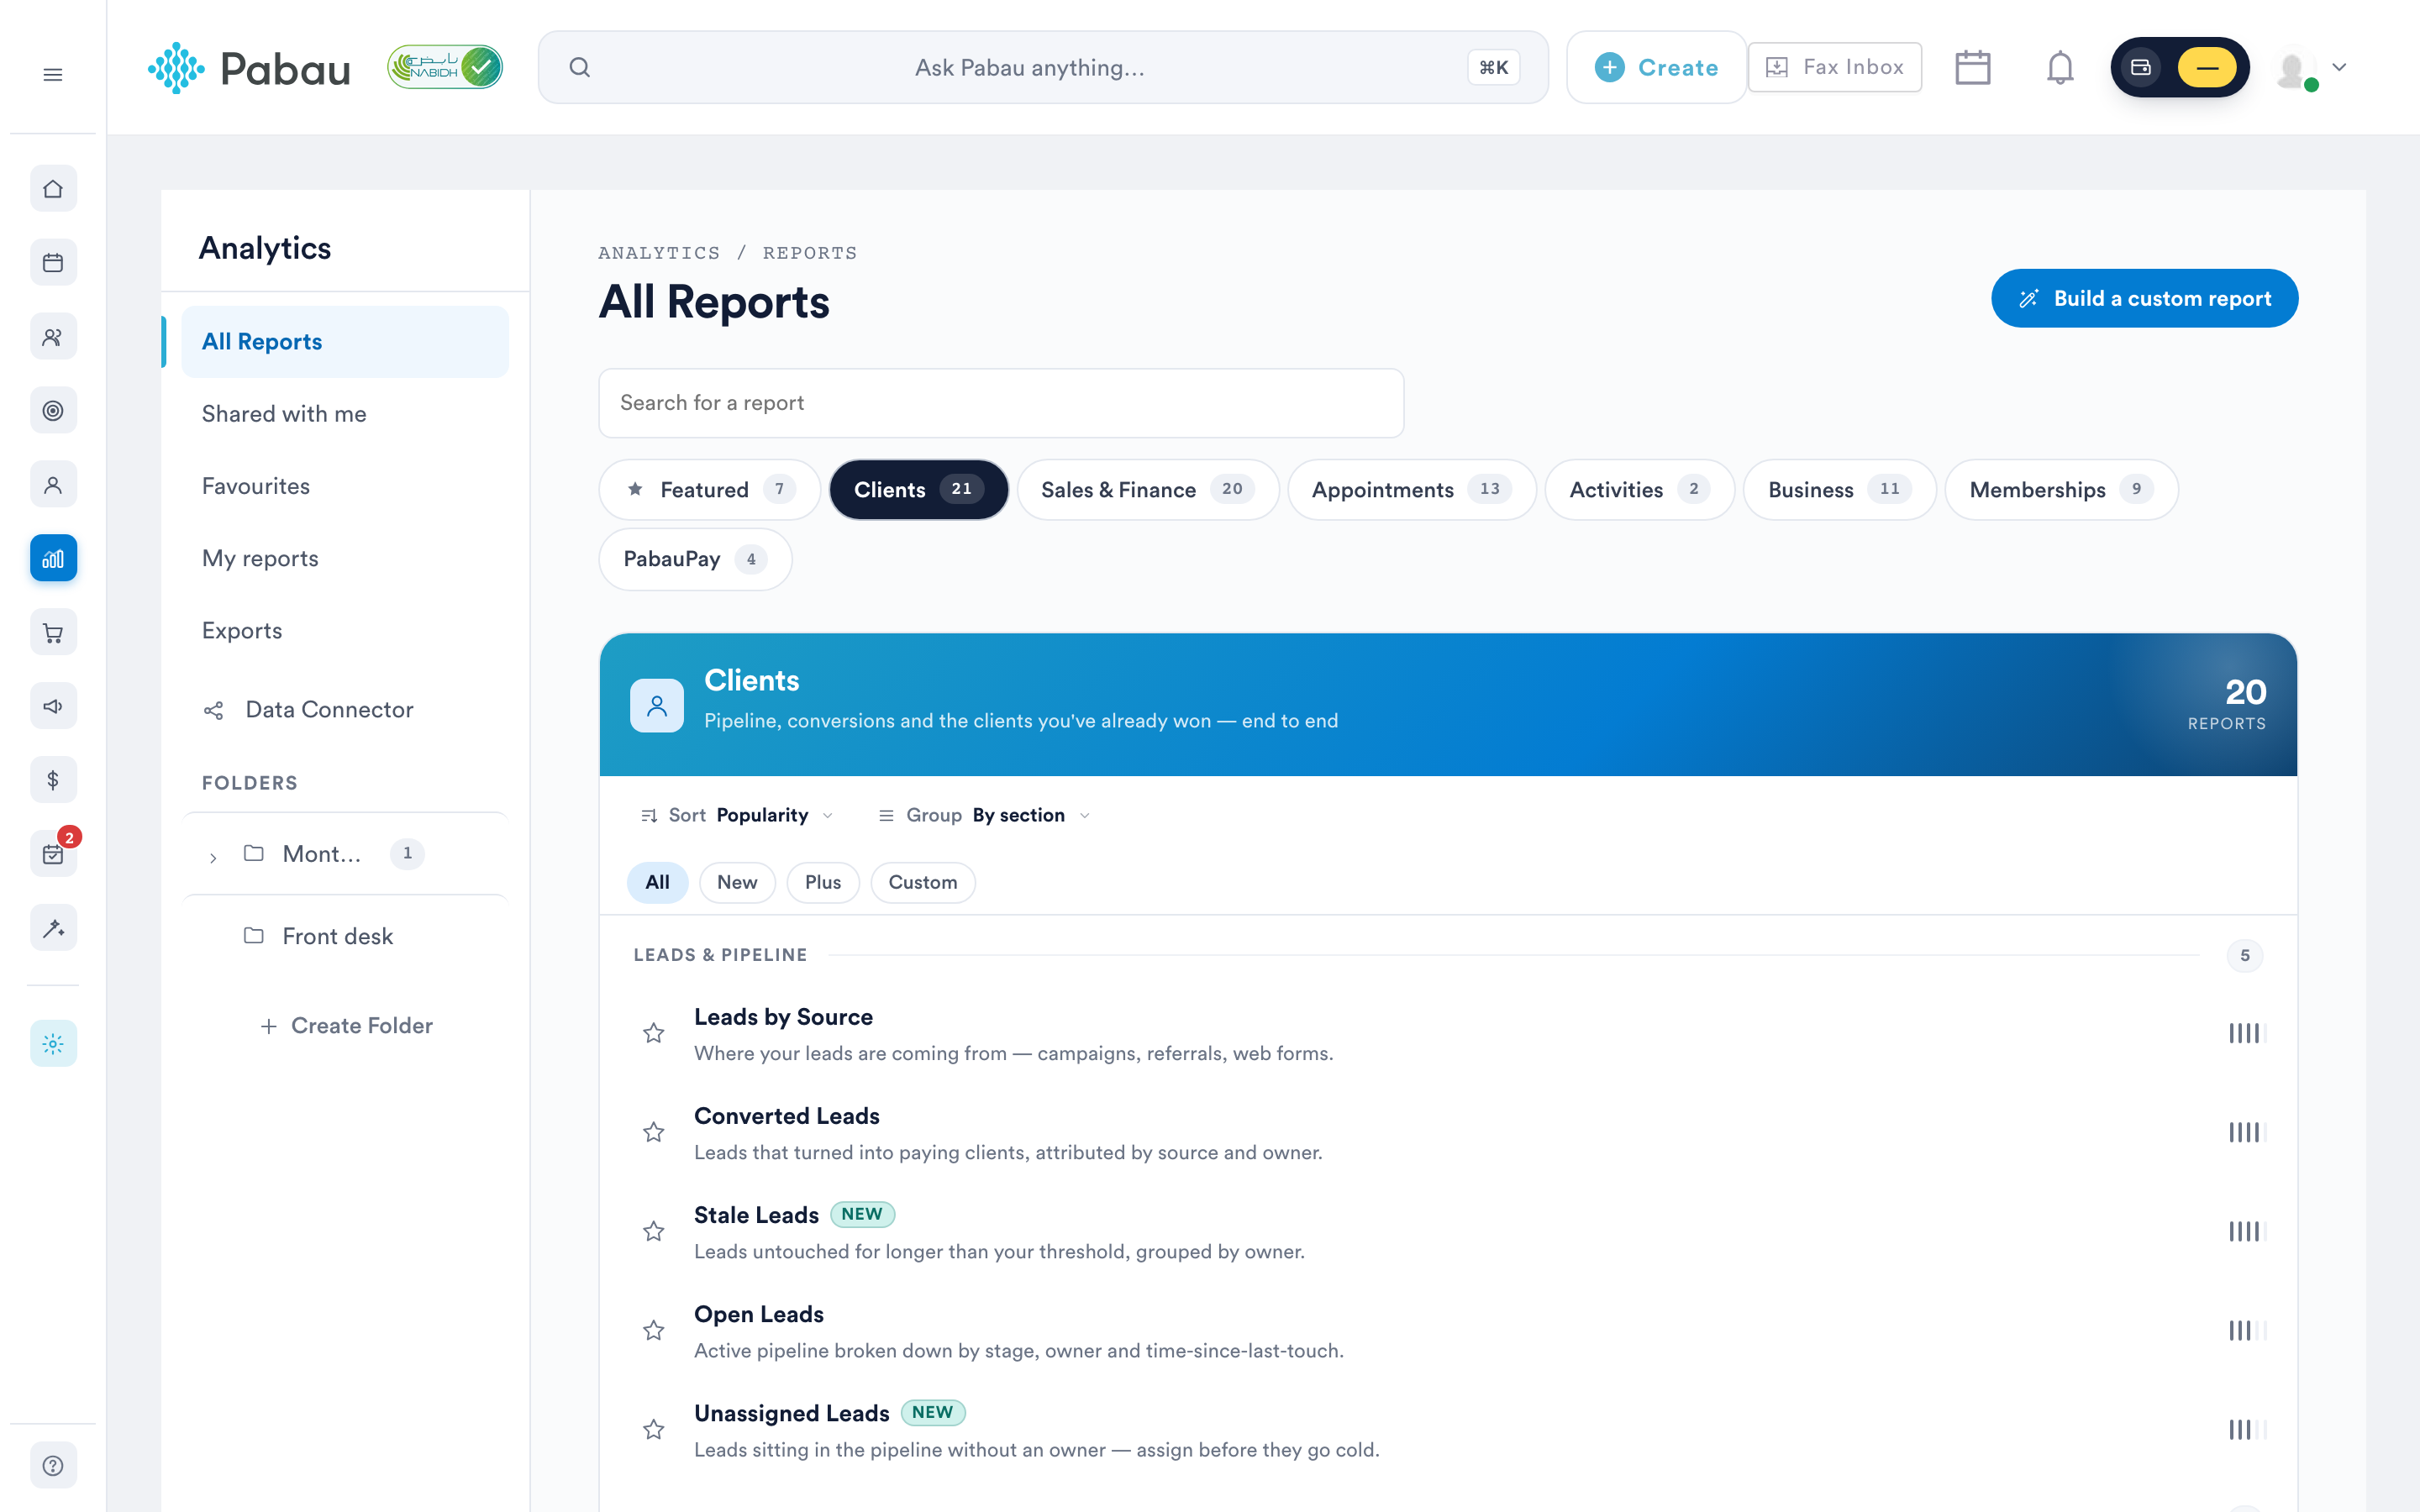
On the "Try our new suite of reports" banner, click Try it now.
NOTE: The Lost Leads by Reason report is available only in the new reports view — it does not appear on the legacy reports list, so if you normally work from the legacy page, use the banner to switch over first.
Step 3: Generate the Lost Leads by Reason Report
Once you're in the new reports view, go to the Clients section, then scroll to the "Win/loss analysis" group and click on Lost Leads by Reason to open the report. The report carries a "New" badge, and you can click the star next to its name to add it to your favorites.
Step 4: Understand the preset filters
The report opens with two filters already applied:
- Lead status is Lost — this includes every lead your team has marked as lost.
- Lead lost reason is not empty — only leads with a lost reason recorded are shown.
The reasons shown in the report come from the lead lost reasons configured in your account — the list your team picks from when marking a lead as lost.
Each filter has four elements — object, field, operator, and value:
- Object: This is what you're focusing on ("Lead").
- Field: This is the specific detail you're interested in ("Lead lost reason").
- Operator: This shows how the field relates to the value ("is not empty").
- Value: This is the specific data you're looking at (for the "is not empty" operator, no value is needed).
Each of these elements can be customized by clicking on them and choosing a different option. For example, you can change the "Lead lost reason" filter to a specific reason to focus on just those leads.
NOTE: Leads that were marked as lost without a reason recorded are hidden by default. To include them, hover over the "Lead lost reason is not empty" filter and click the "X" icon to remove it — the report will then show every lost lead, with or without a reason.
Step 5: Add, edit, and delete filters
- Adding a New Filter: To introduce an additional filter, click the plus sign (+) located beneath your current filters. Then, specify the details for your new filter. You can filter on any Lead or Client field, including custom fields — for example, add a "Lead lost time" filter to focus on a specific period.
- Editing an Existing Filter: Locate the filter you wish to modify. Click directly on the element you want to adjust (such as the object, field, operator, or value). A dropdown menu will appear; choose your desired new option.
- Removing a Filter: To delete a filter, simply move your mouse cursor over it. An "X" icon will appear; click it to remove the filter.
After changing filters or columns, click the "Run" button in the top right corner of the screen to refresh the report data.
Step 6: Review the data
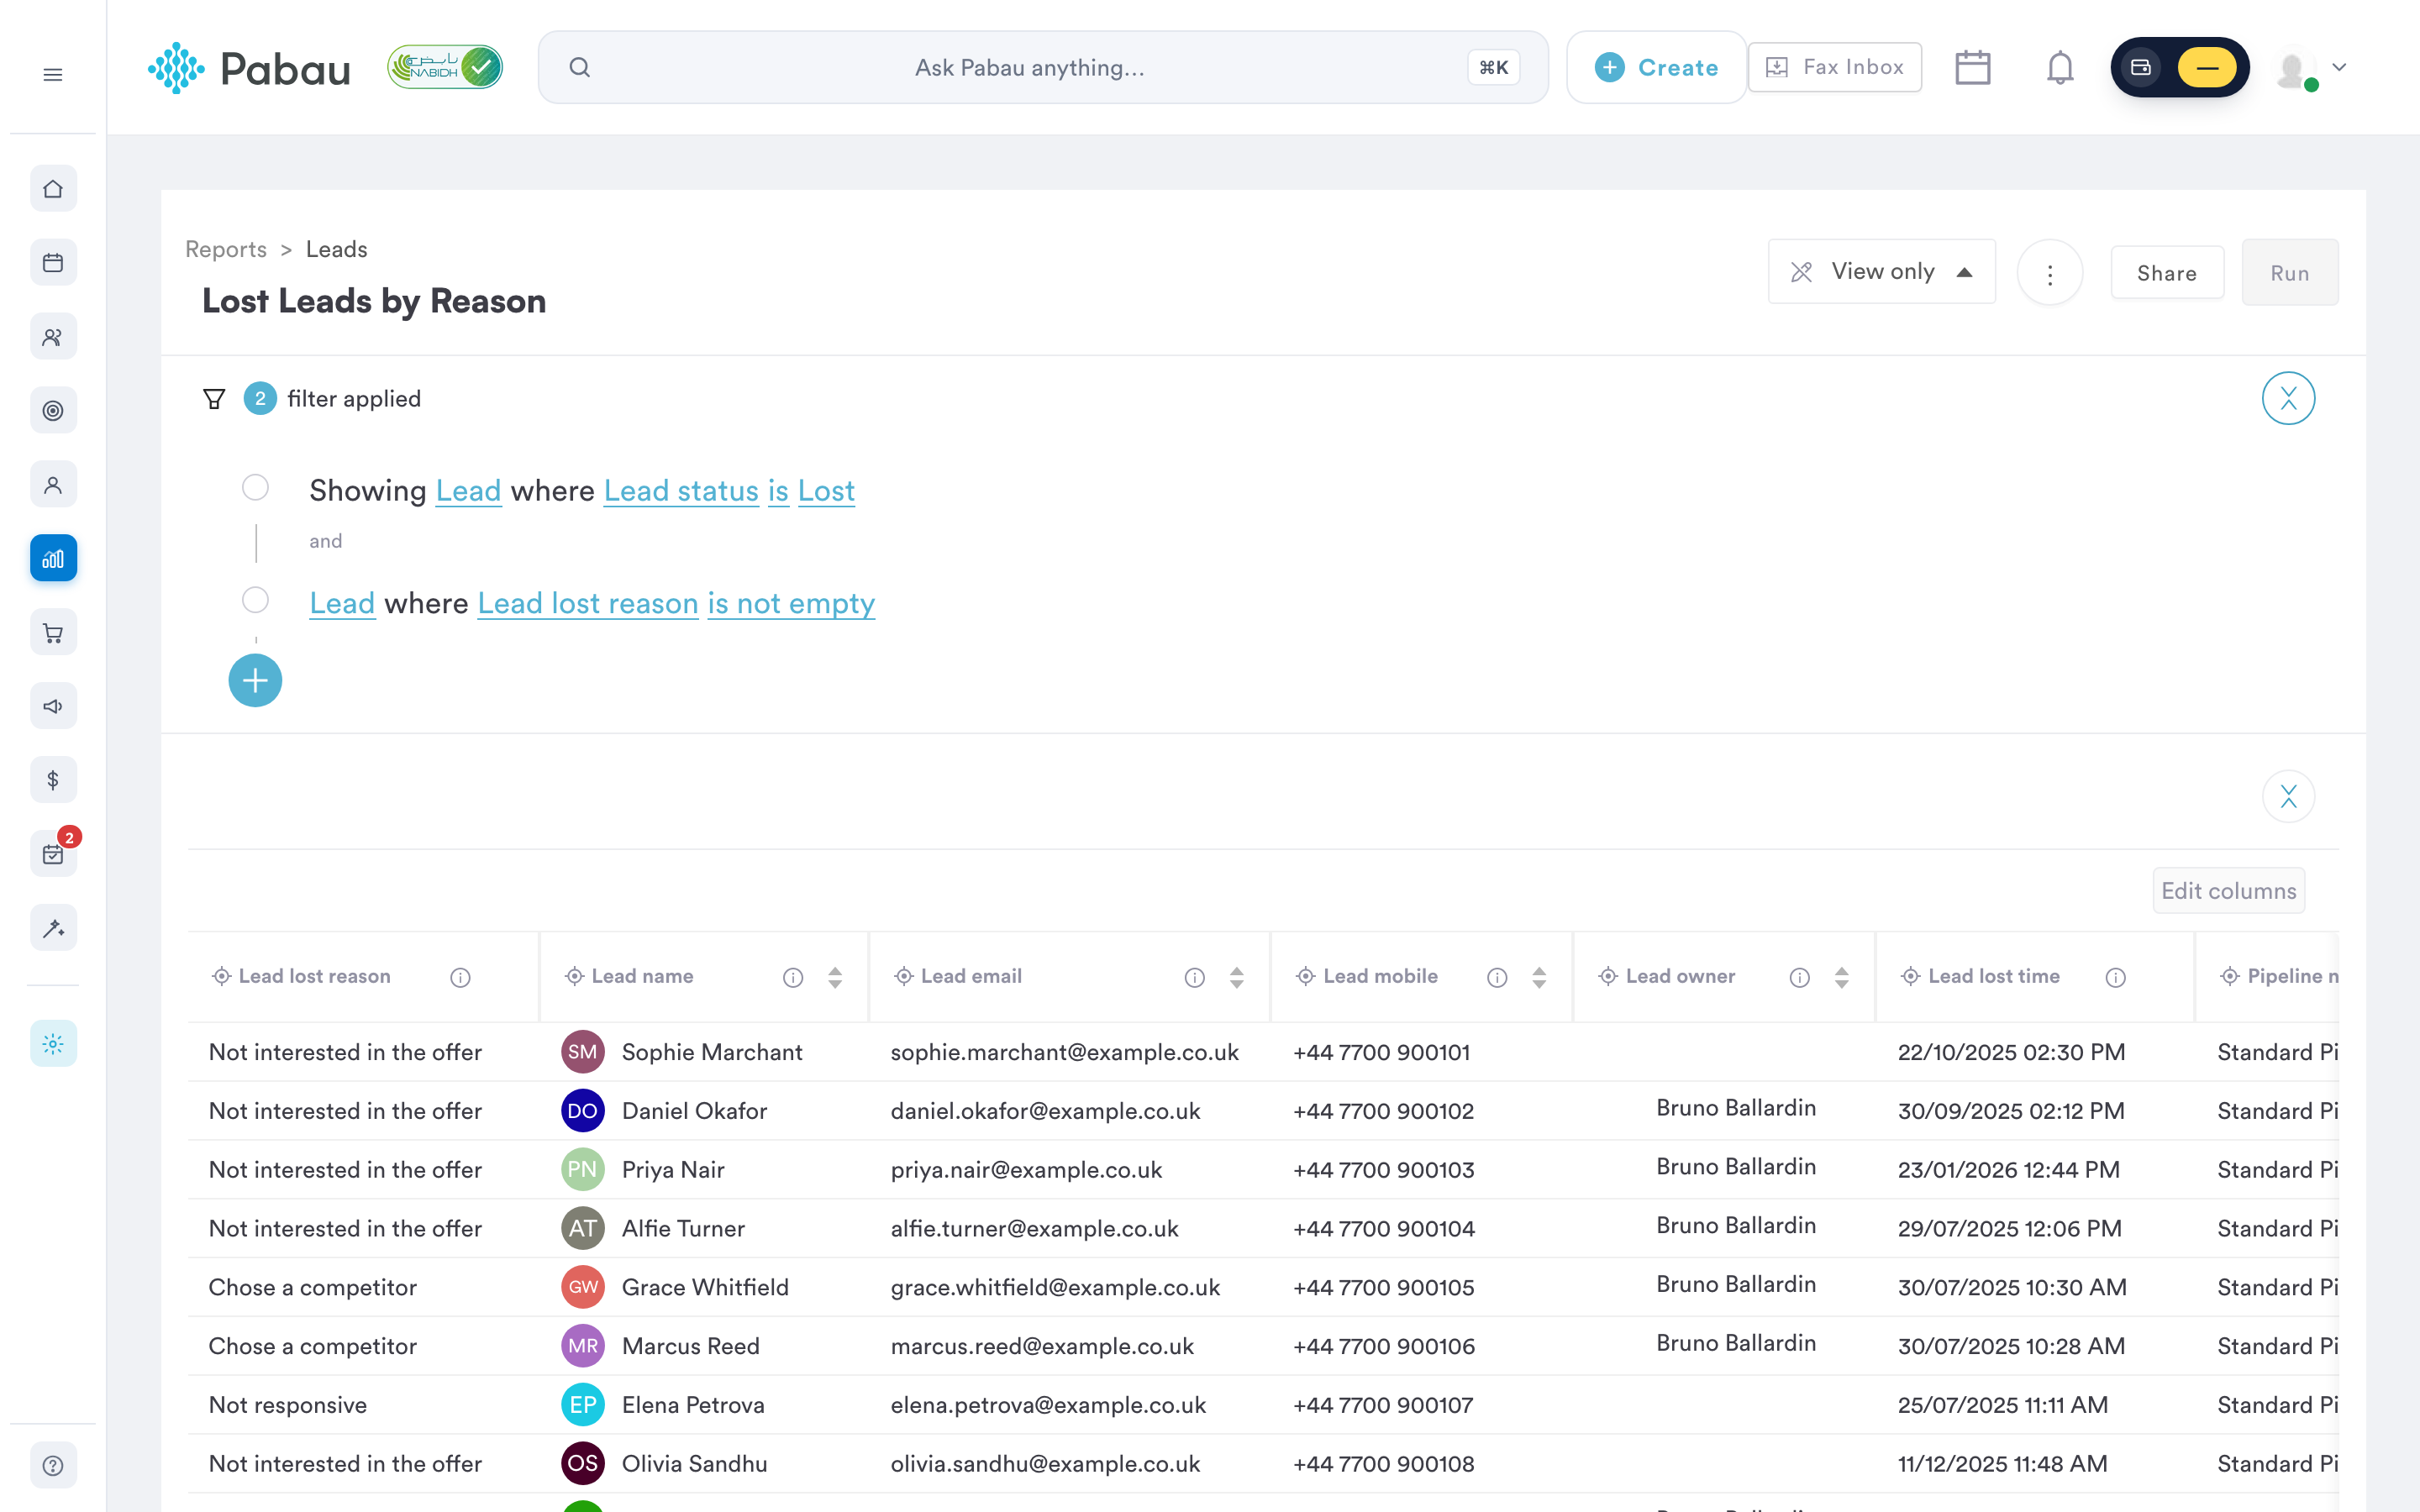
The results are displayed as a table — a list of individual lost leads, with the reason shown on each row, rather than a per-reason count chart. To total up each reason, export the data and summarize it in your spreadsheet tool.
The report includes the following columns by default:
- Lead lost reason: the reason recorded when the lead was marked as lost
- Lead Name: the name of the lead, through which you can access their lead card
- Lead email and Lead mobile: contact details, in case you want to re-approach the lead later
- Lead owner: the team member who was responsible for the lead
- Lead lost time: when the lead was marked as lost
- Pipeline name and Pipeline stage: the pipeline the lead sat in and the stage it reached before being lost. For more information regarding lead pipelines, review this article.
You can also add additional columns — including custom fields — for more specific details. After selecting any additional columns, click "Save" so that they will appear on the list. You can also deselect options that are currently included in the columns.
Step 7: Save, print, and export the data
This report opens marked "View only" — it is a pre-created library report, so your changes are never saved over the original. Once you have customized it, use the Save as option to keep your version as your own copy under "My reports", leaving the original intact. The Share button in the top right corner lets you share the report with other team members.
To export the data from this report, click on the three dots on the top right side of the screen to reveal the 'Export' button. Once you click Export, a window will pop up, and you can choose to export the data as a CSV file (the default) or an Excel (XLSX) file.
NOTE: Excel export is disabled when the report contains more than 100,000 rows — use the CSV format for very large exports.
The same three-dot menu also offers Print (detailed) for printing. Because this is a pre-created library report, its menu shows fewer options than reports you have saved yourself.
NOTE: Opening the new reports view requires the "Can access reports page" permission, and the Lost Leads by Reason report itself requires "Can access leads company reports". Team members who are not the account owner may additionally need "Can access financial company reports" to open pre-created reports. If you cannot see or open the report, contact your account administrator.
By following these steps, you can easily generate the Lost Leads by Reason report and understand why deals don't close. You may also find these related guides useful: How to Generate the Stale Leads Report, How to Generate the Unassigned Leads Report, and How to Generate the Converted Leads Report.
For more guides, refer to related articles below, select additional guides, or use the search bar at the top of the page. These guides will help you get the most out of your Pabau account.
Additionally, to help you fully utilize and understand your Pabau account, we recommend exploring additional guides and resources offered at the Pabau Academy. It offers in-depth video tutorials and lessons, offering a holistic learning experience that can equip you with the essential skills for achieving success with Pabau.