
NOTE: Cases is part of the Care Plus plan. If you do not see Cases under Clients in the sidebar, speak to your account manager about upgrading.
TIP: Set your case types up first. A case cannot be created without one, and the stages you define here are the steps staff will click through on every case.
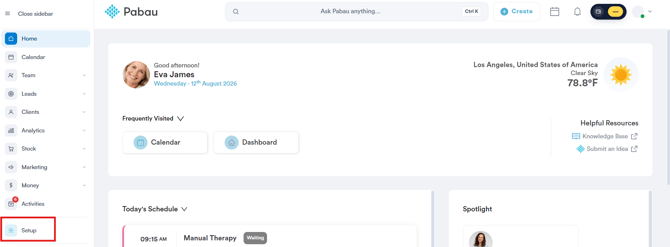
Step 1: Navigate to Setup
Start by logging into your Pabau account using your login credentials. Then, navigate to the Setup page located in the bottom left corner of the screen.
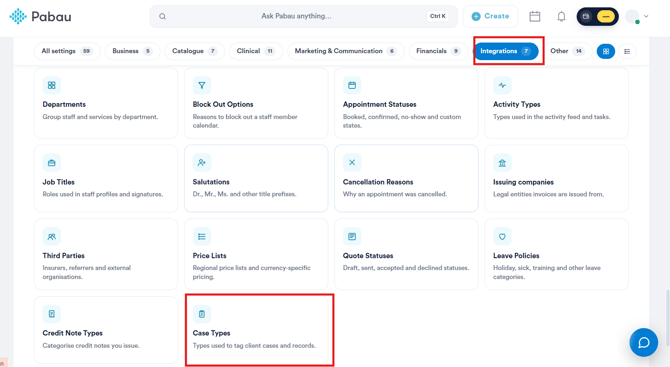
Step 2: Access Case Types
Now, expand the "Objects" section. This will reveal the "Case Types" sub-tab.
Step 3: Create a New Case Type
On the Case Types page, navigate to the top right corner and click the 'Create Case Type' button to get started.

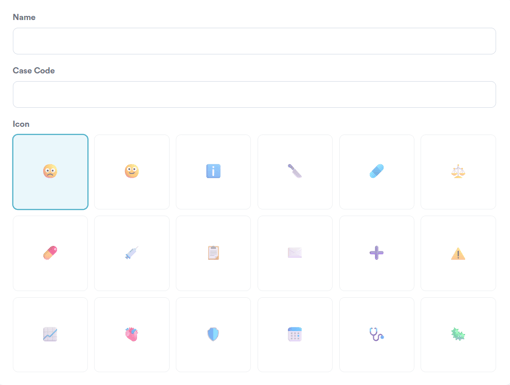
Once you click Create Case Type, complete the following fields:
- Name - a clear, descriptive name staff will pick from the list when creating a case (for example, Burn or Billing Complaint).
- Case Code - a short, unique code used for quick reference and reporting. Maximum four characters.
- Icon - choose one from the grid so the case type is easy to spot in lists and dashboards.
- Reporting Categories - how cases are classified for reporting and analysis. Two empty fields are provided; click + Add item to list for each additional category you need.
- Stages - the steps a case moves through, in order. These define the workflow and become the progress bar on the case itself. Two empty fields are provided; click + Add item to list to add more.
- Outcomes - how a case can end. Staff must pick one when closing a case, ensuring consistent tracking of how cases are resolved or escalated. Two empty fields are provided; click + Add item to list to add more.
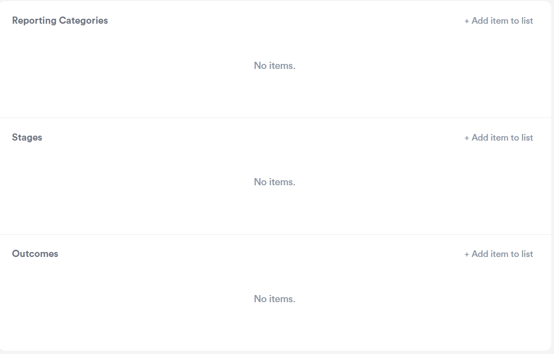
IMPORTANT: Each of Reporting Categories, Stages and Outcomes needs at least one entry. Saving without them shows an error such as "Add at least one stage."
Drag any row by its handle to reorder it. Stage order matters — it is the order staff will work through on the case.
Step 4: Save Changes
To finalize, navigate to the top right corner of the screen and click the 'Save' button.

By following these steps, you can easily create case types in Pabau.
What if I need to remove a case type?
Open it and click Delete, then confirm with Yes, remove case type. Cases already created against that type keep their stage and outcome history.
Was this guide helpful? Let us know by voting below - your feedback helps us write clearer articles.
For more guides, browse the related articles below or use the search bar at the top of the page. You can also watch our video learning series, the Pabau Academy, or visit the Support page for additional help.