
Add-ons let you attach customizable option groups to a service, so clients or staff can make selections when booking or selling - with each option able to adjust the service's price, duration, and resource requirements. Instead of creating a separate service for every variation, you build the enhancements once on top of an existing service, keeping your service list clean and giving staff a structured way to offer upgrades at the point of booking or sale.
Step 1: Navigate to the Add-ons tab
Start by logging into your Pabau account. In the left sidebar menu, click on Setup, then select Services under the Catalogue section.
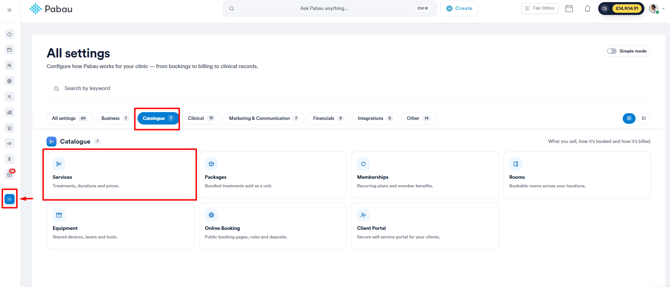
Open the service you want to build add-ons for, then click on the "Addons" tab at the top of the service page.
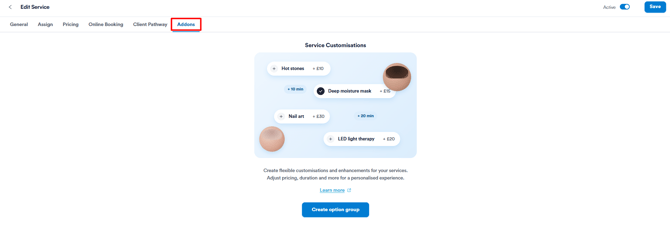
Note: Add-ons are a service setting, so the service must already exist before you can build add-ons on it. To learn how to set up a service, read this article.
Step 2: Create an option group
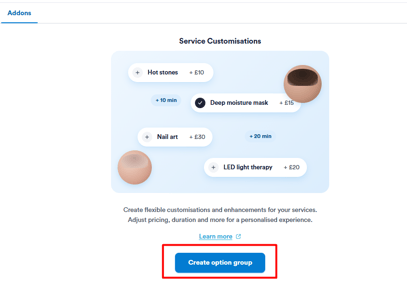
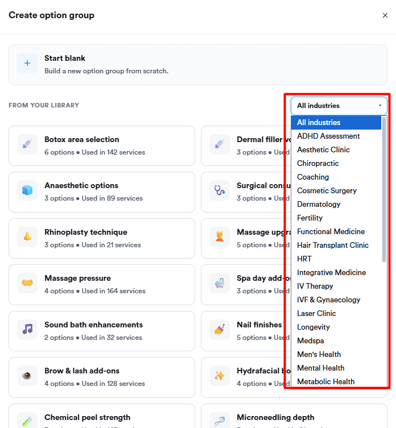
Click on the "Create option group" button. A modal opens with two ways to build a group:
Start blank - build a new option group from scratch using the configuration form.
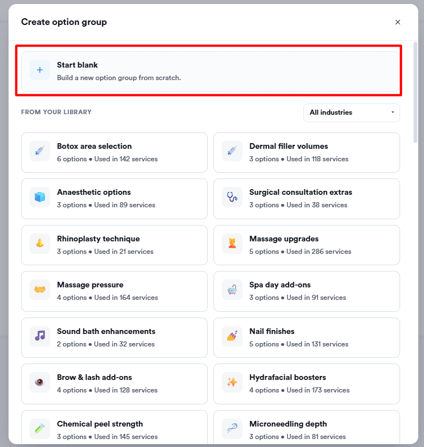
From your library - choose a ready-made template, including Pabau's built-in templates and any your clinic has saved previously. Templates are filterable by industry using the dropdown at the top, and each card shows the template name, how many options it contains, and how many services currently use it. Selecting a template loads it into the configuration form with everything pre-filled, ready to review and adjust.
Step 3: Name the group and set a client prompt
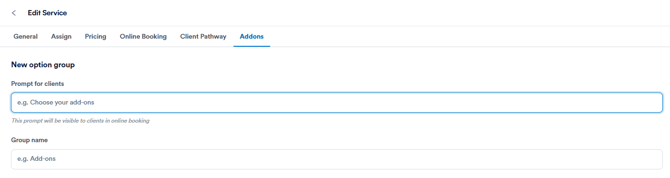
In the "Prompt for clients" field, enter the question or instruction clients will see during online booking, such as "Choose your add-ons."
In the "Group name" field, enter an internal name used to identify the group within the system.
Step 4: Add and configure options
Under "Available options", click on "+ Add option" to add each choice.
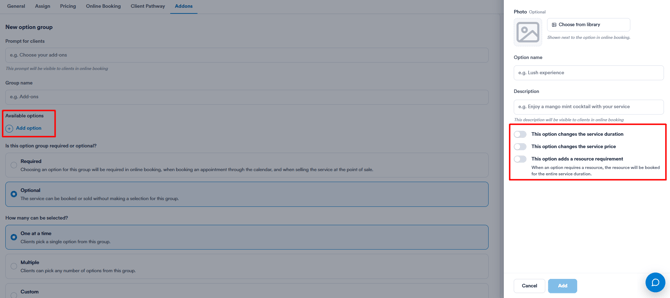
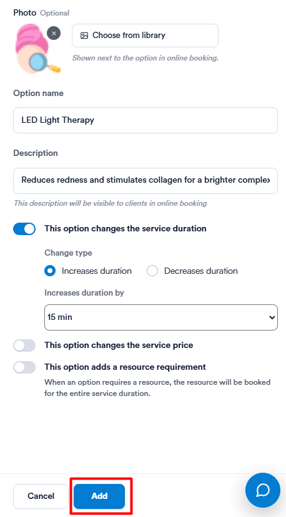
For every option, you can configure:
- Photo (optional) - an image shown next to the option in online booking
- Option name - the name displayed to clients and staff.
- Description (optional) - supporting text visible to clients in online booking.
Each option also has three toggles that control whether selecting it modifies the service:
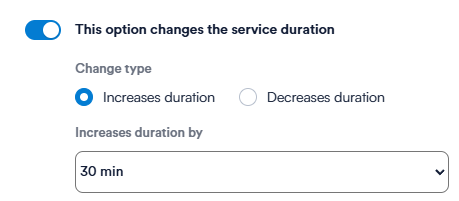
- This option changes the service duration - set whether it increases or decreases the duration, and by how much.
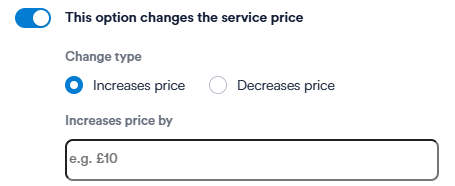
- This option changes the service price - set whether it increases or decreases the price, and by how much.
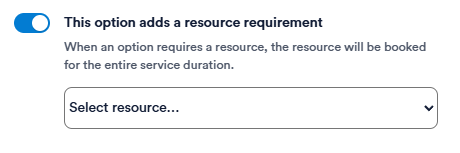
- This option adds a resource requirement - select a resource that will be automatically booked for the full service duration whenever this option is chosen.
Click on "Add" to save the option to the group. Added options appear as a list with edit and delete icons on each row, and can be reordered by dragging.
Step 5: Set the group as required or optional
Choose whether a selection from this group is mandatory:
- Required - a selection must be made in online booking, on the calendar, and at the Point of Sale. The booking or sale cannot proceed without one.
- Optional - the service can be booked or sold without a selection, which suits upsells.

Step 6: Choose how many options can be selected
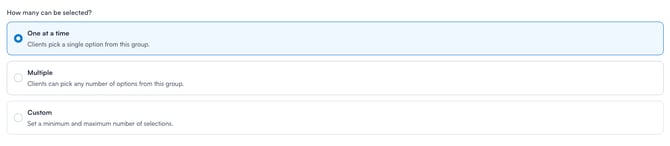
Set how many options a client or staff member can pick from the group:
- One at a time - a single option can be selected.
- Multiple - any number of options can be selected.
- Custom - set a minimum and maximum number of selections.
Step 7: Choose where the add-on can be used
Select the contexts where the option group appears. At least one must be selected:
- Calendar - staff can select from this group when booking an appointment through the calendar.
- Online Booking - visible to clients during self-service online booking.
- Point of Sale - available for staff when adding the service to a ticket.

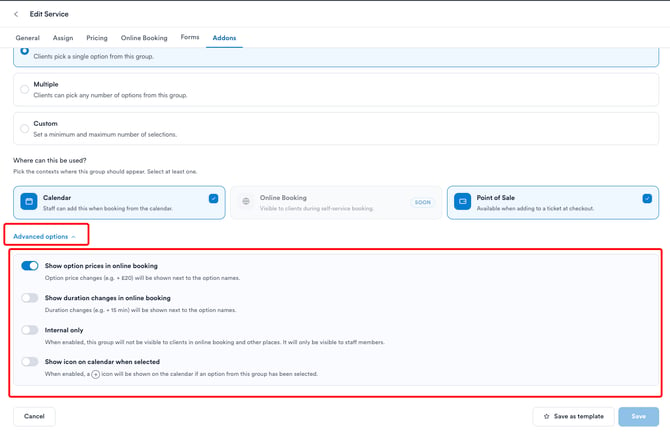
Step 8: Configure advanced options
Expand the "Advanced options" tab at the bottom of the form for additional toggles:
- Show option prices in online booking - displays price changes next to option names in the booking flow.
- Show duration changes in online booking - displays duration changes next to option names.
- Internal only - hides the group from clients across all client-facing surfaces, keeping it visible to staff only.
- Show icon on calendar when selected - displays an icon on the calendar appointment block whenever an option from this group is selected.
Step 9: Save the group
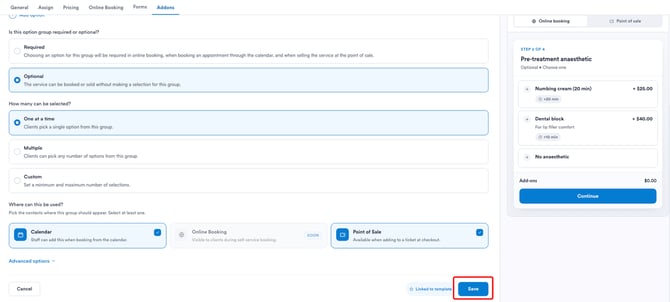
As you build, the live preview panel on the right updates in real time, showing how the group will appear in both the "Online Booking" and "Point of Sale" contexts, switchable via the tabs at the top of the panel. When you're ready, click on "Save" to add the group to the service.
To reuse a group you built from scratch on other services, click on "Save as template" at the bottom of the form. This saves the group - including its name, prompt, options, and settings - to your library, making it available to any service in the clinic.
Note: Add-ons built from a template stay independent per service. Editing or removing options within a service does not affect the original template or any other service already using it.
By following these steps, you can create add-on option groups that let staff and clients customize a service at the point of booking or sale, with pricing, duration, and resources adjusting automatically.
Was this guide helpful? Let us know by voting below - your feedback helps us write clearer articles.
For more guides, browse the related articles below or use the search bar at the top of the page. You can also watch our video learning series, the Pabau Academy, or visit the Support page for additional help.