
Step 1: Access Promotions
Once logged in to Pabau, go to the left-hand sidebar and select ''Marketing'', then ''Promotions''.
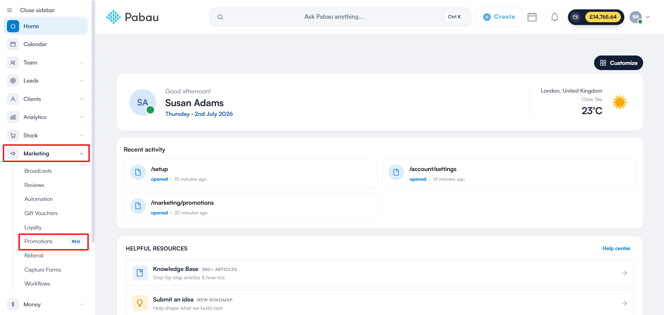
Step 2: Start a New Deal
From the Promotions dashboard, click Create deal in the top right corner.
%202.png?width=664&height=282&name=how%20to%20create%20a%20promotion%20(code-based)%202.png)
Step 3: Select the Deal Type
On the first step, select Flash sale as the deal type, then click Continue in the top right corner.
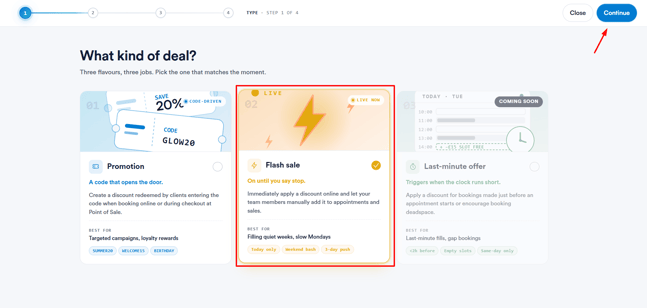
Step 4: Enter the Flash Sale Details
- Name - the name of the flash sale as it will appear in the system.
- Description (optional) - additional context about the flash sale, up to 600 characters.
- Discount value - enter the value and select the unit: % or £.
- Promotion starts / ends - the date range the flash sale runs for. Leave the end date blank to run indefinitely.
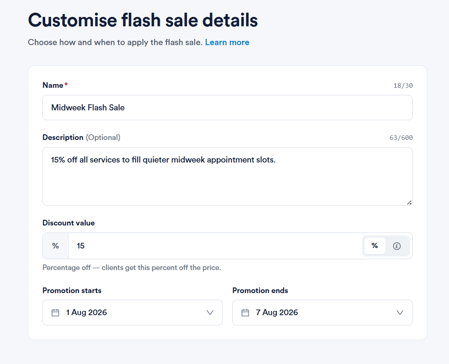
Unlike a Promotion, a Flash sale doesn't use a discount code - the discount is applied automatically to eligible items.
NOTE: A flash sale with a flat rate discount greater than the basket total will reduce the total to £0 - it will never produce a negative balance.
Step 5: Choose What's Discounted
Select which catalogue items the flash sale applies to - Services, Products, Gift cards, or Packages or tick Include all to apply it across the whole catalogue.
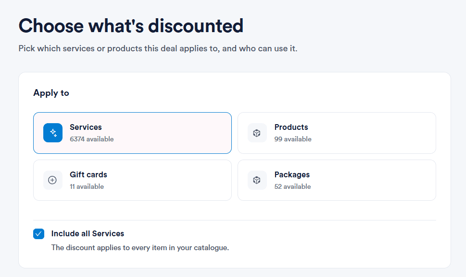
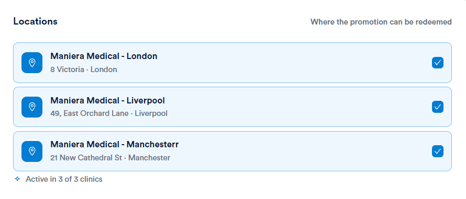
You'll also choose which clinic locations the flash sale can be redeemed at, and set client eligibility if needed.
Step 6: Set Time-of-Day Rules
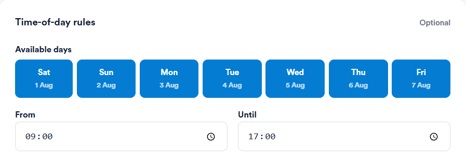
Flash sales can be restricted to specific days and times, so the discount is only visible and applicable within that window:
- Available days - select which days of the week the sale is active, Monday through Sunday.
- From / Until - set the time window the discount applies during, e.g. 09:00–17:00.
Using the busiest business hours heatmap
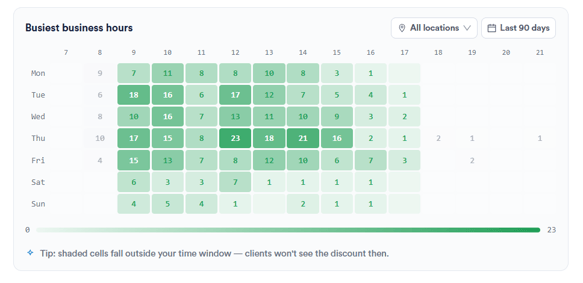
Below the time-of-day settings, a heatmap displays appointment density by day and hour across the last 90 days, filterable by location. Darker cells indicate busier periods, while lighter cells highlight quieter times - helping you identify the best windows to target with a flash sale. Shaded cells outside your selected time window show where clients won't see the discount.
NOTE: Usage limits are not available for Flash sales, since the discount is applied automatically rather than redeemed individually by clients.
Step 7: Review and Publish
Review the summary of your flash sale and use the Live preview panel to see how it will appear to clients at checkout or during online booking.
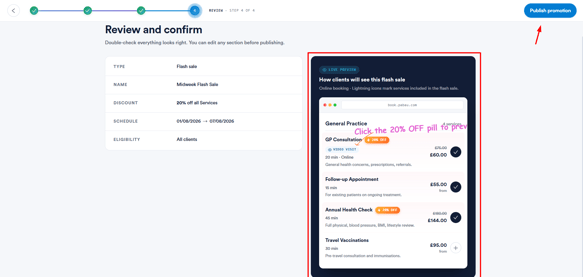
Once everything looks correct, click Publish promotion to make the deal live.
By following the steps above, you can create and publish a Flash sale to help fill quieter periods in your calendar.
Was this guide helpful? Let us know by voting below - your feedback helps us write clearer articles.
For more guides, browse the related articles below or use the search bar at the top of the page. You can also watch our video learning series, the Pabau Academy, or visit the Support page for additional help.