
This article covers the new Client Card, available to selected clinics from August 2026. If your Client Card looks different, see the How to Compare Before and After Photos in the Client Card (Classic) guide instead.
Step 1: Navigate to the Client Card
Start by logging in to your Pabau account. Then, use the search bar at the top of the screen to find the client — type at least three letters of their name and select them from the results to open their client card.

Step 2: Open the Photos Tab
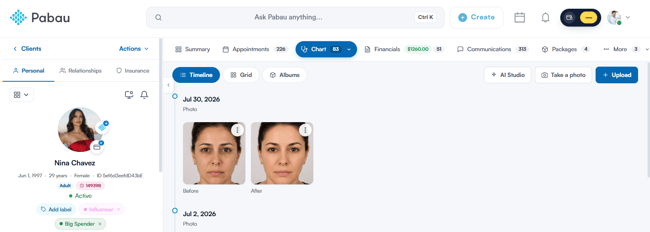
In the navigation bar of the client card, click EMR (labelled Chart on some accounts). This opens the EMR overview — select Photos to view all uploaded photos. Here’s a guide on how you can upload them.

Step 3: Select or Upload a Photo
On the Photos tab, you can browse existing photos in Timeline, Grid, or Albums view using the toggle at the top left.
If the photo you want isn’t on file yet, click + Upload in the top-right corner to add one from your device, or use Take a photo to capture one on the spot.
Once your photo is available — whether newly uploaded or already on file — click it to open it in full screen.
Step 4: Choose a Comparison Layout
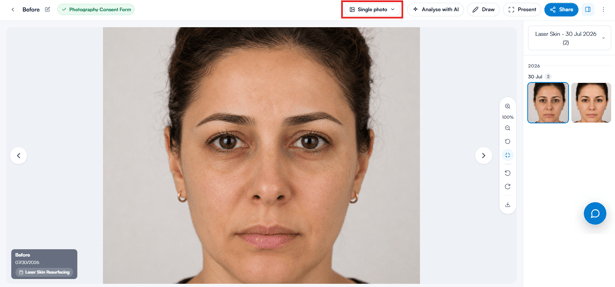
The photo opens in Single photo view. Click the layout button in the top-right corner — it shows the name of the current view — to open the layout picker.
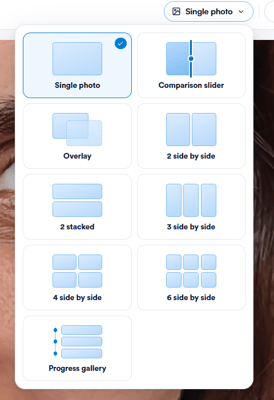
This reveals the available layouts: Single photo, Comparison slider, Overlay, 2 side by side, 2 stacked, 3 side by side, 4 side by side, 6 side by side, and Progress gallery. On the free plan you can use Single photo and 2 side by side; the other layouts require an active Care Plus subscription and show a “Plus” badge until it’s enabled.
NOTE: To learn more about upgrading to Care Plus, refer to this guide.
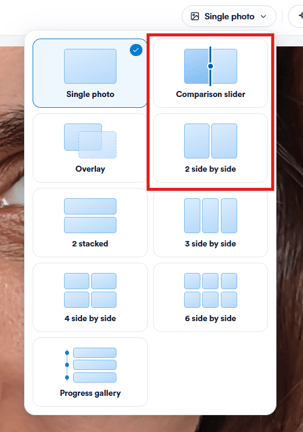
If you’re comparing two before and after photos, you can use either the Comparison slider or the 2 side by side layout. Let’s start with the Comparison slider.
Step 5: Compare Photos with the Slider
In the Comparison slider view, you’ll see the photo you opened alongside an empty pane. The photo sidebar on the right lists all of the client’s photos, grouped by date.
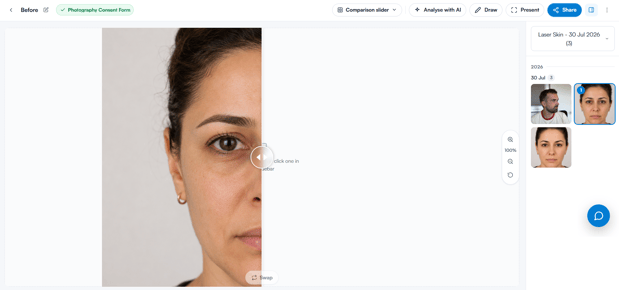
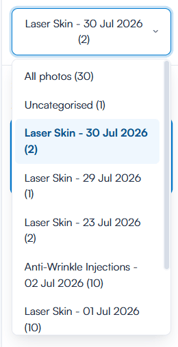
To pull photos in from a different album, use the album dropdown at the top of the sidebar — you can show All photos, a specific album, or Uncategorised photos.
Click a photo in the sidebar to fill the empty pane, or drag and drop it onto the pane. Then drag the slider handle across the image to sweep between the two photos and see the differences.
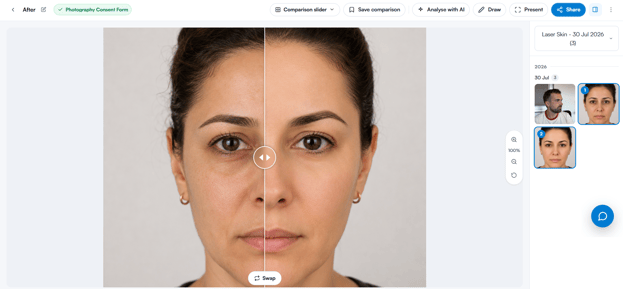
Step 6: View a Side-by-Side Comparison
If you’d rather see both photos in full next to each other, open the layout picker in the top-right corner again and select 2 side by side.
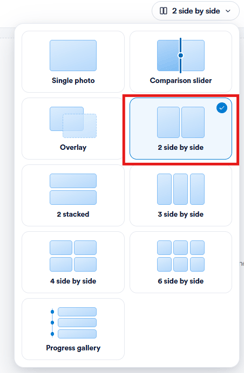
Add the second photo in the same way — click it in the sidebar or drag and drop it onto the empty pane — and both photos will be displayed side by side.
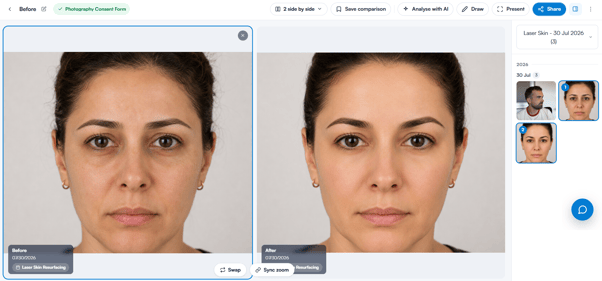
NOTE: To upload a picture from your device, do it from the Photos tab of the client card — you can’t upload a new photo from within the full-screen viewer.
TIP: For a quicker route, hover over a photo in the gallery and tick the checkbox in its bottom-left corner. Select two photos, then click Compare in the bar that appears at the bottom of the screen to open them side by side straight away. While viewing a comparison, you can also click Save comparison at the top of the screen — saved comparisons appear at the top of the gallery under Saved comparisons.
By following these steps, you can compare clients’ before and after photos in Pabau.
Was this guide helpful? Let us know by voting below - your feedback helps us write clearer articles.
For more guides, browse the related articles below or use the search bar at the top of the page. You can also watch our video learning series, the Pabau Academy, or visit the Support page for additional help.