
This article covers the new Client Card, available to selected clinics from August 2026. If your Client Card looks different, see How to Upload a Document (Classic) guide instead.
Step 1: Navigate to the Client Card
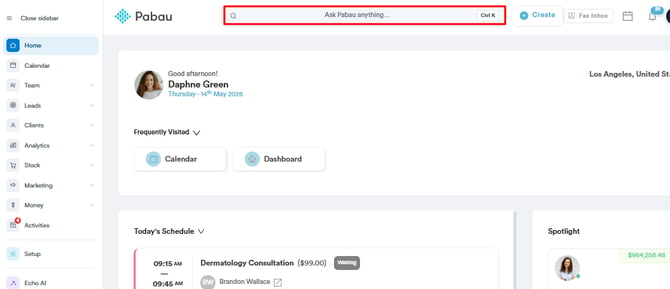
Start by logging in to your Pabau account using your login credentials. Then, navigate to the Search bar at the top of the page and type at least three letters of the client's name. Pabau will filter the results as you type.
Step 2: Open the Documents Section
In the client card, click on the "EMR" tab in the menu at the top (labelled "Chart" for US businesses). This opens the clinical overview grid. Click on the "Documents" card to open the client’s document store.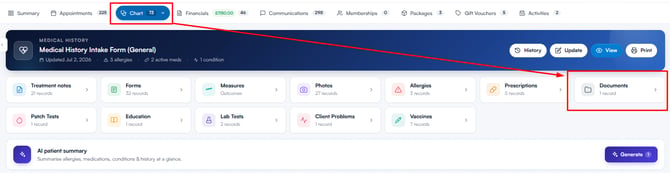
Step 3: Upload a Document
Click the "Create" button in the top right corner of the Documents section and select "File upload" from the dropdown.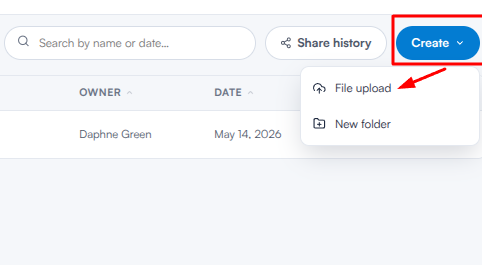
The "Upload documents" modal will appear. Drag and drop your files into the upload area, or click inside it to browse your computer. Both images and document files are accepted. Once your files are ready, click "Upload" to confirm. Your files start uploading straight away, and a progress tray appears in the bottom-right corner of the screen.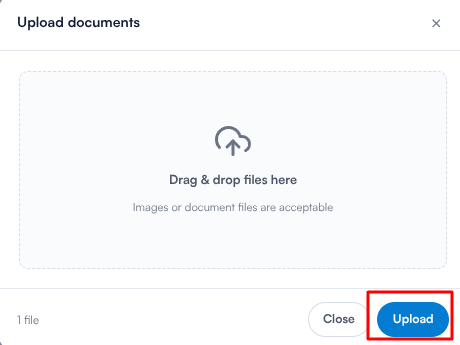
TIP: You can also drag files from your computer anywhere onto the Documents section to start uploading them straight away — no need to open the upload window first. Files are uploaded into the folder you currently have open.
By following these steps, you can easily upload documents to the client card.
Was this guide helpful? Let us know by voting below - your feedback helps us write clearer articles.
For more guides, browse the related articles below or use the search bar at the top of the page. You can also watch our video learning series, the Pabau Academy, or visit the Support page for additional help.